In this post we are going to install another Debian Based Operating System is named Voyager. Voyager is an open-source Linux Operating System. it comes with 6 more different Desktop Environments.
What is Voyager
Voyager Linux is another Debian-based Operating System. An infinite and varied Linux community. A free operating system. Voyager respects your privacy. No information was collected for advertising. No system clamping.
Voyager Linux Installation Desktop Environments
- Voyager Xfce
- Voyager Gnome
- Voyager Gamers
- Voyager Debian Buster
- Voyager Editions Gaming
- Voyager LTS
Already Download the Voyager Linux offline edition If you already Download Voyager Linux and already make a bootable USB disk, you can follow these steps.
- Blackarch Install Virtualbox
- Install Kali Linux In Virtual Box.
- Voyager Linux Installation
- Garuda Linux Installation
- Voyager Linux Installation on VirtualBox
Voyager Linux Dual Booting Installation Steps
Let’s start Voyager Linux installation, if you’re installing on your Base System you need to create a Bootable USB Disk and go to the bios setting or go to the boot option and change your Boot sequence to set your USB/DVD Drive First priority and save changes.
After saving the changes restart your computer and press your boot key and there you see many drives choose carefully your Voyager Linux bootable USB disk and hit enter.
After booting with Voyager, USB Disk, we see the boot menu choose the first Live option, and hit enter. and your Voyager Linux starts booting up.
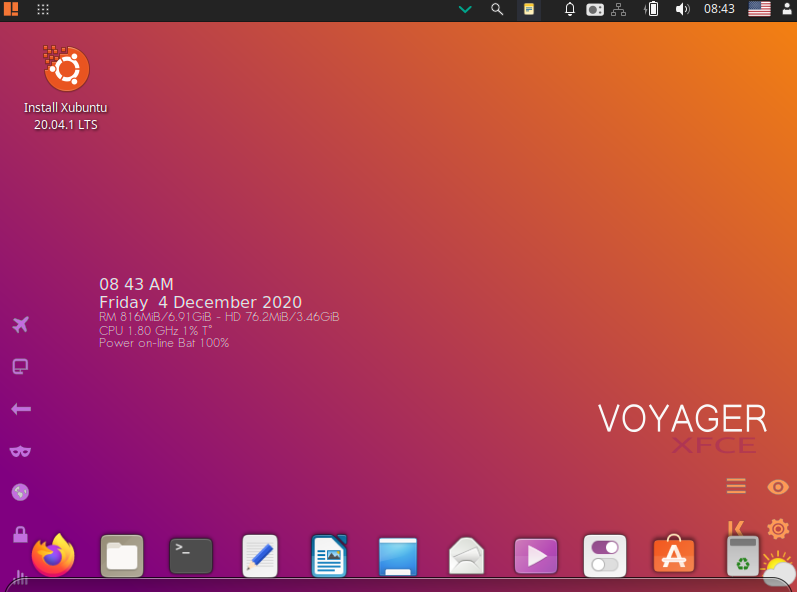
Now Our Voyager Linux is boot up let’s start the installation click the Install Xubuntu 20.04.1 LTS.
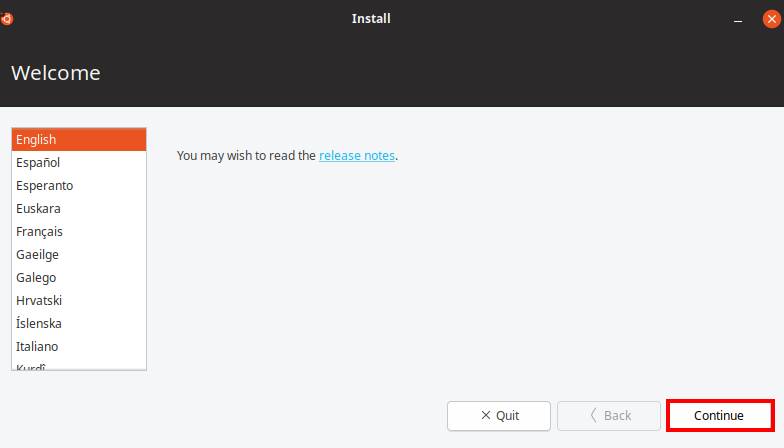
choose your Language and click the Continue.
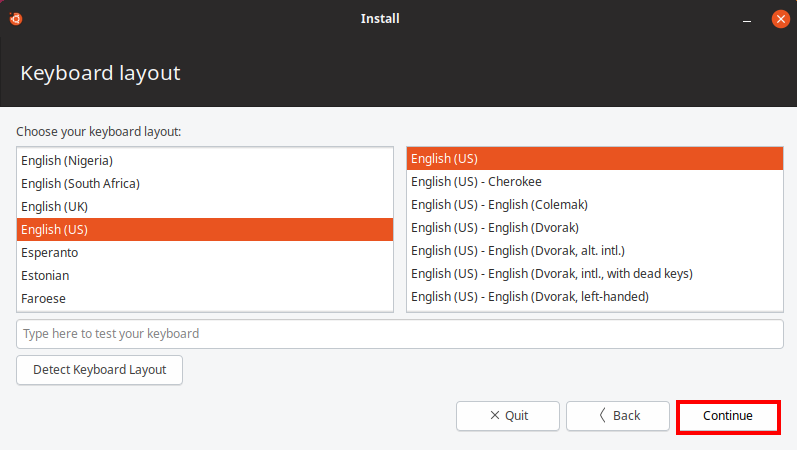
Select your keyboard layout and keyboard type and click the Continue.
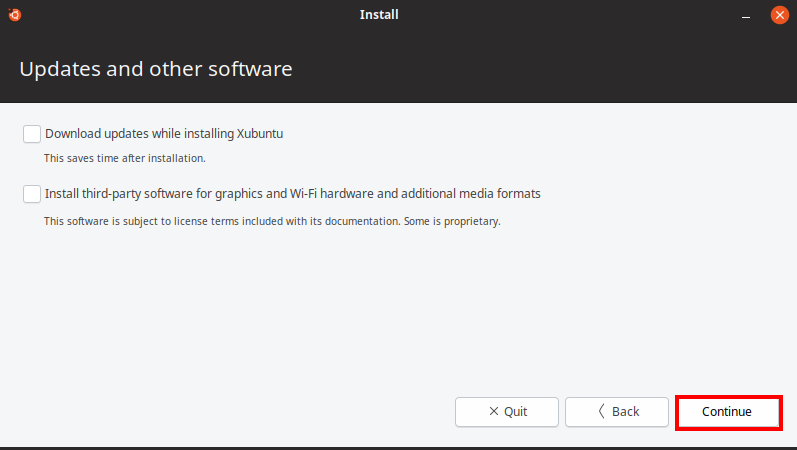
If you want to install additional third-party Software check the checkBox else leave the blank and click continue.
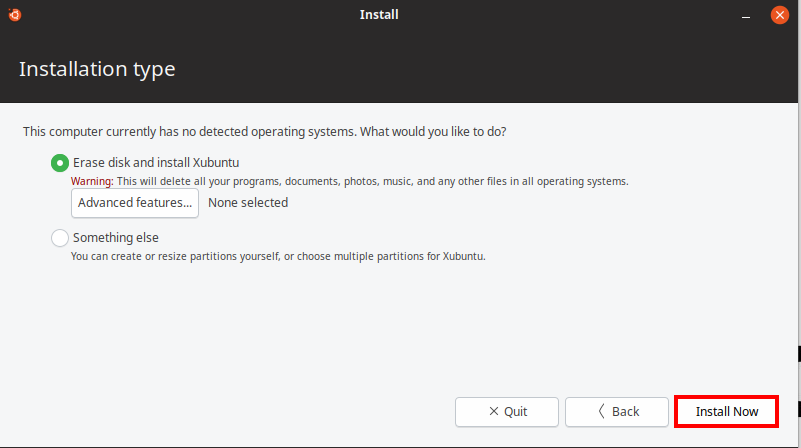
Next windows Ask us for hard-disk information, currently, I haven’t installed another operating system, if you run the Dual-boot process check the second option, and choose carefully your disk partition, I Erase the Entire Disk for Signal Boot.
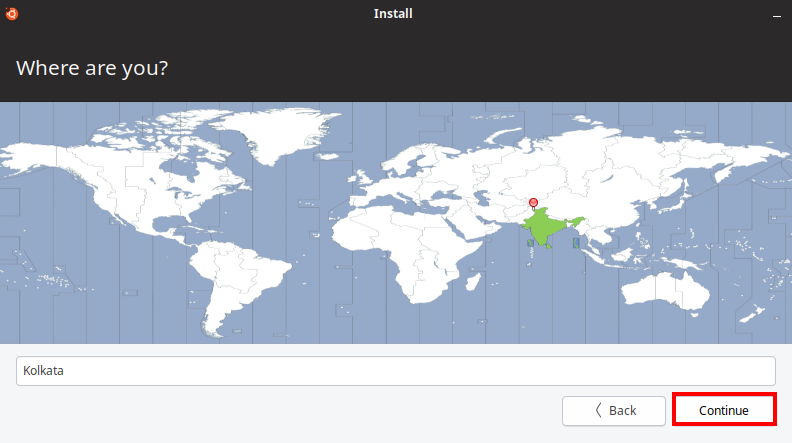
Now choose your Country and click Continue.
Next Windows Ask us New Username and Password for new user account fill information you’re according and click Continue.

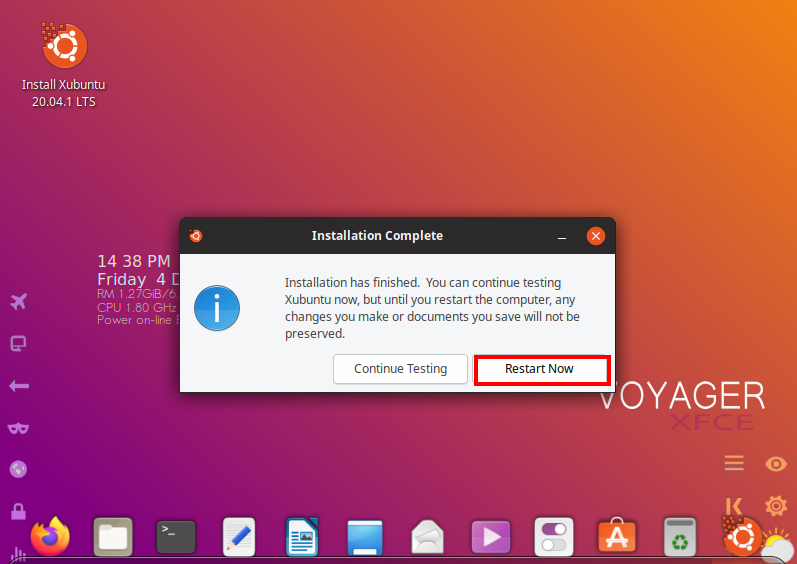
After Wait 5-7 Minutes, our Voyager Linux package installation is Done, and a new window shows the installation Complete message now restart click restart Now Button.

After again booting the system remove your bootable USB drive and If you’re installing on your Virtual Box and another Virtual Environment remove your ISO CD.
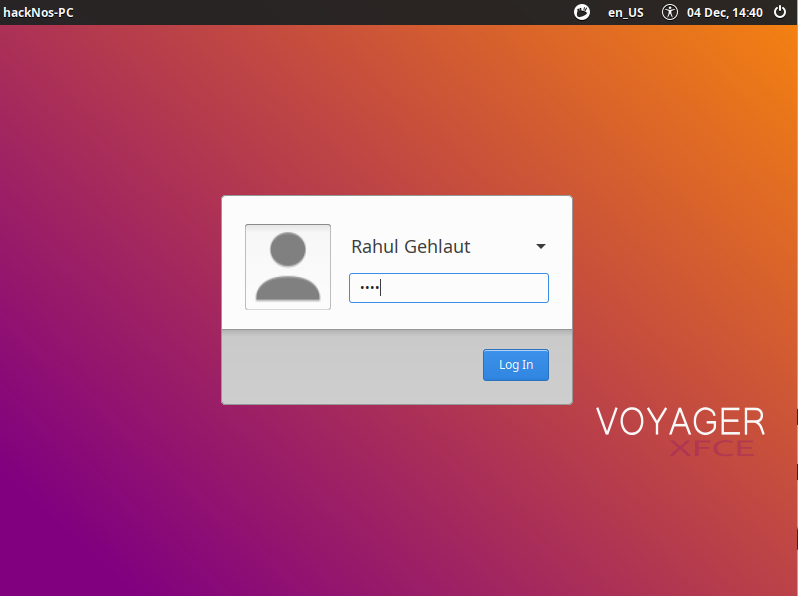
Our computer is power up successfully now login with your credentials, fill in your username and password, and hit enter.