how to buy Free WordPress Hosting on aws ec2 machine
Amazon EC2 presents a true virtual computing environment, allowing you to use web service interfaces to launch instances with a variety of operating systems, load them with your custom application environment, manage your network’s access permissions, and run your image using as many or few systems as you desire. Free WordPress Hosting
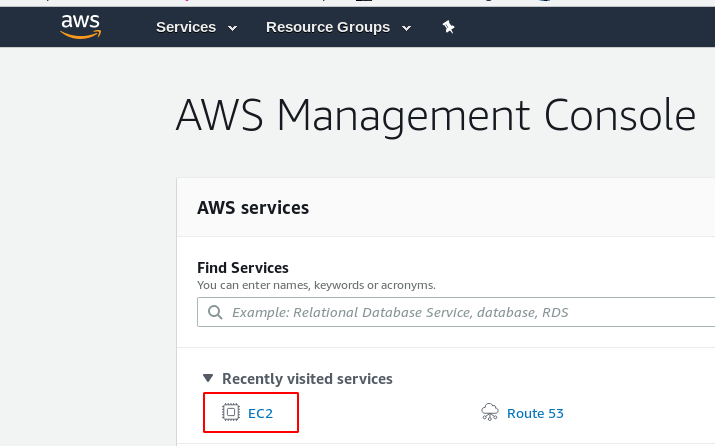
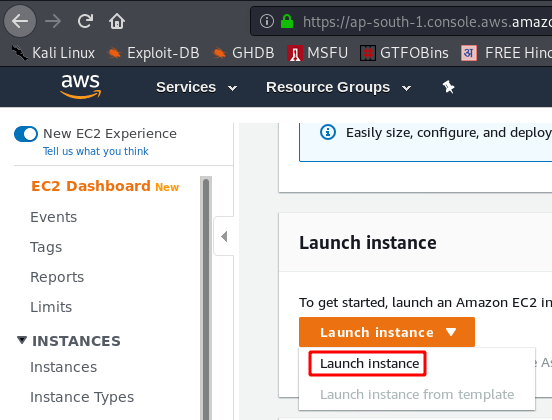
Now our first step is to create a new Ec2 virtual machine on our AWS account link
click Ec2
And Launch instance
Step 1: Choose an Amazon Machine Image (AMI)
First, click on the search button and go to the section of the AWS Marketplace and select WordPress.
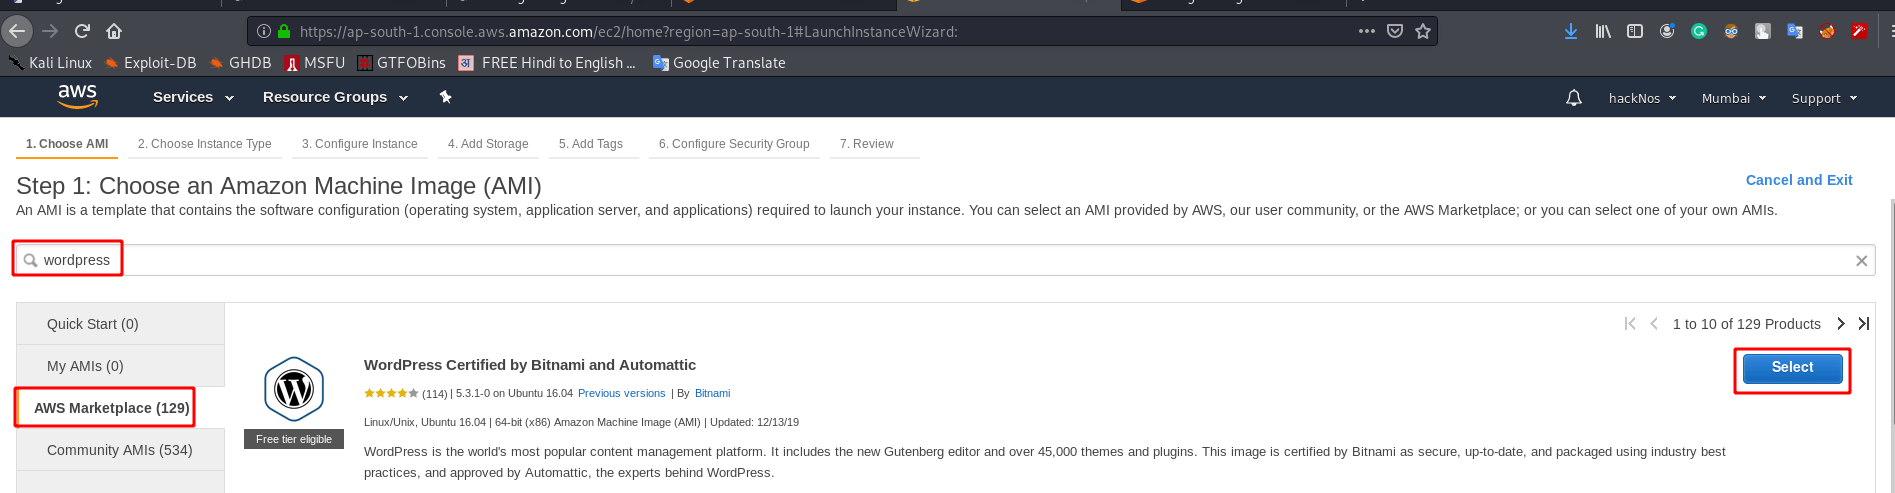
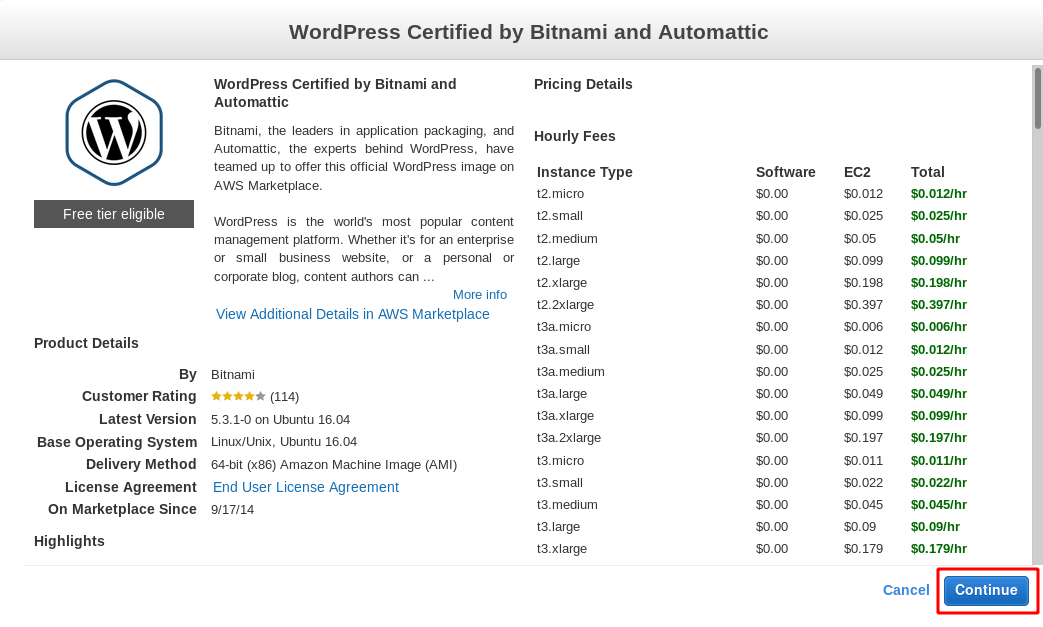
Click Continue Button
Step 2: Choose an Instance Type
Amazon AWS provides free-tier includes 750 hours of Linux and Windows t2.micro instances each month for one year. To stay within the Free Tier, use only EC2 t2.Micro instances. Only
Now select EC-2 machine type t2.micro free tier
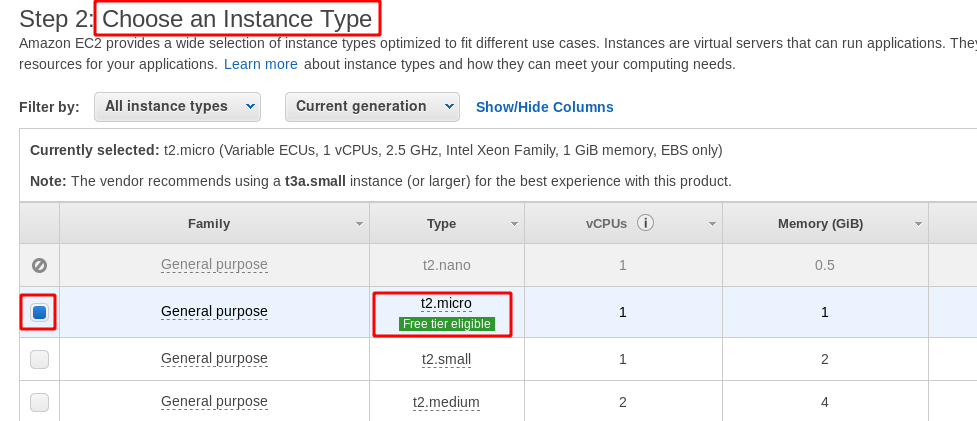
and Click Next: Configure Instance Details

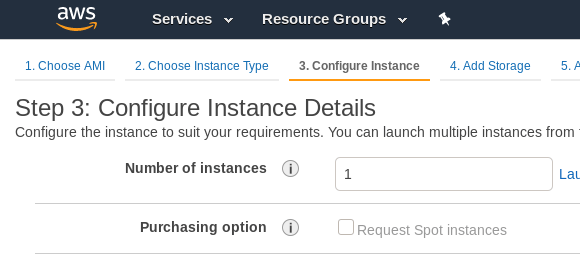
Step 3: Configure Instance Details
all values to be the default settings
Click Next: Add Storage

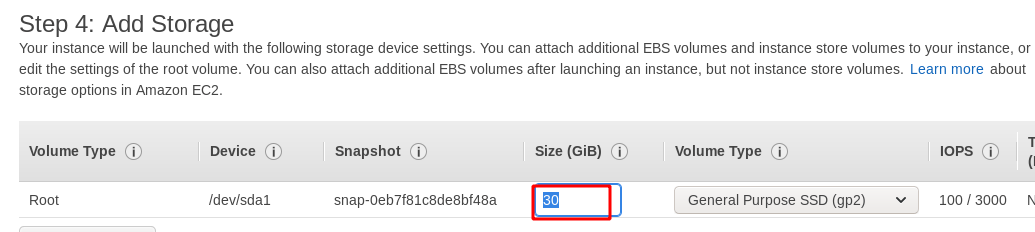
Step 4: Add Storage
This step is to configure Storage AWS provides 30GB Free General SSD you choose 1-30 GB Free Storage your uses according
And click Next: Add Tags

Step 5: Add Tags
This step is to Create a New Tag for our virtual machine click add button and put your key and value

Next click : Next: configure Security Group

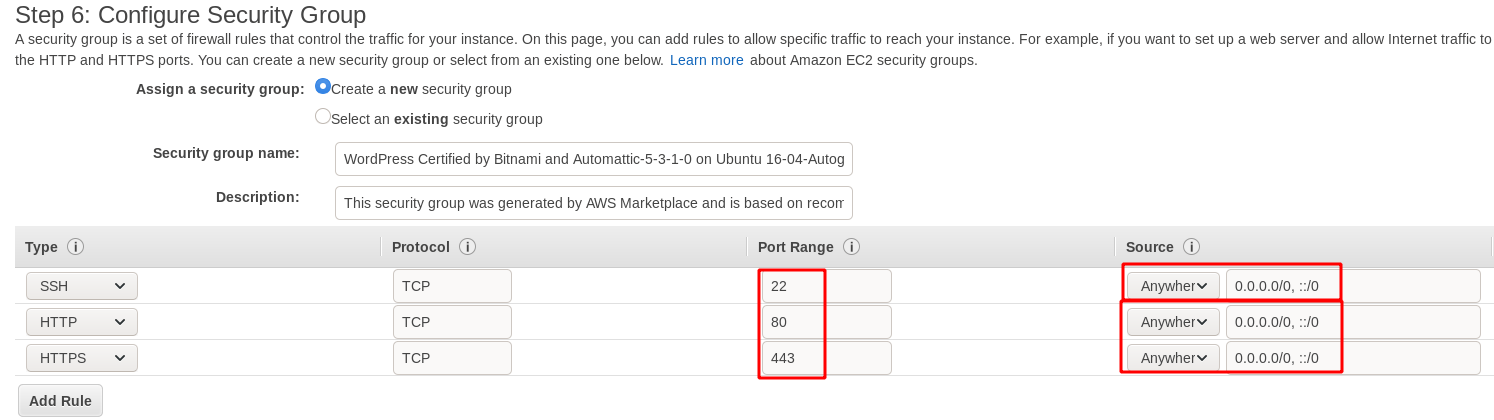
Step 6: Configure Security Group
This step is a network security firewall set up inbound and outbound rule A security group is a set of firewall rules that control the traffic for your instance. On this page, you can add rules to allow specific traffic to reach your instance. I allow port anywhere 22,80,443
And Click Review and Launch

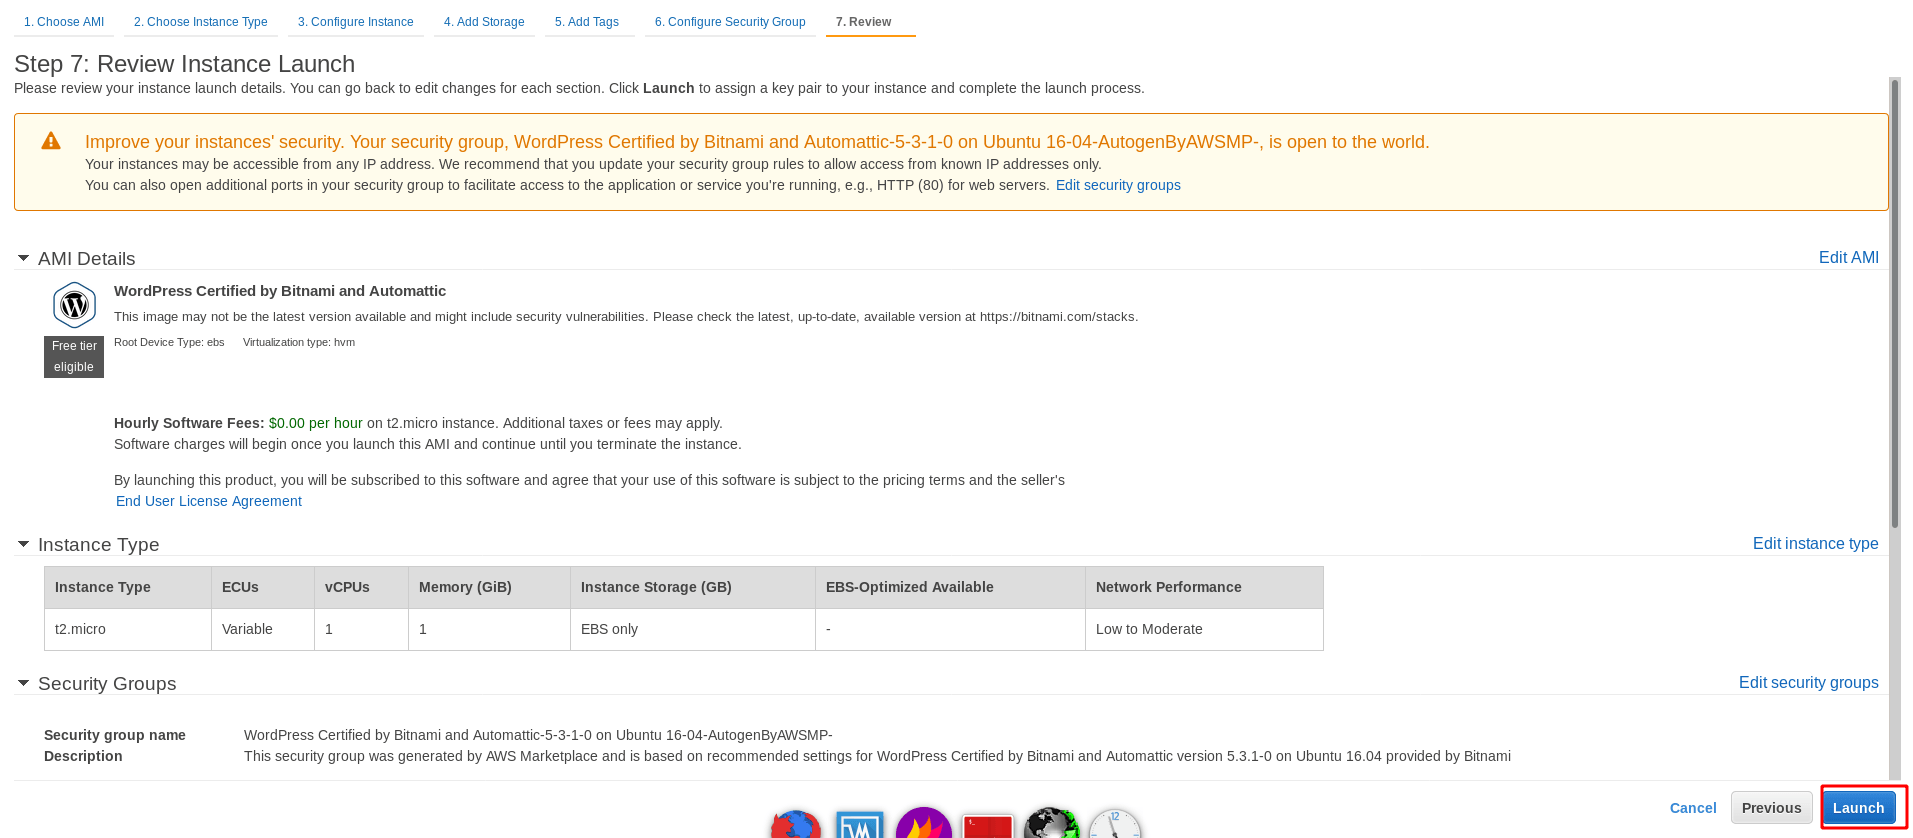
Step 7: Review Instance Launch
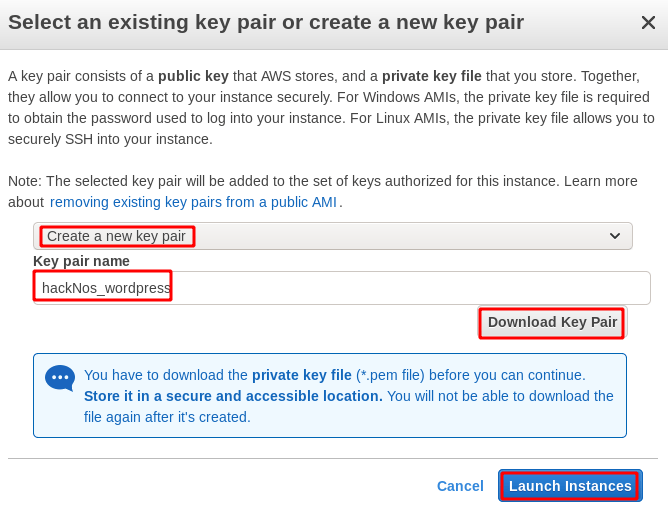
Please review your instance launch details. You can go back to edit changes for each section. Click Launch to assign a key pair to your instance and complete the launch process.
Click Launch Button
Now create a new key for ssh connection to connect our hosting server choose to Create a new key pair and put your key pair name and click the download button after download the key click launch instances
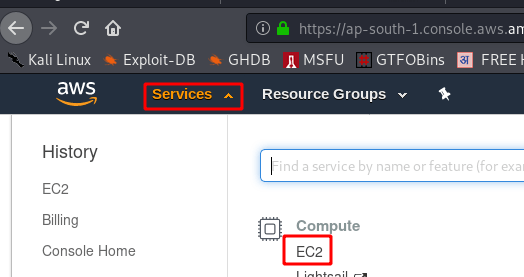
After launch our instance click services and EC2
Click Running Instances
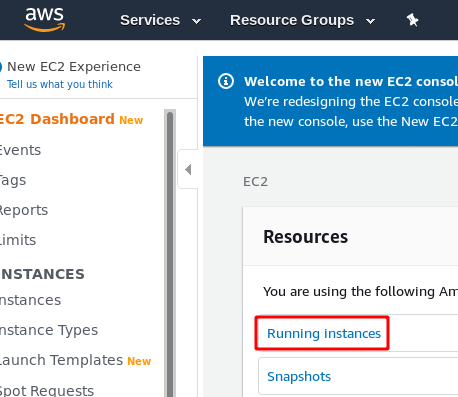
And we see our Ec2 Machine Dashboard now connect our machine through ssh server you copy your machine Public IP your and follow next step

Go to your download directory and change permission ssh key for read-only root user this command
chmod 400 (your key name)
Connect Our Hosting Server Through SSH Server
ssh -i (your key name) ubuntu@<your Public Ip address>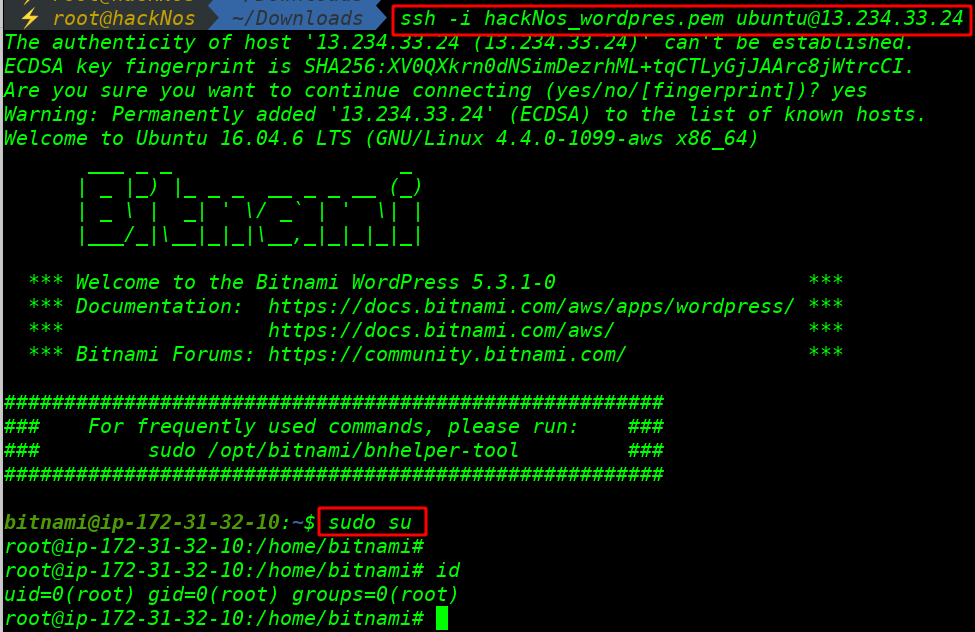
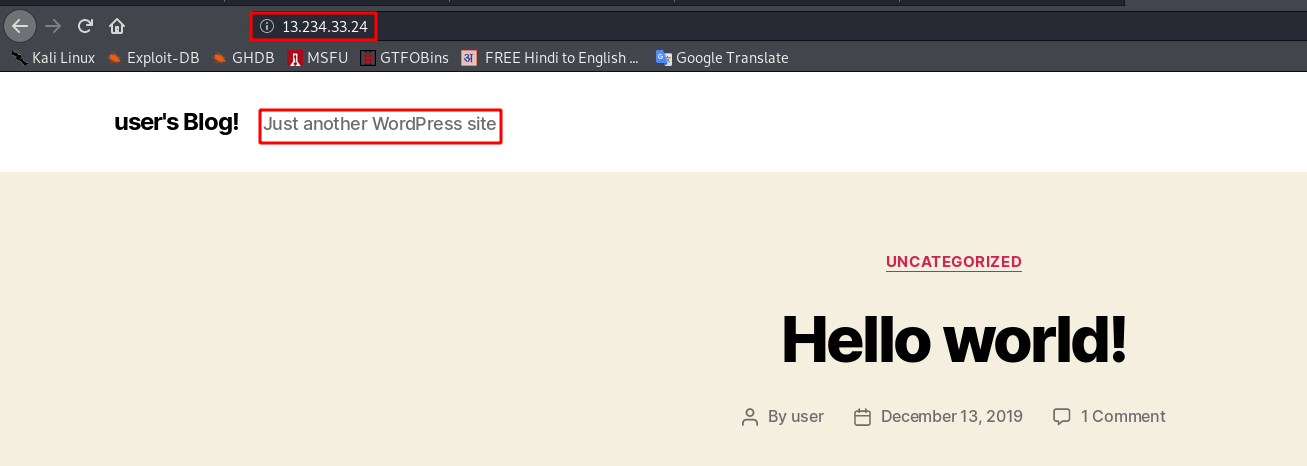
Access our Website type your IP address in URL and Enter you see your WordPress default themes
Joomla setup apache server here