In this article, We are going to configure Nameserver on CyberPanel, and we will talk about what is nameserver, and why we need to configure nameserver on CyberPanel.
What is Nameserver
Nameservers are a fundamental part of the (DNS) Domain Name System. Nameservers help connect URLs with the IP address of web servers. Nameservers look like any other sub-domain name.
The domain name needs to be resolved into a valid IP address of a physical server to open a website. A nameserver is the address of that web server.
- CyberPanel Install on Vultr
- CyberPanel NameServer Configure
- Use of FTK Imager Forensic Tool
- Whatsapp Hacking App 2021
- Shellphish Install in Termux
Create Nameserver for CyberPanel
Before configuring the Nameserver first we need to create a nameserver for our hosting, so login with your domain registrar in my case my Domain Registrar is Namecheap.
After Accessing the domain registrar dashboard you need to Domain Section in my case name Domain List, where you need to select your domain and look for the Advanced DNS option.
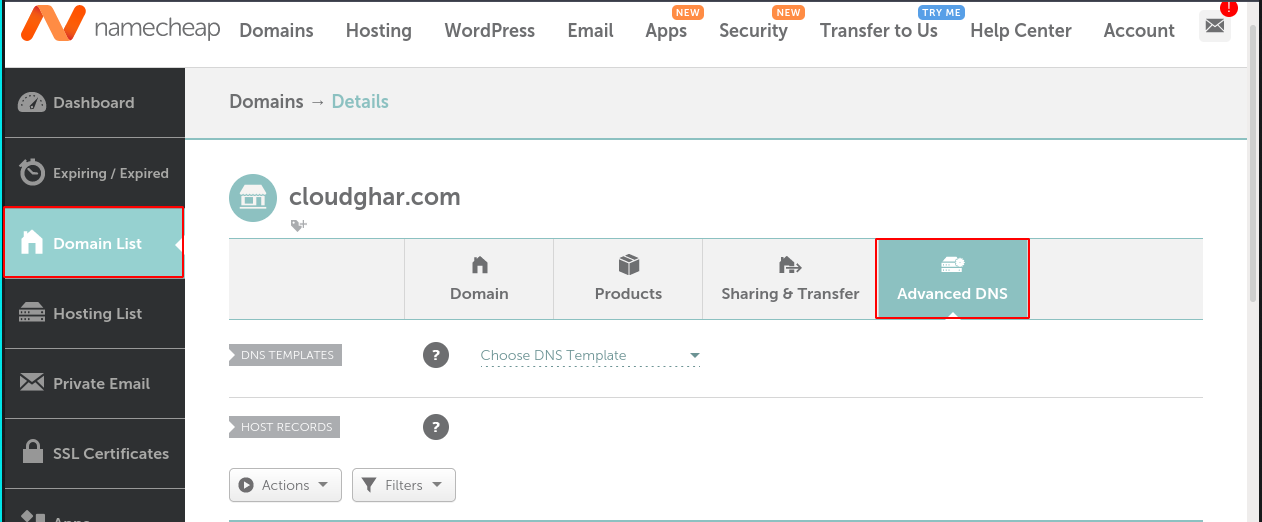
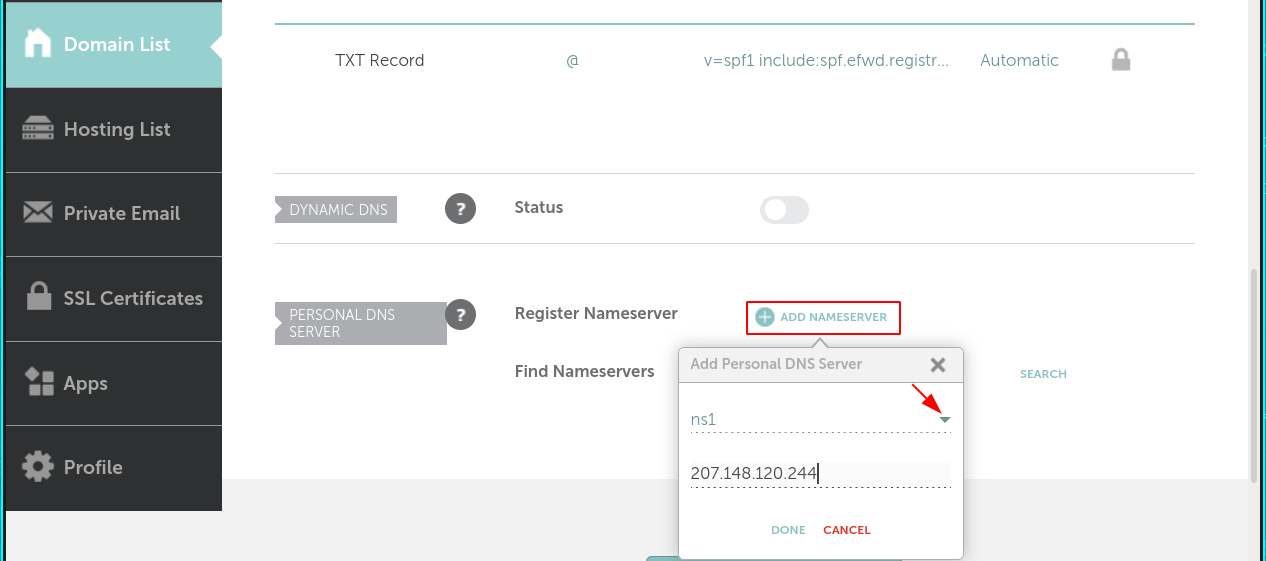
After getting the Advanced DNS page you need to scroll down the page last of the page you will found an ADD NAMESERVER button, let’s click on the add Nameserver button, in this first field you need to choose your nameserver record and the second field write your Server IP Address.
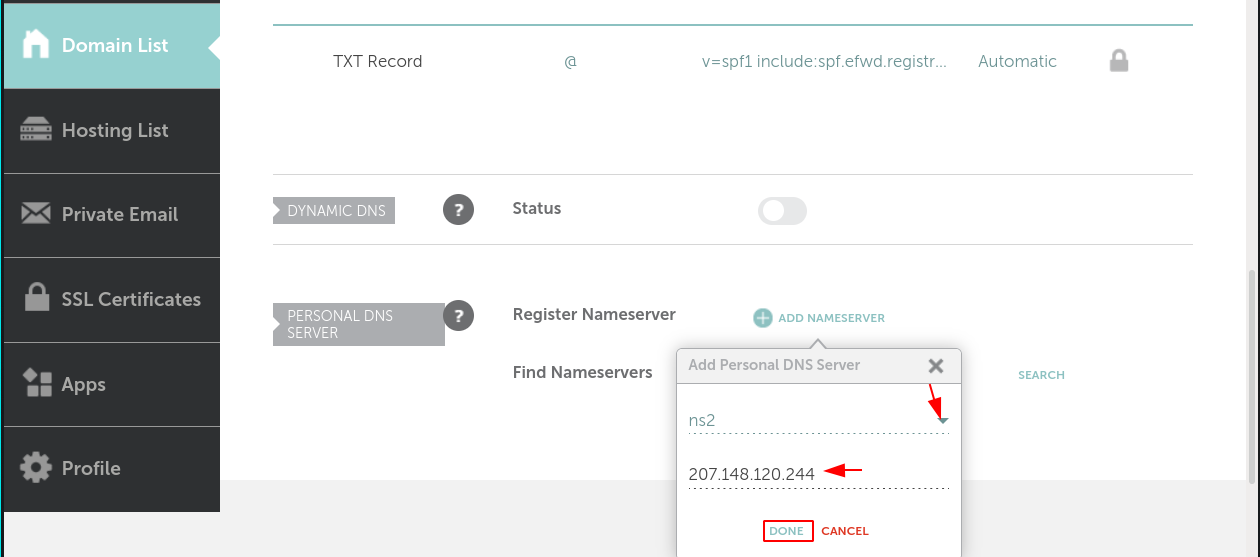
Repeat the same step for creating the second nameserver, and this time you need to change the record name.
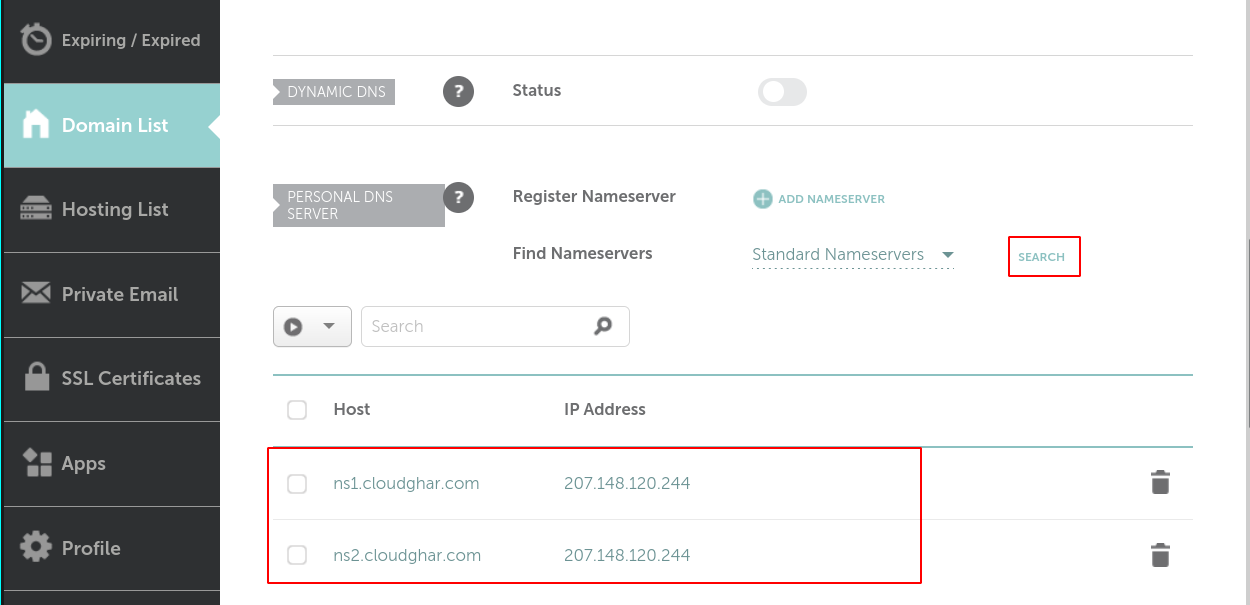
After creating both nameservers your nameserver records look like these records.
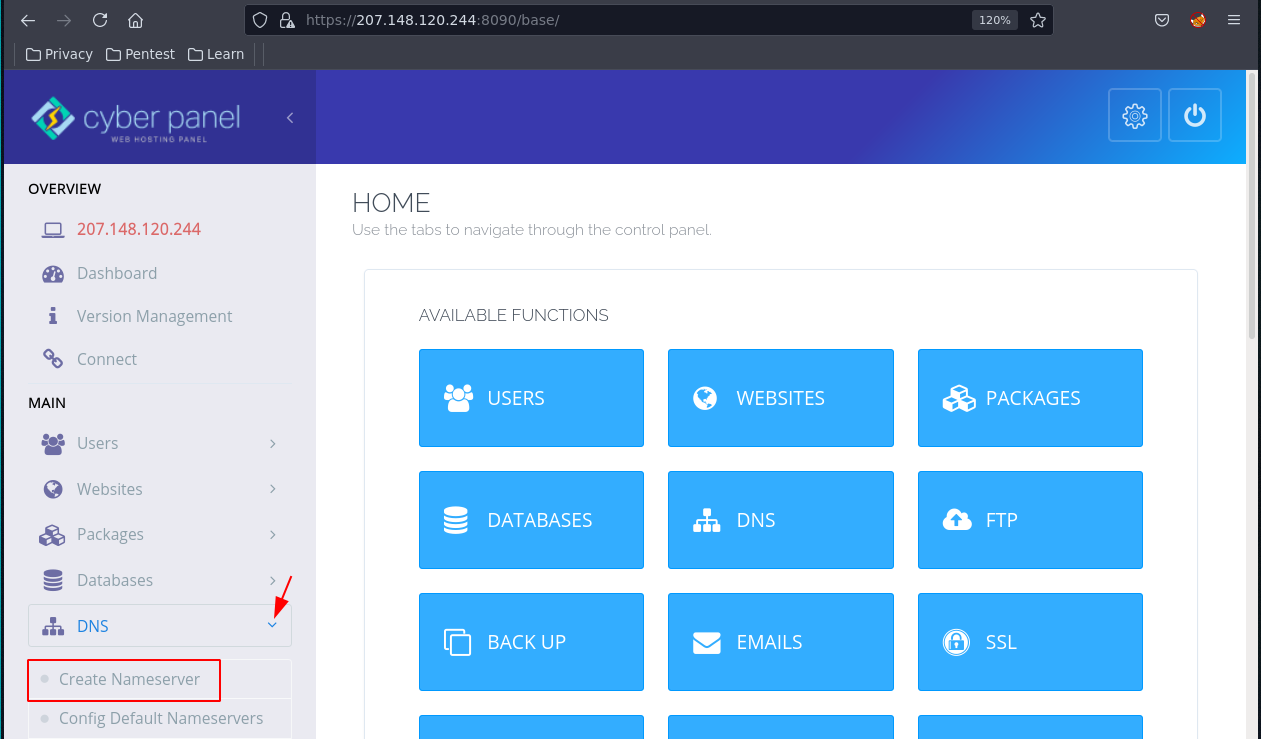
Let’s move on to the next step configuring the nameservers on the CyberPanel, the first login with your CyberPanel Dashboard, and click on the DNS button.
Next click on the Create NameServer button.
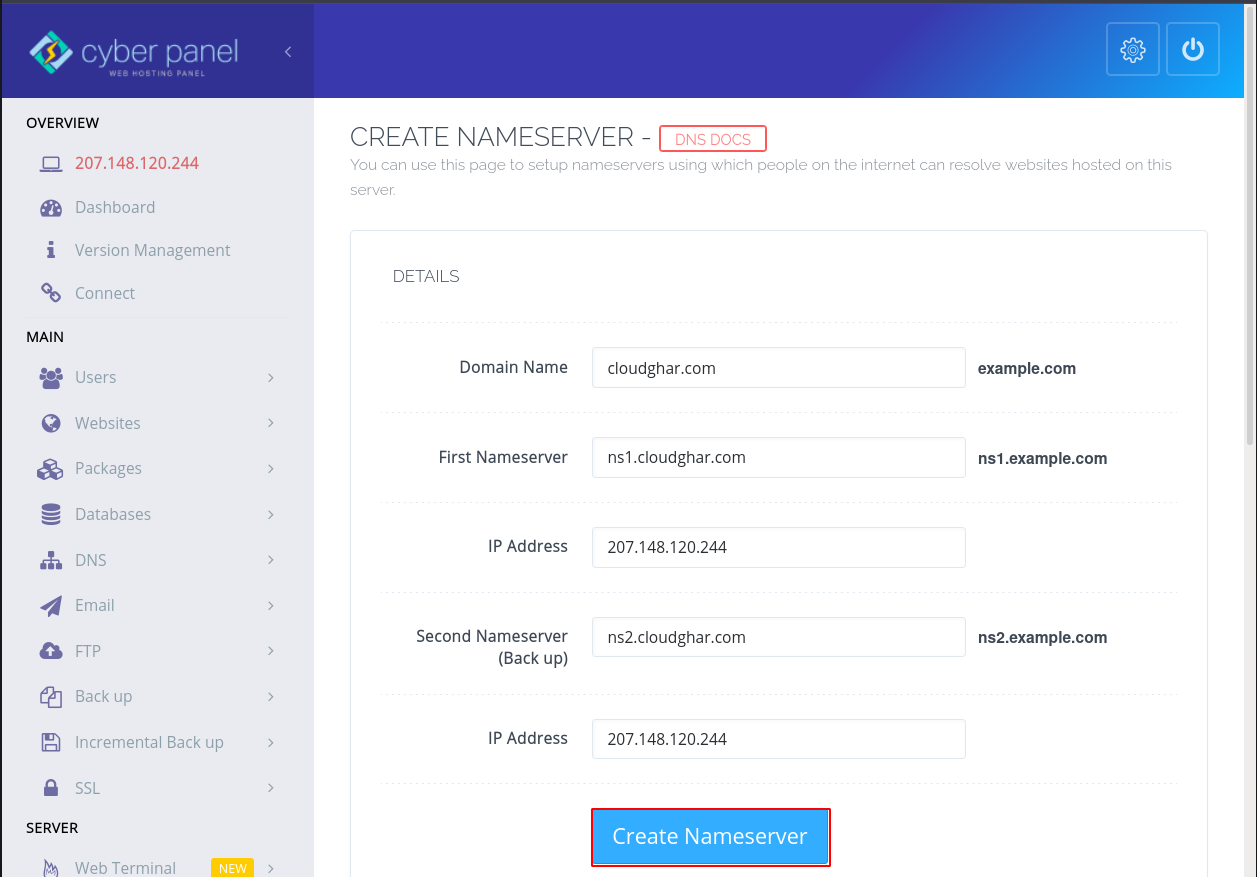
Create NameServer on CyberPanel
In this first placeholder, you need to type your domain name and the First Nameserver placeholder type your first nameserver record,
or the IP Address field type your Current Server IP Address and in the Second Nameserver Field type your second nameserver record or in the IP Address type the same IP address.
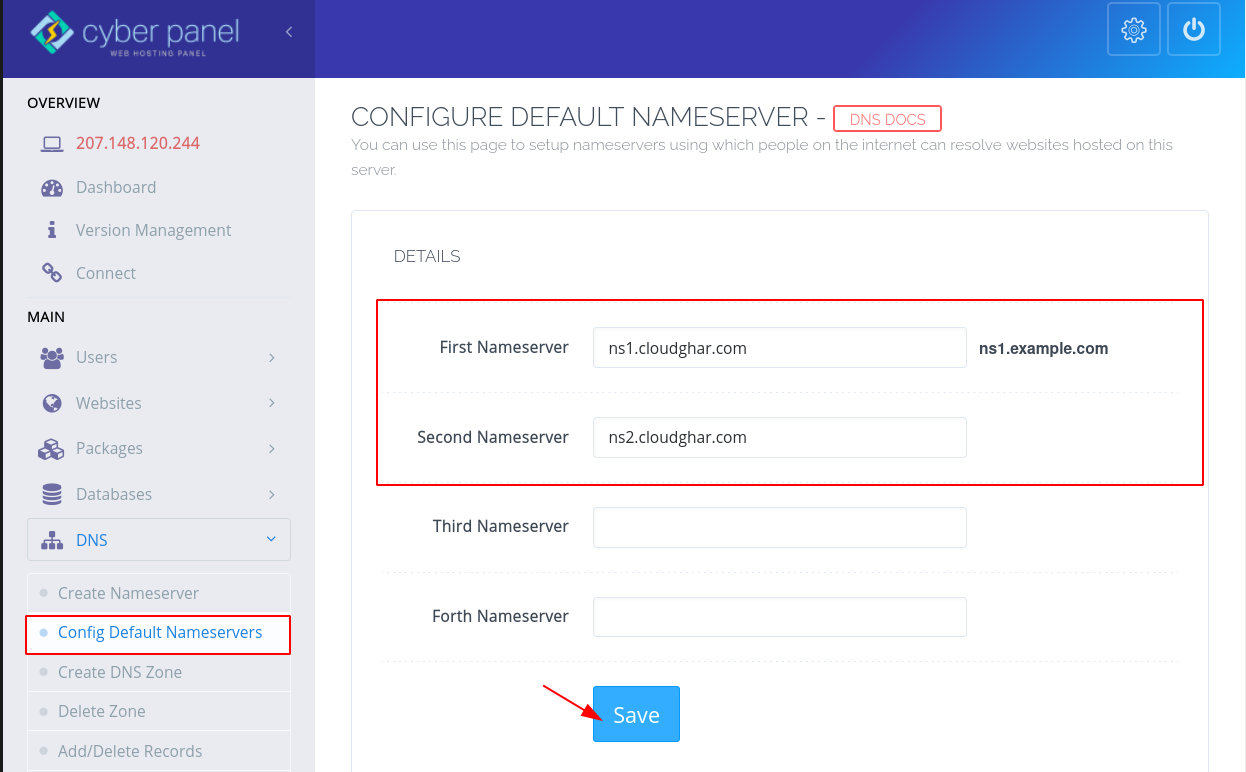
Configure Default NameServer on CyberPanel
After Create the Nameserver on CyberPanel we need to configure Default Nameserver on CyberPanel let’s do it again write your First Nameserver & Second Nameserver records in the first two placeholders and click on Save Button.
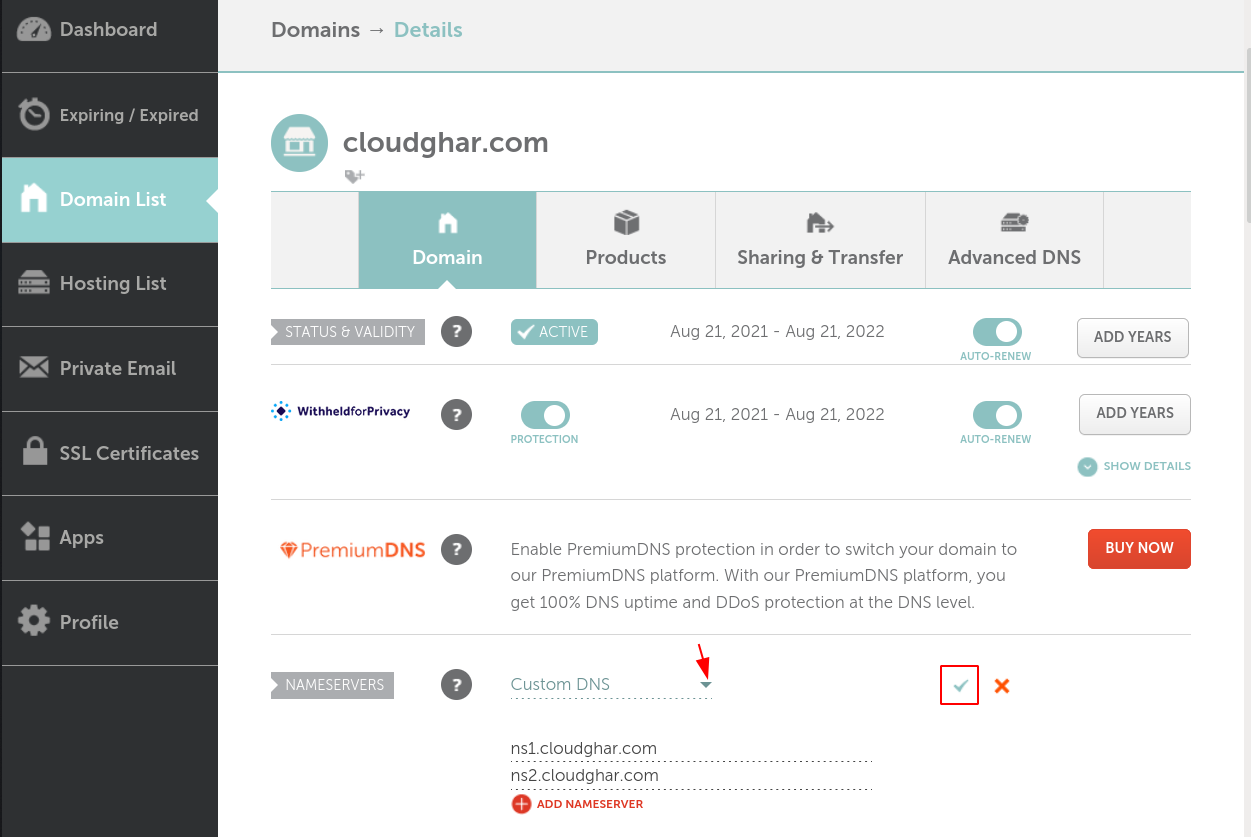
Connect Domain to Hosting using NameServer
Now, this is to check Our Nameserver working properly, for check our nameserver working properly we need to connect our Domain to our hosting nameserver.
Again go to your domain registrar dashboard and select the custom DNS option and add here your both nameservers record.
Note: In my case, my domain name is the same you can try this method on your others Domain.
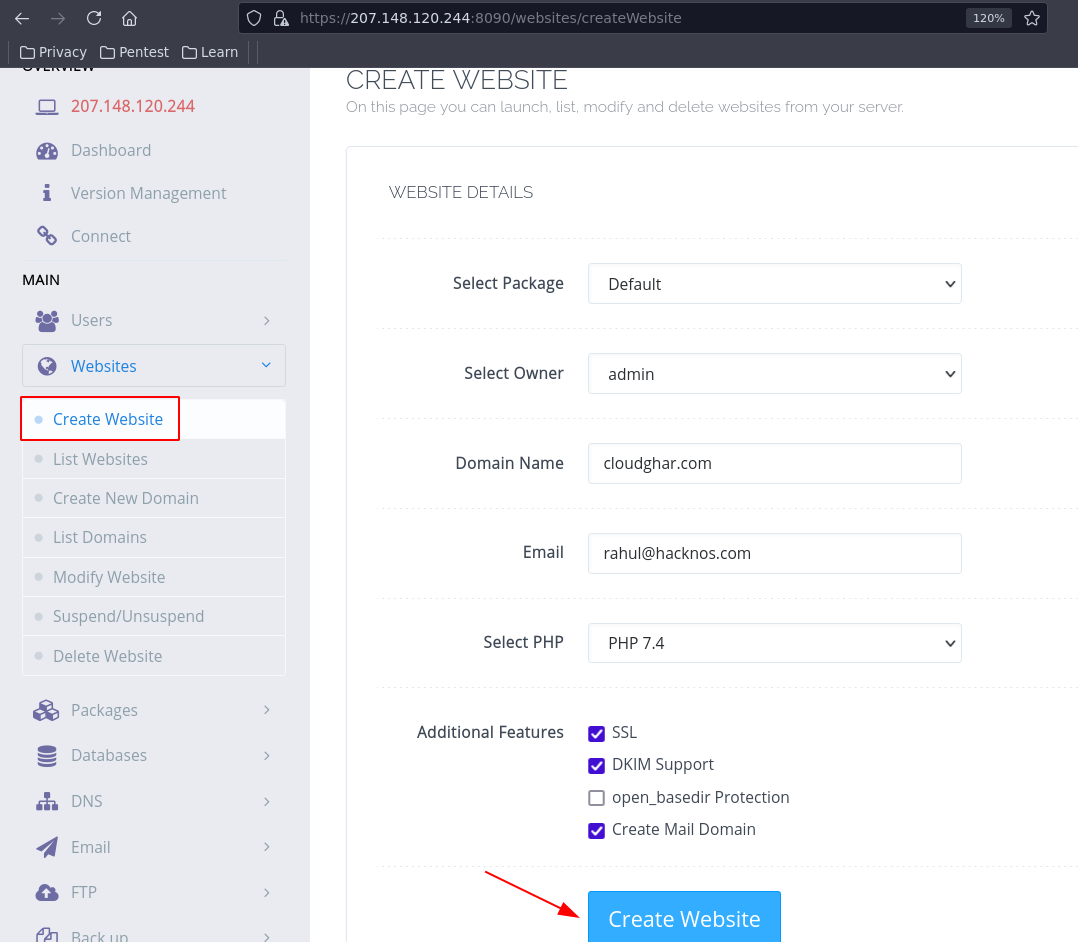
Create Website on CyberPanel
Our nameservers are connected to our domain let’s create a Website on CyberPanel again go to your CyberPanel Dashboard and click on the Website button next click on the Create Website button.
Now Enter Your Website Details.
- Select Package => Default ( choose the default option if you haven’t any other package )
- Select Owner => admin ( if you owner of the website choose the admin role else choose your name )
- Domain Name => Write here you domain name
- Email => enter your support email
- Select PHP => PHP 7.4 ( you can choose the latest version if your Web Application is supported 8.0 )
If you want to install free SSL select the first option
also select the DKIM Support for your Domain
If you want to configure here your mail box you can select teh last option ( Create Mail Domain )
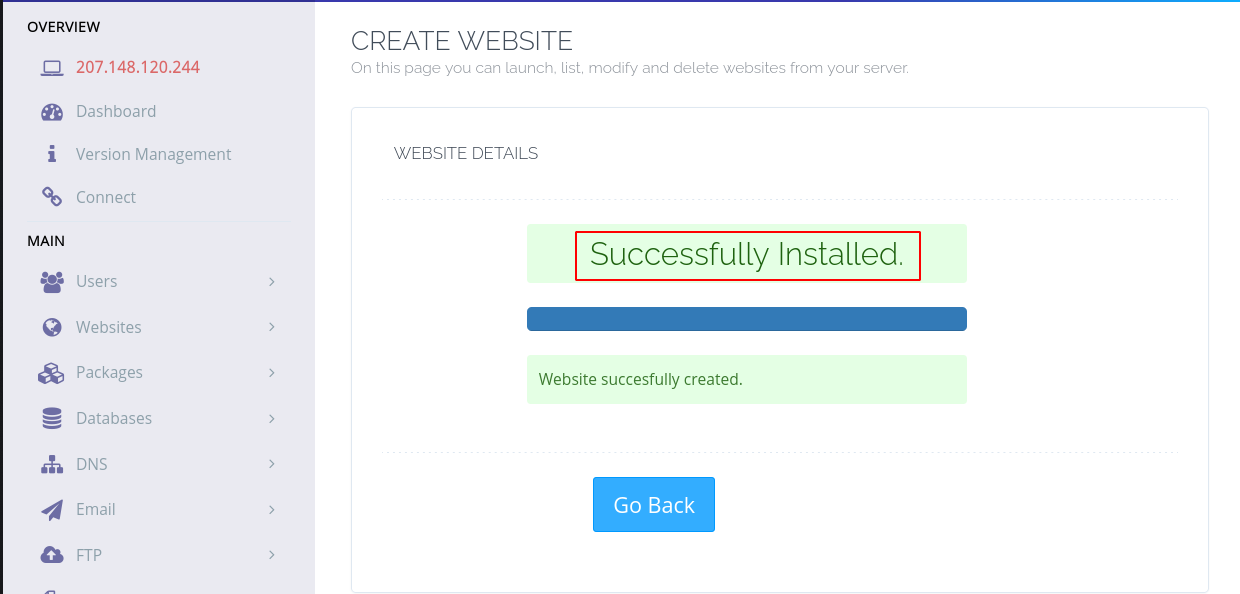
After filling the requirement click on the Create Website button.
It takes 1-3 minutes depending on your Server speed, when website creation is done you will get the Successfully Installed Message.
Let’s check the website is working properly. navigate your domain in browser URL, if you get this message CyberPanel Installed, which means our Website is successfully connected to our hosting using DNS Records.
https://your-website.com
ISSUE SSL For Hostname CyberPanel
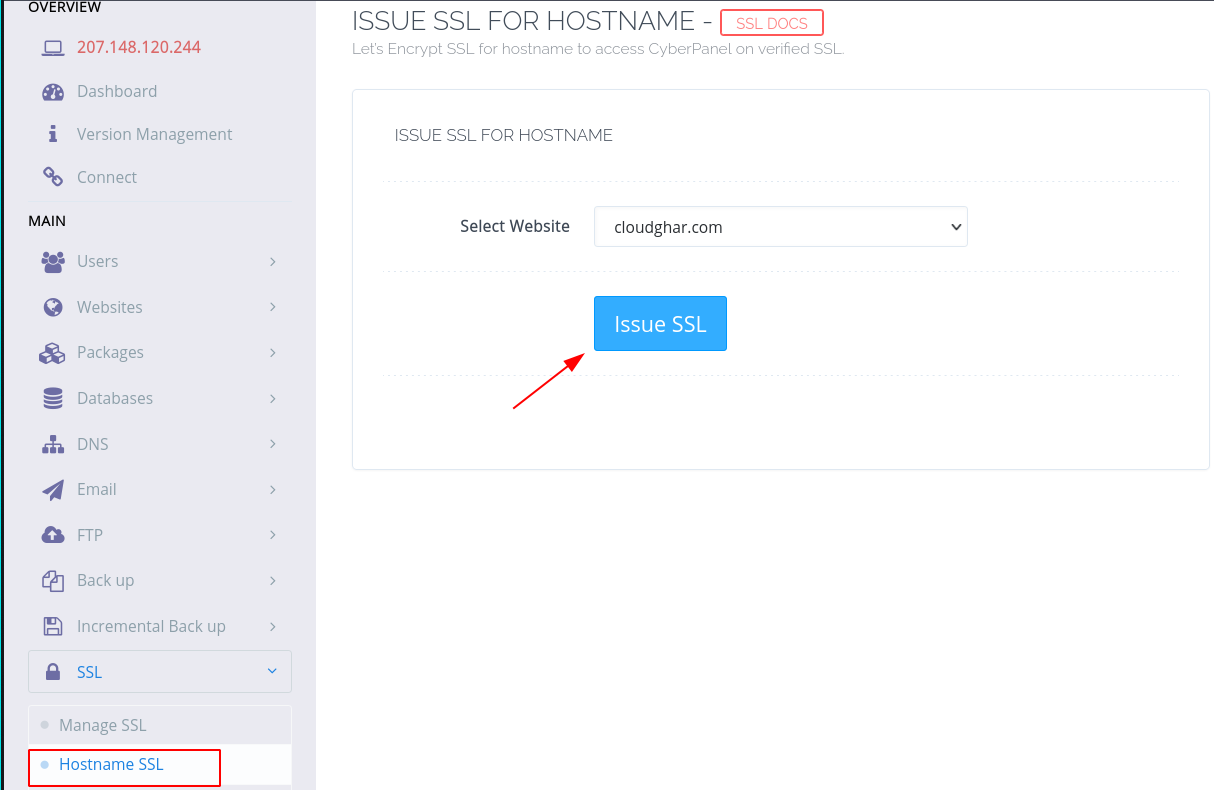
If you yet haven’t Issue an SSL Certificate for your CyberPanel login Dashboard you need to follow this step to Issue an SSL for the login portal.
when you have done the Nameserver steps or Website Creation for your CyberPanel, you need to click on the SSL button,
and then choose the Hostname SSL now click on the down aero button and then select your domain for CyberPanel and final click on the Issue SSL button.
As we can see from the image our SSL is successfully Issued for our Cloudghar.com hostname domain.
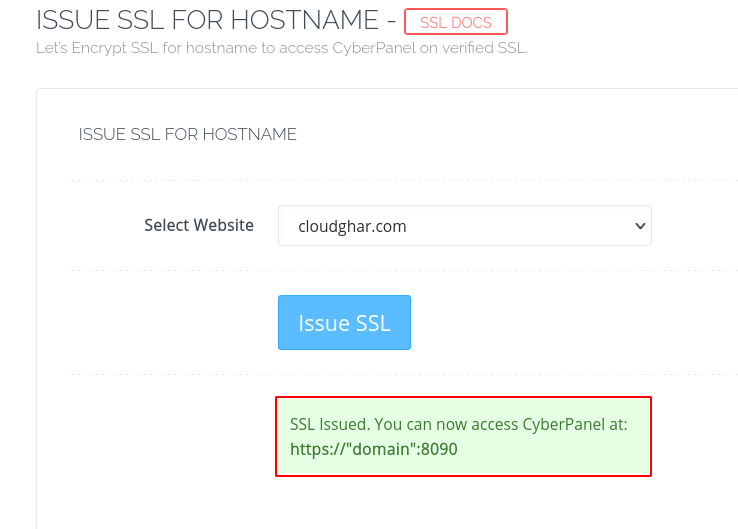
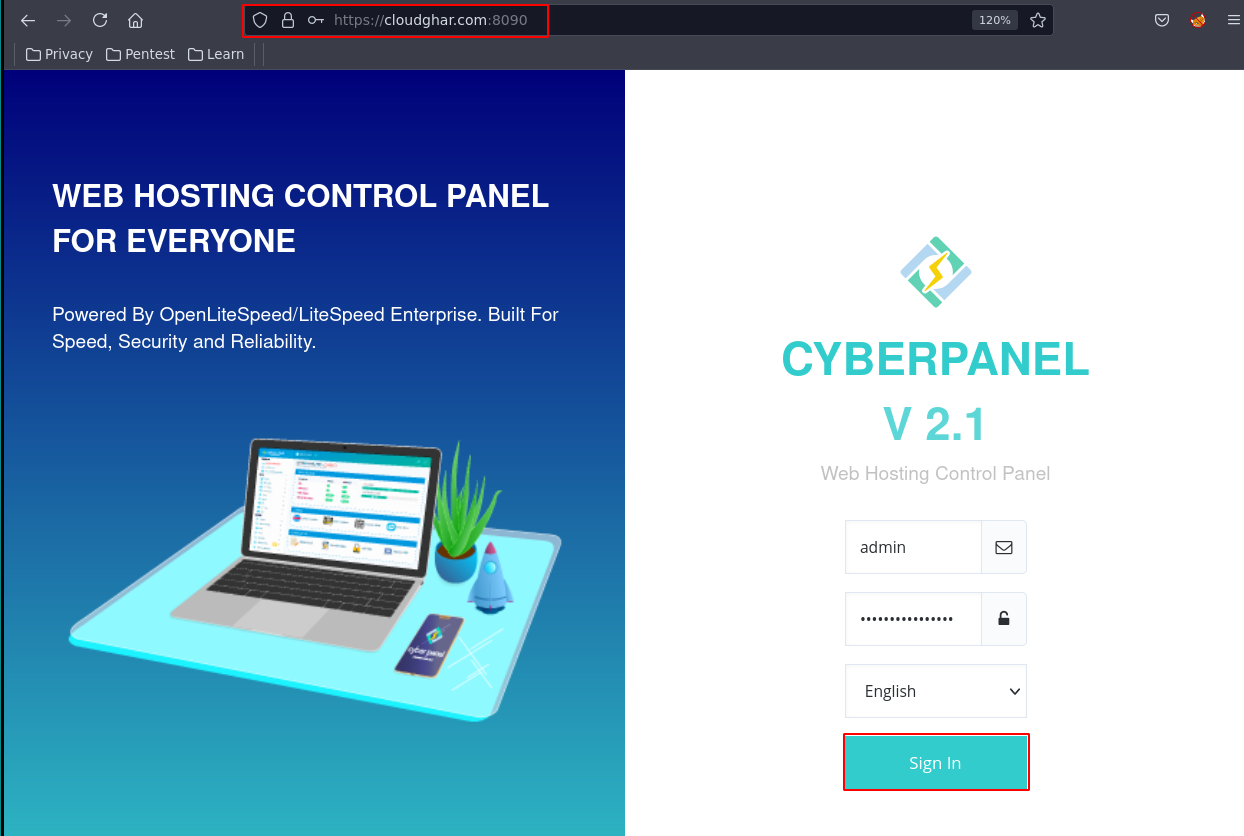
Let’s check the SSL Certificate is working properly navigate your domain with HTTPS protocol and use port:8090.
And we can see the page we successfully access the Cyber Panel Without an SSL Security Warning: Potential Security Risk. which means our SSL is successfully issued for our hostname.
https://your-domain.com:8090