Today I will tell you how you can create a backup on Vultr cloud hosting and share it with any other machine. In this whole process, you have to keep in mind that you can share or restore the created backup with the same machine which has the same configuration.
It is possible if you create a backup of a server with the same configuration and restore it on another server with the same configuration.
More Questions About Website
- How To Login To Uk2.net 2021?
- Free Web Hosting With Cpanel Every Thing Free.
- Create Free WordPress Website On Profreehost.
- Free SSL Certificate On WordPress.
- Cheapest .Com Domain Registration Only $1 Limited Time Offer.
- Track Live Traffic WordPress Website.
Create Backup On Vultr Cloud Hosting

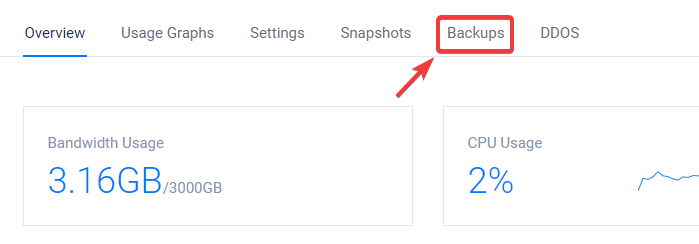
First of all, you have to create a backup of any one of your servers, for which you have to open the details of the server. After opening the details, some kind of interface will open in front of you, here you will see the option of backups, you have to select it from where you can create a backup of the server.

If you have purchased an auto-backup plane on Vultr Cloud Hosting and have activated it on your server, then the backup of your server will be created automatically and some files like this will be created in front of you, which will be done at the time given by you.
According to your server is backed up. After creating the backup, now you have to convert it inside a snapshot by which we can restore our backup on another server. To convert a backup to a snapshot, click on the Convert button and your backup will be automatically converted to a written snapshot.

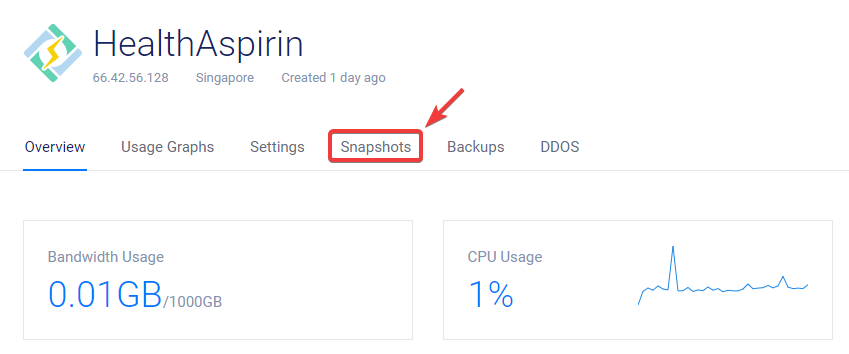
After doing this, now your backup is absolutely ready to restore on any other server. Now you have to open the server in which you want to restore the created snapshot. After opening the details of the server, you have to select the option of snapshots where all the snapshots created by you will be visible.

After this, a window like this will open in front of you, here the snapshot created by you will appear and the option of restoration of short will appear on the right corner of the snapshot. To restore the snapshot to the current server, press the restore button on the corner.

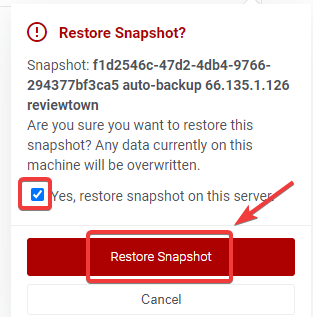
After pressing the restore button, a window like this will open in front of you, here you will be asked for the configuration whether you want to restore the snapshot on this server or not, for this, you have to tick the checkbox above. Giving and Restoration is the press of a shirt button so that your data will be restored on the server.

After doing this, a process like this will start in front of you, here all the data of the snapshot created by you will be restored on the server and your server will start reinstalling again, after some time you will start automatically and use Will be ready to. After this, you will be able to access all the files that you have restored on the server.
Create Backup On Vultr Cloud Hosting In 2021 – vultr download snapshot – vultr pricing – vultr object storage – vultr auto-scaling – vultr status – vultr snapshot – vultr live chat – vultr data centers


