Today I will tell you how you will start your computer through Wake Up On Lan Windows 10, for this, you will have to do some settings on your computer and mobile, after which you will be able to start the computer from Wake Up On Lan Windows 10.
More Questions About Windows
- Windows 10 Free Download.
- Windows 11 Download and Install 2021.
- Reset Windows 10 Without Losing Data.
- 10 Ways to Speed Up Windows 10.
- Bypass Windows 10 Password Without Software.
- Upgrade From Windows 10 Home to Pro 2021.
- Fix “This PC Can’t Run Windows 11” Error – Fix the TPM 2.0 error.
Wake Up On Lan Windows 10 – 2021
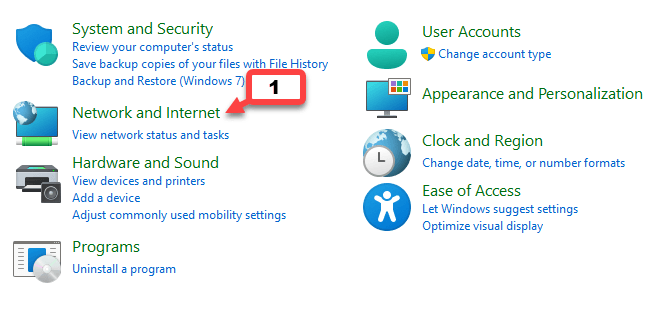
First of all, you have to open the control panel on your computer, after this, you will see some interface like this, here you have to select the option of network and internet where we will do some setting of internet, after which you can set up your phone. will be able to start the computer.

After going to the section of Network and Internet, here you have to open the first option Network and Sharing Center.
Here you can see all the internet sharing options related to your computer and from here we will open the sharing mode of our laptop.
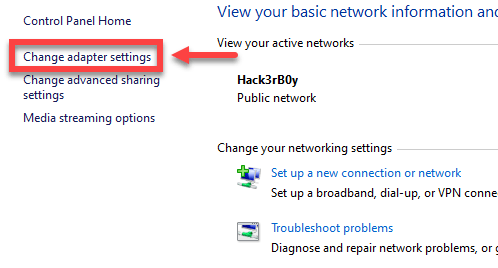
After opening the Network and Sharing Center section, you have to click on the Change adapter setting in the left corner so that you will be able to configure the internet adapter you are using in your computer and from here you can see all the adapters for which through which you access the Internet.
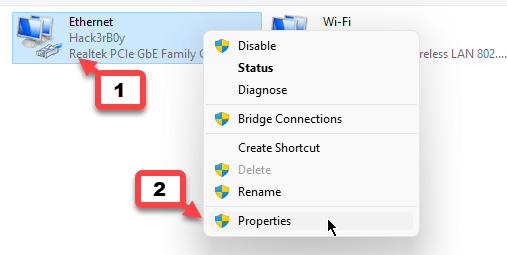
Here you will see all the internet adapters out of which you have to right-click on the Ethernet adapter and then go to the section of properties.
Only here you have to make some settings in the ethernet adapter itself, do not change any with the rest of the adapters.
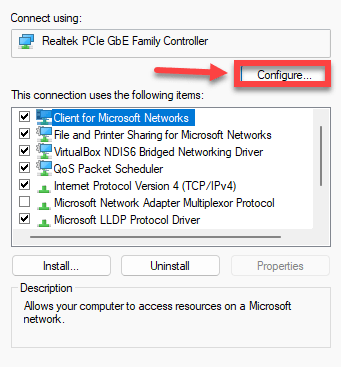
After doing this, a window like this will open in front of you, here you have to click on the configure button so that you will be able to do the Ethernet adapter.
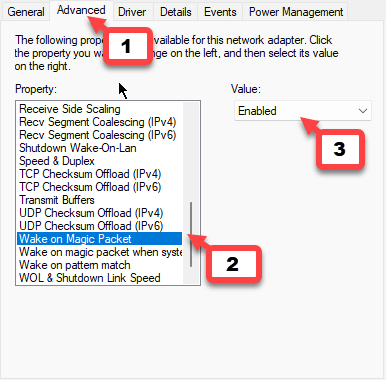
After clicking on the configure button, a window will open in front of you, here you have to first select the advanced option and then select the wake on the magic packet from the properties section given below and then enable its value.
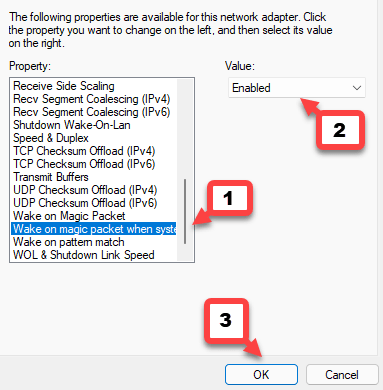
After doing this, you have to select which magic packet when the system given in the section of properties and also enable its value, after following all this process, you have to save all the things for which you have given below You can click on the OK button.

After following all the processes of Network Sharing Center, now you have to open Network and Sharing Center again and then click on the Change Advanced Sharing Center button so that you will be able to confirm some advanced features of Sharing Center.
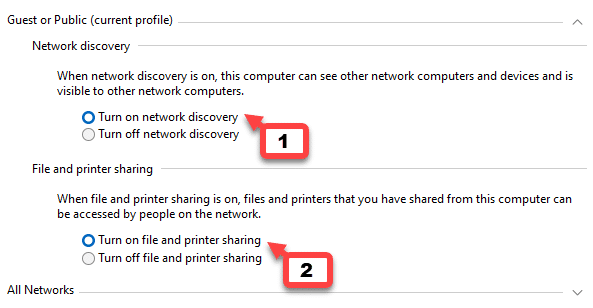
After doing this, a window like this will open in front of you, here you have to turn on both the Guest on Public and File and Printer Sharing option score. So that you will be able to share all the packets through the network.
You have to do all this process on your computer and then after that, you have to do some settings on your android mobile for which first you have to download an application.
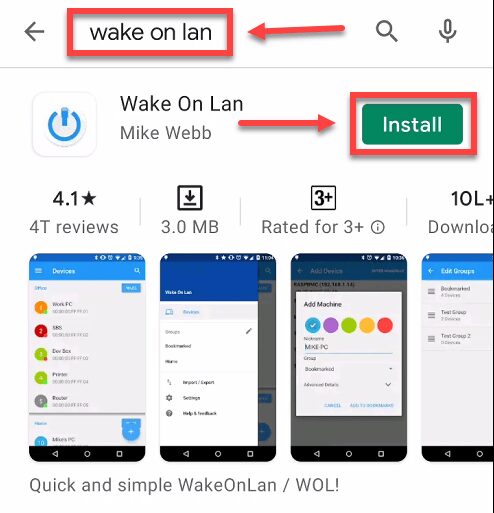
To download the application, you can go to the Play Store and search Wake On Lan, and then some kind of application will open in front of you, here you have to click on the install button.
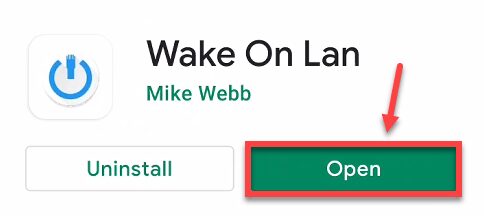
After installing the application, now you have to open it in such a way that you can connect your computer and Android mobile with each other.

After opening the application, you will see an add option in the right corner, by clicking on it you will be able to add all the computers that are on your network.

After this, you have to scroll down and search all the computers present in your network and then your computer will appear in front of you, if your computer does not appear in the scan result, then you can enter your computer by clicking above the button manually. can connect with.
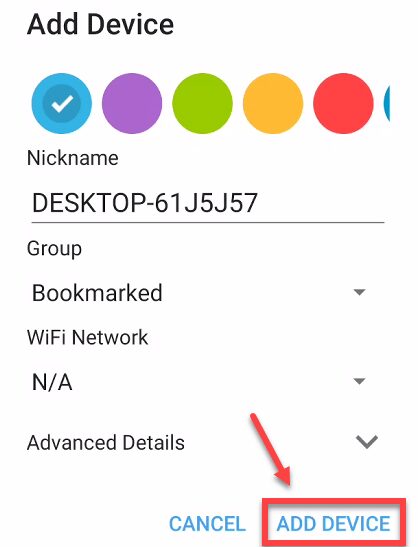
After this, you have to click on your computer shown in the result and then here you will be able to do the configuration related to your computer, after confusing all the things, you have to click on the add device so that your computer is added to your Android application.
And now you will be able to start and stop your computer from mobile anytime.
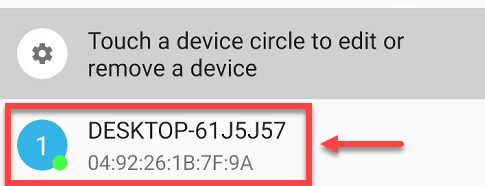
After doing all the configuration of the mobile, now you can see that our computer has been successfully added.
Here green dot means that our computer is connected to the internet and is online if the red dot comes in place of green here then it means that your computer is not yet connected to the Internet and is offline.
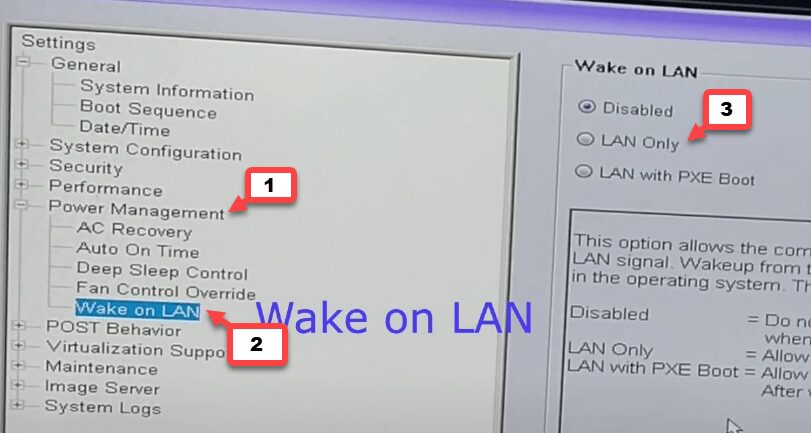
After doing all this process, now you have to go to the BIOS settings of your computer and then configure the Wake On Lan settings. Each brand has different buttons to open BIOS.
So you can search on Google by entering the name of your brand, which button to use to open new in your computer’s BIOS.
After following all this process, now both your computer and phone are connected to each other and whenever you power off your computer, then you will be able to easily turn on the computer through your mobile.
BIOS Keys by Manufacturer
Here’s a list of common BIOS keys by brand. Depending on the age of your model, the key may be different.
- ASRock: F2 or DEL
- ASUS: F2 for all PCs, F2 or DEL for Motherboards
- Acer: F2 or DEL
- Dell: F2 or F12
- ECS: DEL
- Gigabyte / Aorus: F2 or DEL
- HP: F10
- Lenovo (Consumer Laptops): F2 or Fn + F2
- Lenovo (Desktops): F1
- Lenovo (ThinkPads): Enter then F1.
- MSI: DEL for motherboards and PCs
- Microsoft Surface Tablets: Press and hold volume up button.
- Origin PC: F2
- Samsung: F2
- Toshiba: F2
- Zotac: DEL


