In this post we are going to install Osticket on Ubuntu Server, osTicket is an open-source ticket system often used for support.
It is written in PHP and it comes with a simple and intuitive web interface used to manage, organize, track and archive all support ticket requests in your company. today I am installing the osticket apache server
How to install osticket apache server ( osticket installation )
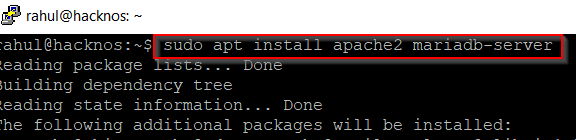
Now our first step is installing an apache web server and maria database server for connecting osticket service simple install via the apt ubuntu packet manager.
|
1 |
sudo apt install apache2 mariadb-server |
MariaDB Create database ( osticket installation )
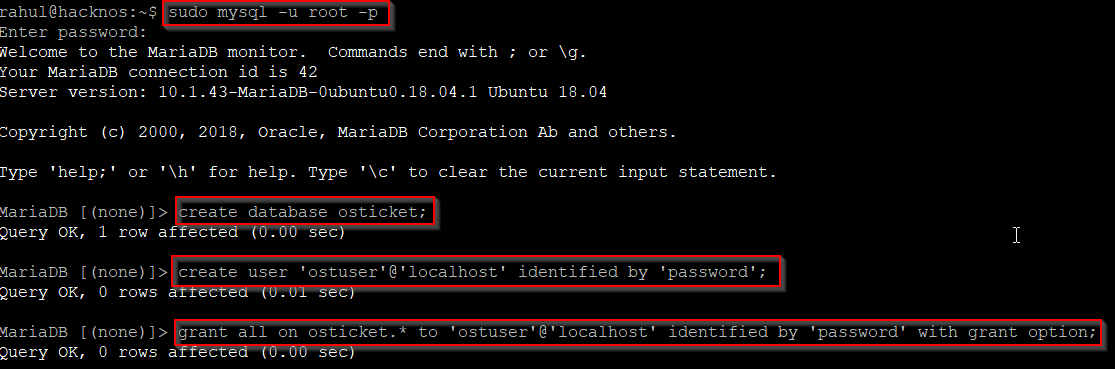
we see our apache server and MariaDB server is installed the second step is log in with the database I am login our root database and create a new database with MySQL query.
|
1 |
sudo mysql -u root -p |
- create database osticket;
- create user ‘ostuser’@’localhost’ identified by ‘password’;
- grant all on osticket.* to ‘ostuser’@’localhost’ identified by ‘password’ with grant option;
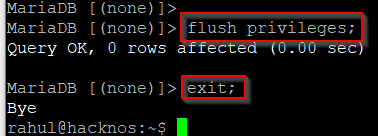
- flush privileges;
- exit;
The next step is to install php modules osticket requirements. (osticket installation )
|
1 |
sudo apt install php php-gd php-mysql php-imap php-xml php-dom php-mbstring php-intl php-apcu |

you download here osticket Github link I am downloading with Linux wget command
|
1 |
sudo wget https://github.com/osTicket/osTicket/releases/download/v1.14.1/osTicket-v1.14.1.zip |

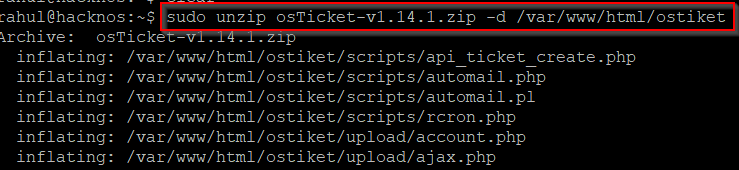
After completing the download, we see our directory osticket .zip extracting the file with unzipping toll (-d parameter use for our apache destination folder)
|
1 |
sudo unzip osTicket-v1.14.1.zip -d /var/www/html/ostiket |
changing permission osticket directory ( osticket install )
|
1 |
chmod -R 755 /var/www/html/ostiket |
changing ownership and group ( osticket installation )
|
1 |
sudo choww -R www-data:www-data /var/www/html/ostiket |

|
1 |
cd /var/www/html/ostiket/upload |
next configuration is renamed the ost-sampleconfig.php file
|
1 |
sudo cp include/ost-sampleconfig.php include/ost-config.php |
After copying the new ost-sampleconfig.php file no permissions changing permission our new file
|
1 |
sudo chmod 0666 include/ost-config.php |

This is the next step complete all step we need to restart our apache server
|
1 |
service apache2 restart |
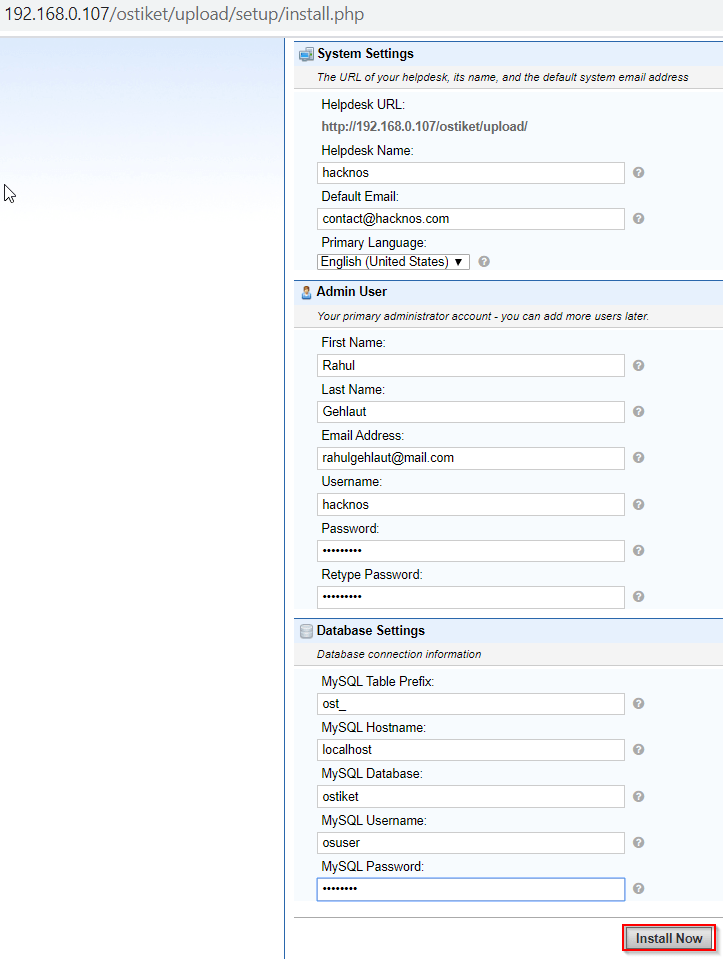
Open your web browser and put your IP address in URL and your osticket destination directory and hit enter and we see our osticket installation dashboard now put your helpdesk name and email address, your database name password fills you’re according to all field. and click install now button
|
1 |
http://192.168.0.107/ostiket/upload/setup/install.php |
we see congratulation massage your os Ticket installation has been completed successfully and our next step is changing permission we see the image file
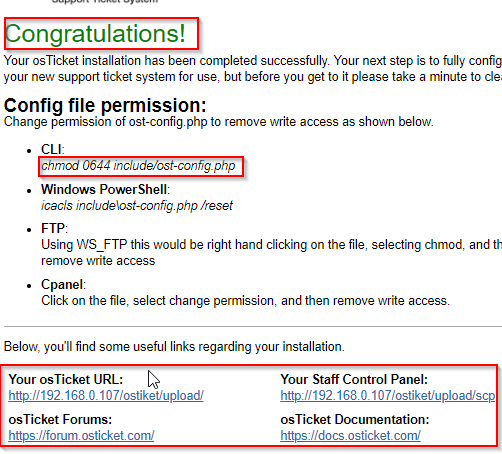
we see our osTicket URL I am opening the URL new tab and our support center is work correctly
|
1 |
http://192.168.0.107/ostiket/upload/ |

How to install multi-website one server see here