How to install VestaCP ( vesta cpanel ) on AWS ec2-machine free one year uses.
Vesta is an easy to use open-source web hosting control panel. It has everything needed to manage a web hosting server.
You will be able to work with users, domains, databases, cron jobs and mail accounts. Vesta Control Panel can be an excellent choice for your server. vestacp installation on AWS
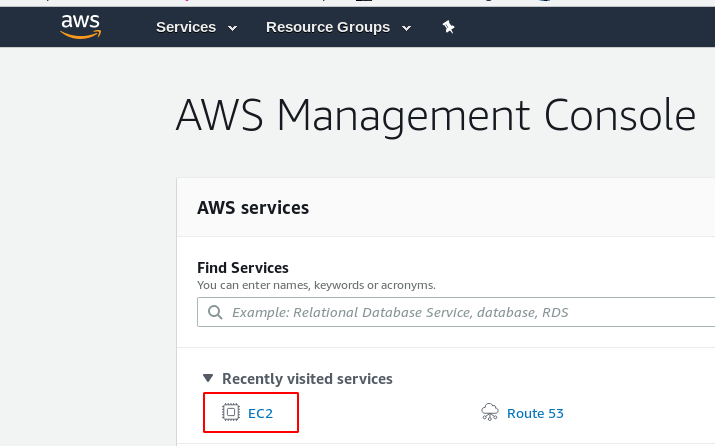
1. The first step is to log in your AWS Account
Now login your AWS account and go to ec2 Dashboard and we need to create a new machine for vesta cpanel installing click the Launch instance button and Launch.

2. The second step is to choose Image VM
we see the Amazone machine image ( IAM ) click to search button and search vestacp and go to AWS Market place and we see the Vesta Control Panel With Plugins Select the Image file.

Aws Charges panel is open and vesta cp description read pricing and Continue

3. Instance Type
Amazone provides many types of a machine according to your uses choose Instance today we are using t2. micro Free one year uses and clicks the Next configuration button


Instance Details choose we continue choosing all field default

and go to the next step add Storage

4. Add Storage Instanced
According to uses choose storage AWS t2.micro machine provides 30 GB free space.


5. Add VM Tag
adding your Virtual machine Tag and key and go to the next step configure Security Group.


6. Configuring Network Security Group
We see the machine many ports open the security group is generated AWS by based on Vesta Uses now changing the Source custom port to Anywhere and click Review and Launch.

7. Review and Launch Instance
Before launch, your instance checks all setting and review your Instance and go to the next step assign a key pair ssh login.

Click the Launch button

you need to create a new key pair and give a name to the key. Click on download key pair as you will not be able to download the file again after it’s created.
Then click on Launch Instances.

After Launch instance, you can see the instance is running even you can provide the name to your created instance.

Now connecting to ssh connection to access the VM now go to your Download directory and changing key permission 400
|
1 |
chmod 400 vestakey.pem |
Connect to the ssh connection using username ec2-user and @ your public IP address
|
1 |
ssh -i vestakey.pem ec2-user@13.234.239.191 |

After Access the ssh connection we need to change the admin password for vesta panel login changing our user ec2 to superuser root and type Linux password changing command passwd admin and twice type your password
|
1 |
sudo su |
|
1 |
passwd admin |

Open your any browser and type URL https://yourpublicipaddress:8083 and we see SSL error click the advanced button And accept the Risk And continue
we see our vesta login panel now type default username admin and your password


After login the admin account we see the vesta panel is installed successfully.