Today I will tell you how you will Create Payoneer Account in 2021 and will be able to take advantage of international transactions. You will not face any problems in this whole process. Your account is approved on this website within a few hours and you can transfer the payment to your local bank from any country outside.
How to create a Payoneer account in Pakistan 2021how to create a Payoneer account in Pakistan 2020payoneer Pakistan Payoneer India Payoneer fees Payoneer app Payoneer review payoneer vs PayPal.
What is Payoneer?
Payoneer is a platform that gives you the option to receive international payments, through which if you create an account, it creates your account in different countries, through which you can receive payments by giving your account number to companies. Through Payoneer, you can create accounts in many countries like UK, US, Europe, etc.
When your account is created in these countries, you can give the account of that country from whichever country you want to call payment and as soon as they transfer money to your account, it will be credited to your Payoneer account and all the money will be transferred to your local account through Payoneer, for which Payoneer charges some percentage.
More Related Questions
- Install Android Studio On Windows 10 – Part 1.
- Convert a Website to Android App – Part 2.
- Add Splash Screen To Your Android Application – Part 3.
- Enable Download Button In Webview Android App 2021 – Part 4.
- How to Generate APK for Google Play Console in Android Studio – Part 5.
Create Payoneer Account
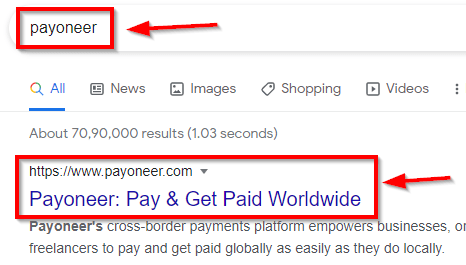
To create your account on the Payoneer website, first, you have to search in Google Payoneer, and first of all the results you have to click on the result, this is the official website of Payoneer where you can register on this website. and you can create your account.

After doing this, as soon as you open the website, you will get an interface like this, here you have to click on the register button given in the right corner so that you can create an account.
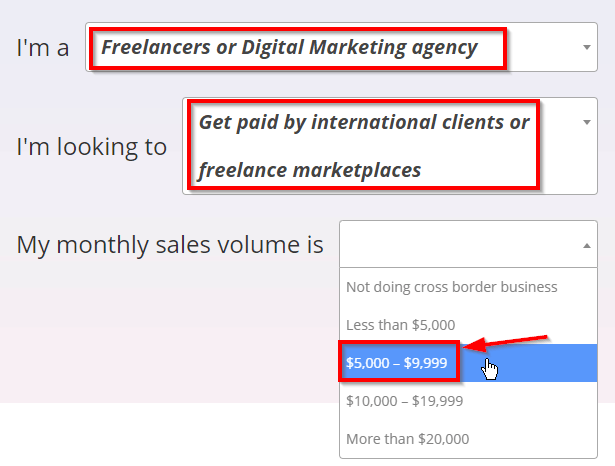
After clicking on the register button you will be asked some questions which you will have to answer in the answer box like what do you do and why do you want to use the Payoneer platform. You have to tell me the amount of payment you want to take from outside the country.
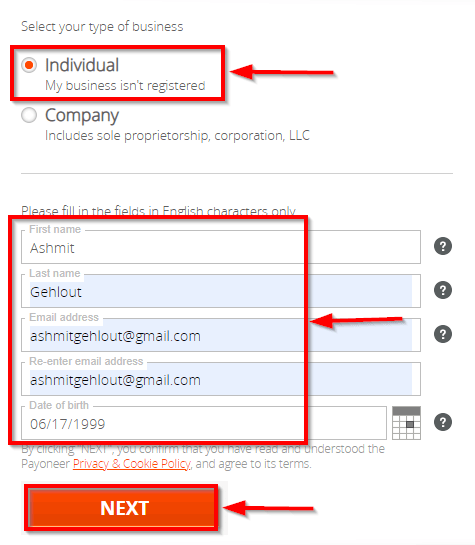
After this, some kind of interface will open in front of you, here you will have to fill in your personal details, first, you have to an individual in the account type and then after filling in your name, email address, and date of birth, click on the Next button. You have to give all this information, you have to enter it correctly.
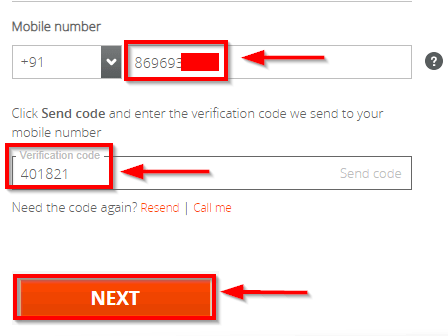
After doing this, now you have to verify your mobile number, for which you have to give your mobile number and by clicking on the send code button given below, an OTP will be sent to your mobile number After filling that OTP in the verification code section.
You have to click on the Next button so that your mobile number will be verified on this website.
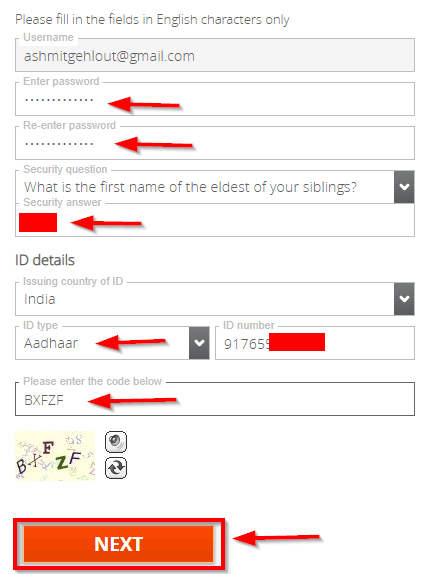
After this, you will have to verify some personal details and your ID proof, first, you have to enter the password of the account you want to create so that no one other than you can access your account, and then after that one for verification. Question is to be used.
After doing this, now you have to give an ID proof that you can give Aadhar card or PAN card, after selecting ID proof, in which section you have to fill your ID number and then fill the verification capture below. After that click on the Next button.
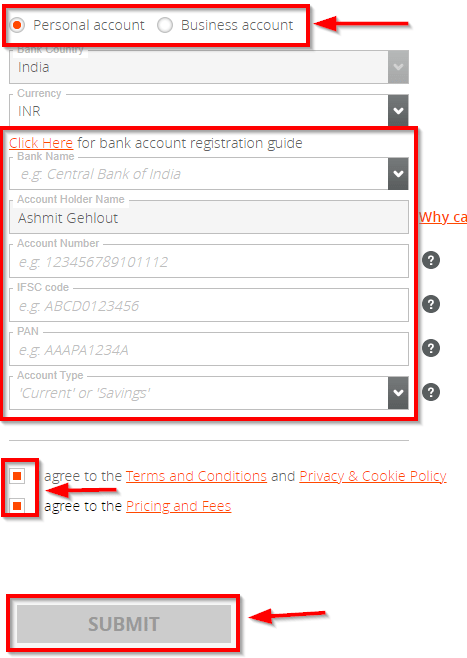
After doing this, now an interface of this kind will open in front of you, here you have to give your account number where you want to transfer the payment brought by all the countries, this is going to be your local account where you can get all your money. want to send the payment.
First, you have to juice your personal account and then below you have to give your account number IFSC code, and PAN card number. After giving all these details, tick the box below and click on the submit button.
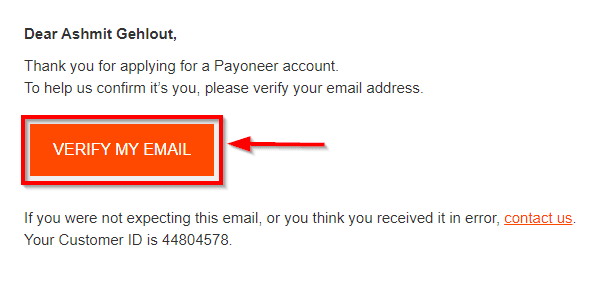
After doing this, your account has been successfully created, now a verification will be received on your email address from which you have created the account, you have to open the mail and click on the Verify member button so that your email address is verified.
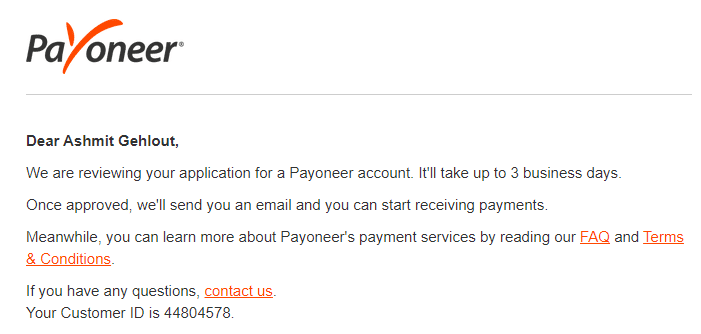
And after that, your account will go for review which will come after a review by the Payoneer team and it will be approved in 2 to 3 days. If I share my experience with you here, then my account was approved in 1 hour.
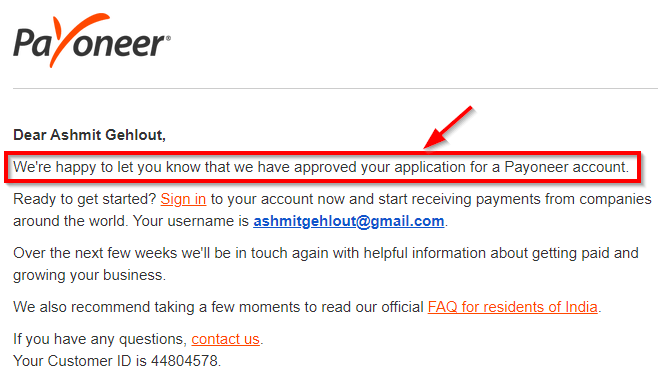
After this, you have to wait for some time and then a mail will be sent to your mail through the Payoneer website in which you will be told whether your account has been approved or not.
If your account will be approved, then you will get a mail like this, my account has been approved in 1 hour, I did not have to wait for 2 to 3 days.
Payoneer Login – Create Payoneer Account.
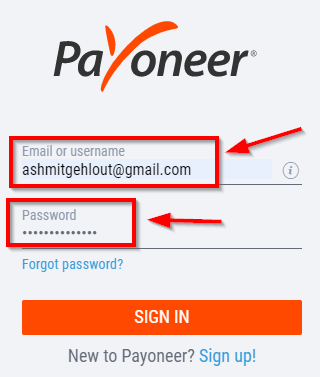
After doing this you have to go back to Payoneer’s website and now your account has been created successfully, then now you have to log in to
Payoneer’s website with your account, for which you have to enter your email address from which you created the account And at the same time, after filling the password that you had given there, you have to click on the sign-in button.
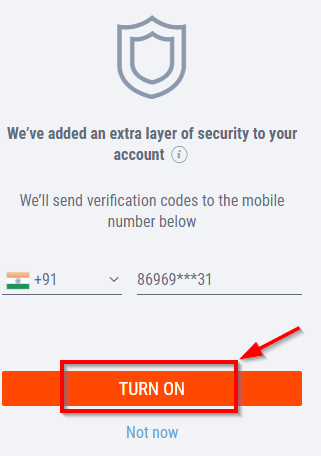
After doing this you will be successfully signed in to your account and you will get a message like this: Here you are being asked if you want to install two-factor authentication in your Payoneer account for security.
If you want to enable Two Factor Authentication then click on the above Turn On button after doing this your registered. An OTP will be sent to the mobile number, you have to fill that OTP here and click on the submit button so that two-factor authentication will be enabled on your account.
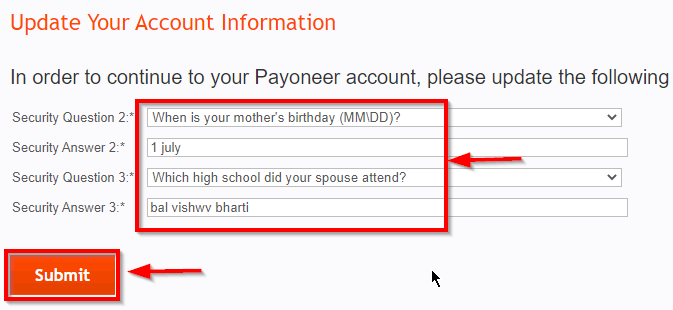
After turning on Two Factor Authentication, now you will be asked here to select some questions so that if you forget the password of your account, then through these questions you will be able to login back to your account.
You will choose and enter its answer, the same will be asked from you later so that you will be able to log in to your account.
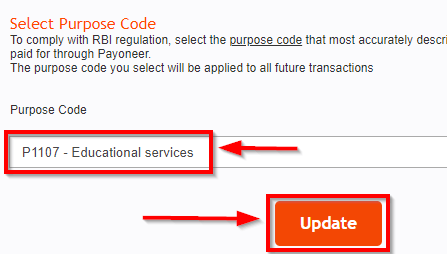
After this, some kind of interface will open in front of you, here you have to select from which purpose you want to use Payoneer’s account or you want to receive payment, here enter whatever category you work in. Give and click on the Update button.
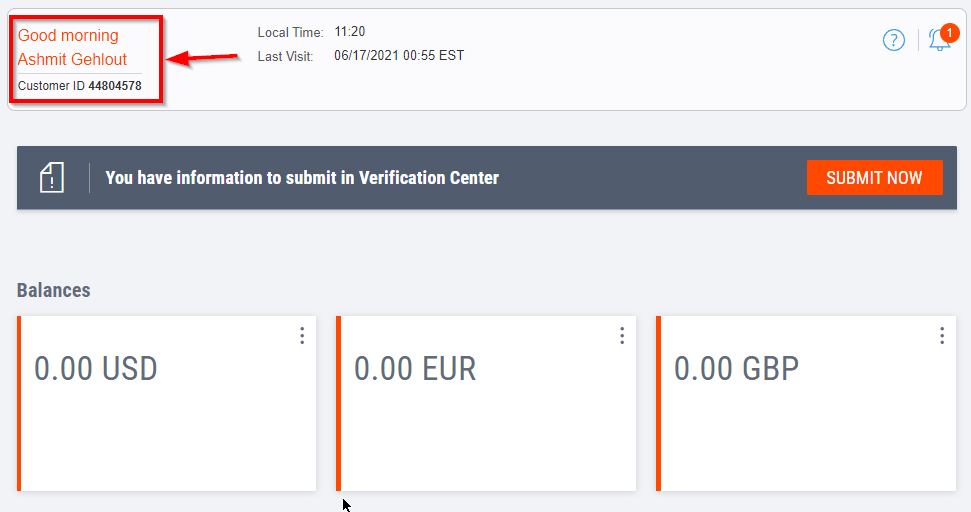
After this, you will come to your account dashboard and here you can see that now my Payoneer account has been successfully created and uploaded now I can create an account for myself in any country bank account here And I will be able to receive payment from international clients.
Your Questions
Payoneer account
Payoneer login
Payoneer sign in
Payoneer sign up
PayPal to Payoneer
my account Payoneer
Payoneer log
