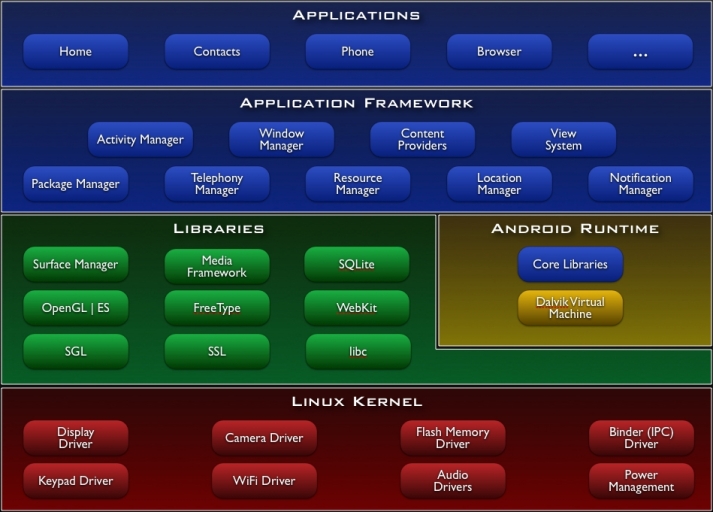
In this Article we will learn how to Convert a Website into an Android Application using Android Studio. If you do not know anything about Android Studio and android system webview yet, Don’t worry. we will start basic level.
What is Android System Webview
The WebView in Android enables you to show the web browser in your Android Application. WebView is a Simple view that displays Website Web pages inside your application. you can also specify HTML string and can show it inside your application using the WebView.
A web page can be loaded from the same application or URL. We can convert our website into android APK using the WebView.
if you want to use webview your application. so you need to give internet permission on your manifest.xml file.WebViews allow cross-platform development resulting in reduced development cost, along with the flexibility to a developer.
How to convert a website into an android app ( Application )
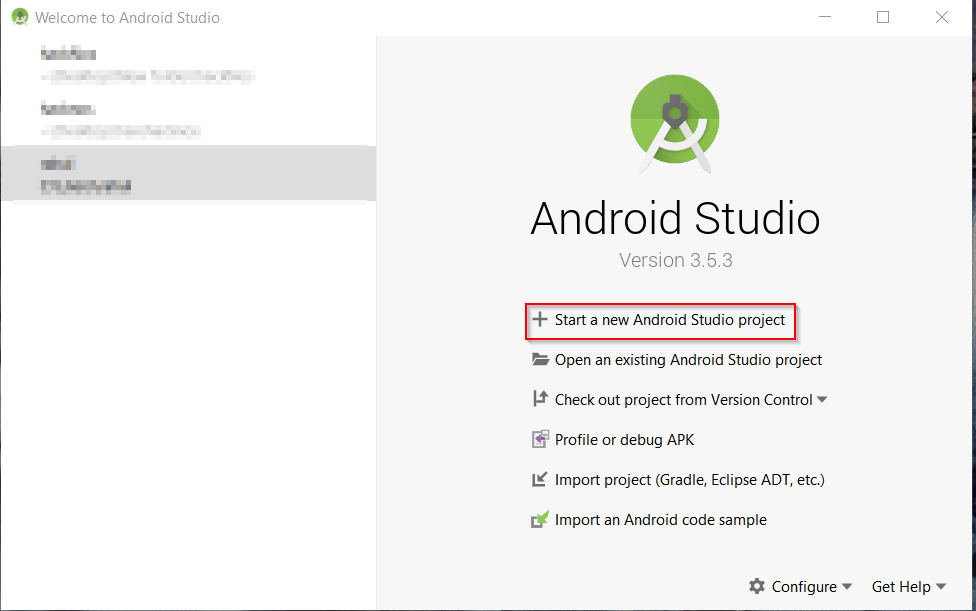
First we create a new project for our new android application open your android studio and choose the option [ Star a new Android Studio project }
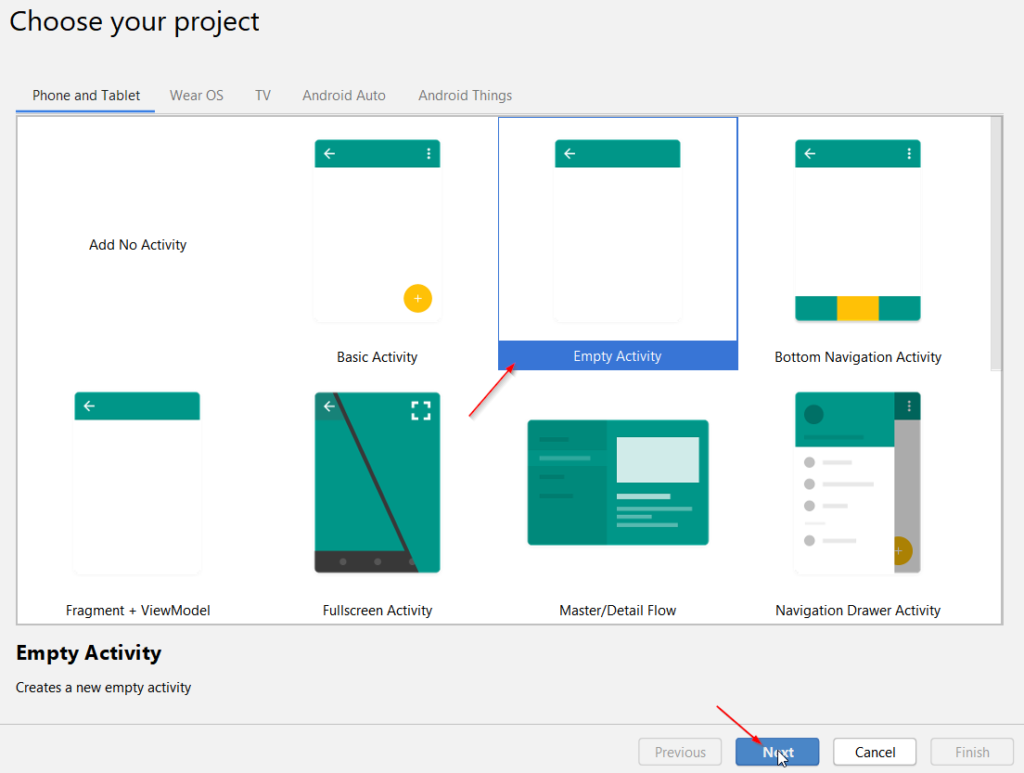
in this app we will use blank activity temp-let choose a empty activity and click the next button
the first placeholder enter your android app ( application ) name and second your package name and click the finish button
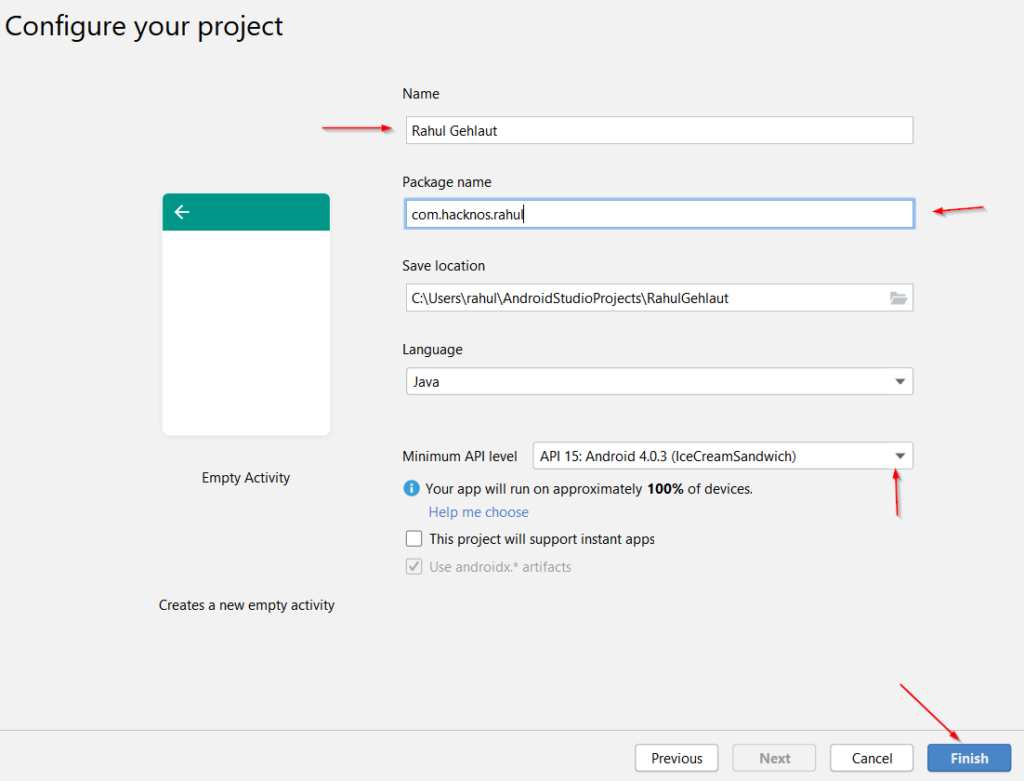
After clicking the finish button our project is ready to customize wait a minute Gradle Scripts is synchronizing this process is take 3-5 minutes.
For convert our website into an android apk ( application ) we need to edit four files our first file is Activity_main.xml, androidmainifest.xml, ic_launcher_foreground.xml and last main activity.java you can locate you file show in graphic image file.
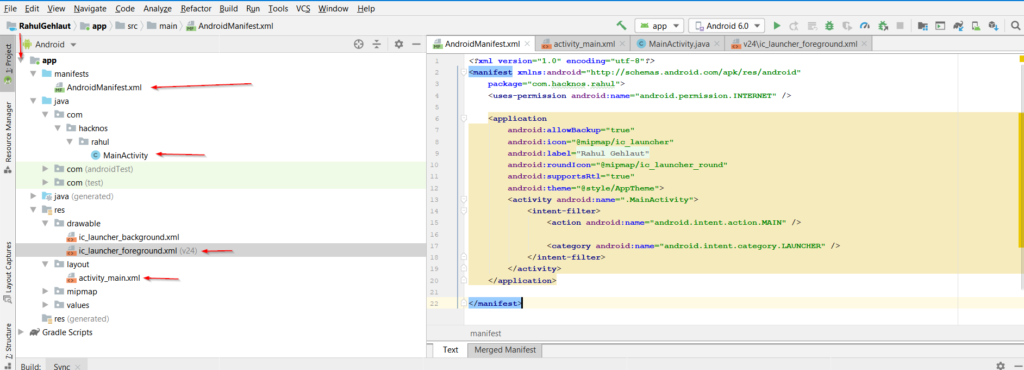
Activity_main.xml
now first open the activity_main.xml file In this file first we change our android app layout into Relative-layout and create a simple WebView.
you can copy and paste my code
|
1 2 3 4 5 6 7 8 9 10 11 12 13 |
<?xml version="1.0" encoding="utf-8"?> <RelativeLayout xmlns:android="http://schemas.android.com/apk/res/android" xmlns:app="http://schemas.android.com/apk/res-auto" xmlns:tools="http://schemas.android.com/tools" android:layout_width="match_parent" android:layout_height="match_parent" tools:context=".MainActivity"> <WebView android:layout_width="match_parent" android:layout_height="match_parent" android:id="@+id/mywebviewid" /> </RelativeLayout> |
AndroidMainifest.xml
our second file is androidmainifest.xml let’s open the file and add user permission for internet access in this application.
copy and paste user permission line you file you can copy all file but first you change package name com.hacknos.rahul change to your package name.
|
1 2 3 4 5 6 7 8 9 10 11 12 13 14 15 16 17 18 19 20 21 22 |
<?xml version="1.0" encoding="utf-8"?> <manifest xmlns:android="http://schemas.android.com/apk/res/android" package="com.hacknos.rahul"> <uses-permission android:name="android.permission.INTERNET" /> <application android:allowBackup="true" android:icon="@mipmap/ic_launcher" android:label="@string/app_name" android:roundIcon="@mipmap/ic_launcher_round" android:supportsRtl="true" android:theme="@style/AppTheme"> <activity android:name=".MainActivity"> <intent-filter> <action android:name="android.intent.action.MAIN" /> <category android:name="android.intent.category.LAUNCHER" /> </intent-filter> </activity> </application> </manifest> |
Main-activity.java
main-activity.java is our main file in this file contain information our website URL and again you can copy and paste this code your application and change your package name and website URL
- package com.hacknos.rahul; to you package name
- mywebviewid.loadURL(“https://www.hacknos.com”);
|
1 2 3 4 5 6 7 8 9 10 11 12 13 14 15 16 17 18 19 20 21 22 23 24 25 26 27 28 29 30 31 32 33 34 35 36 |
package com.hacknos.rahul; import androidx.appcompat.app.AppCompatActivity; import android.os.Bundle; import android.webkit.WebChromeClient; import android.webkit.WebSettings; import android.webkit.WebView; import android.webkit.WebViewClient; public class MainActivity extends AppCompatActivity { public WebView mywebviewid; @Override protected void onCreate(Bundle savedInstanceState) { super.onCreate(savedInstanceState); setContentView(R.layout.activity_main); mywebviewid=(WebView)findViewById(R.id.mywebviewid); WebSettings webSettings=mywebviewid.getSettings(); webSettings.setJavaScriptEnabled(true); mywebviewid.loadUrl("https://www.hacknos.com"); mywebviewid.setWebViewClient(new WebViewClient()); } @Override public void onBackPressed() { if (mywebviewid.canGoBack()) { mywebviewid.goBack(); } else { super.onBackPressed(); } } |
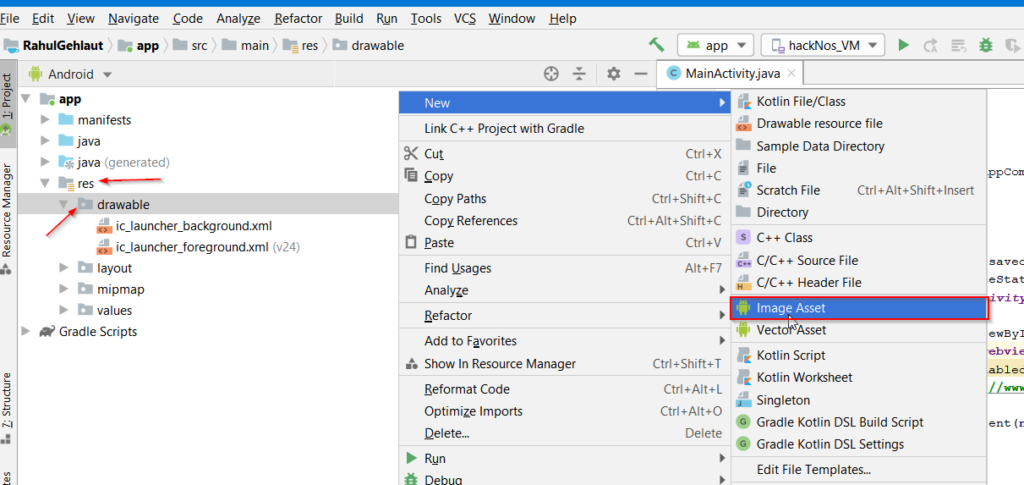
our android web-view app is completed now add your app logo go to res ==> drawable right-click the drawable => new => image Asset
choose your logo location and fix your logo scaling and click the next button
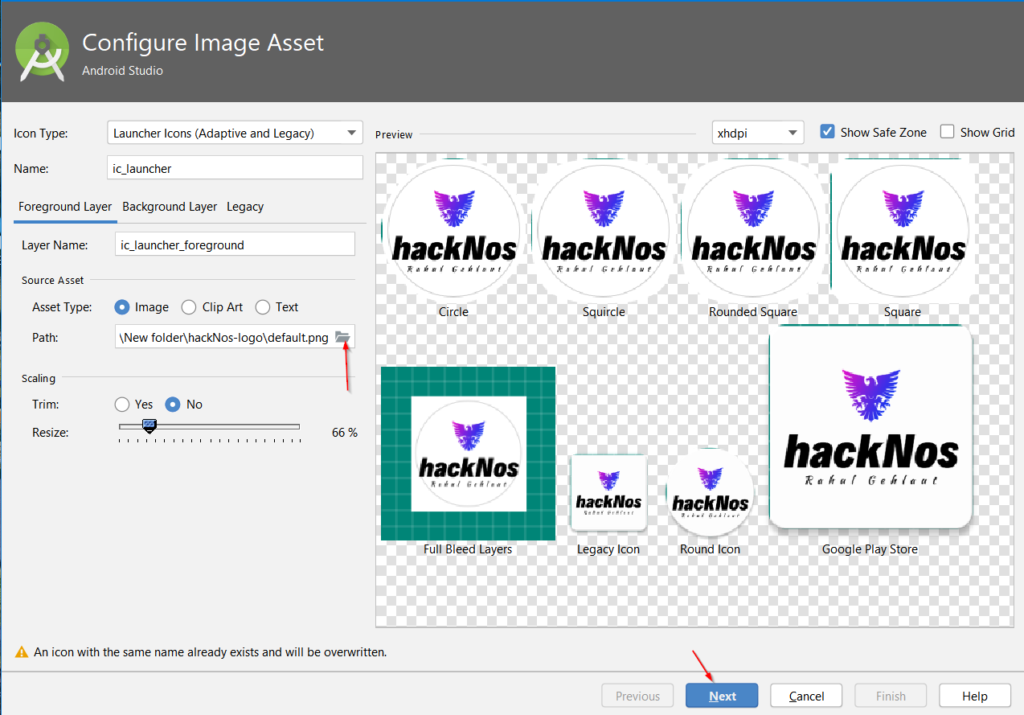
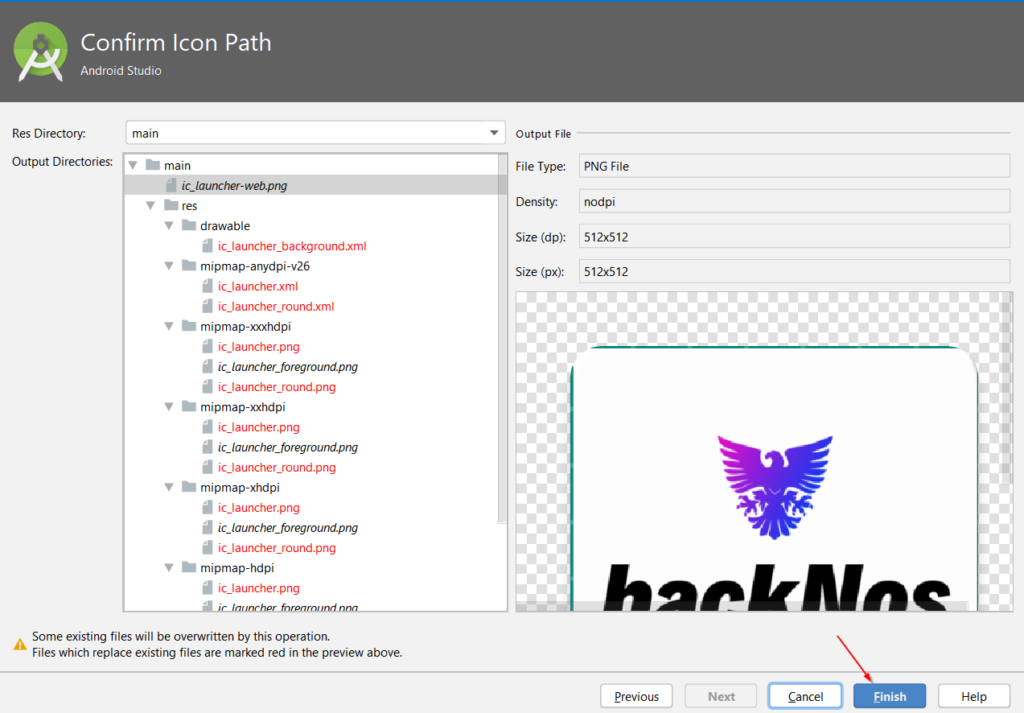
here we see red alert our new logo is overwrite old logo ignore the error and click the finish button.
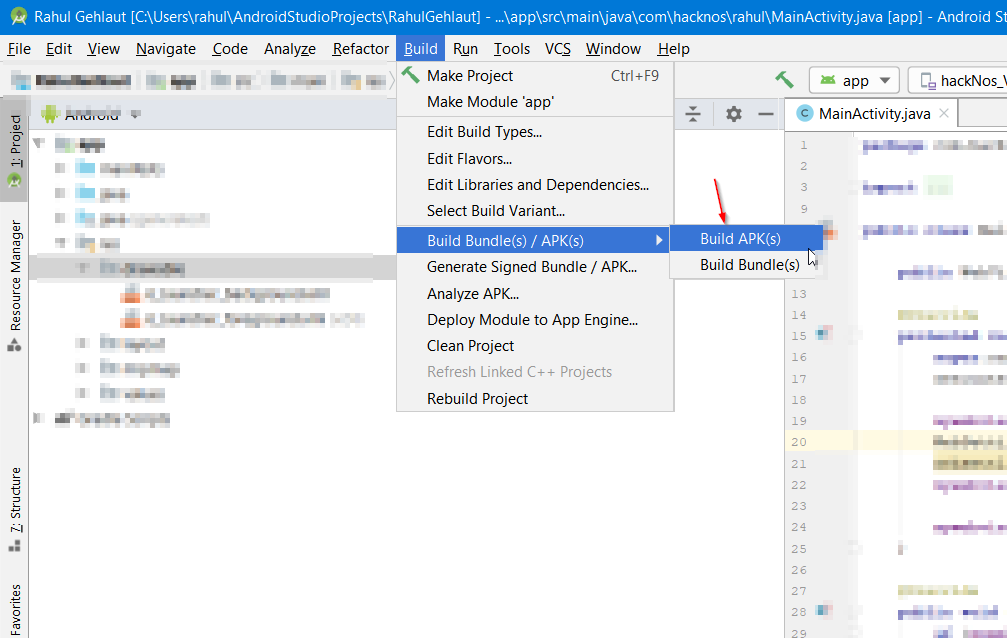
Let’s build our android apk click the build menu button and Build Bundle(s) / APK(s) => build APK(s) after a minute we will see a notification our android apk is generated successfully click the locate text and you see your android apk here.

After install the application mobile phone our application is look like this. but your case your website is look different don’t forgot change load URL.
