I will tell you how you can configure the burp suite in your kali Linux.
How to configuration the burp Suite.
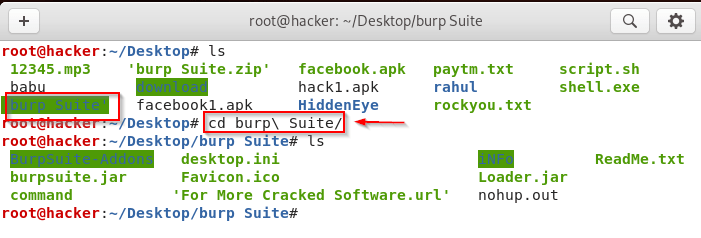
First you have to go to the folder of your burp suite and then you will have to give some permission to some files there.
Kali Linux – Permission The File
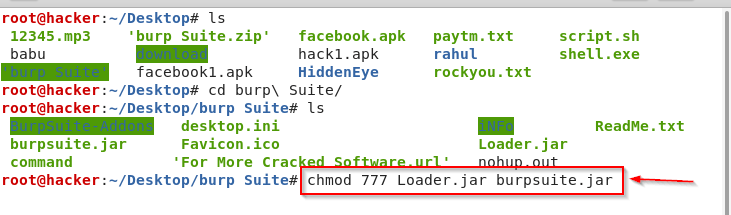
Burp Suite Configuration
|
1 |
chmod 777 Loader.jar |
To give permission, you will find the commands in the section of the command above. With which you have to give permission to the loader.jar file as shown in the photo.

|
1 |
java-jar Loader.jar |
After this, you have to open the loader.jar file whose commands are given above. After opening the file, there will be some screen of this type in front of you, inside which a license key is given. This is the license key of our burp suite.
Kali Linux – Open and Configure Burp Suite.

|
1 |
cat command |
After this, you have to write the above commands in a new terminal and then copy and paste the resulting result. So that your burp suite will open. As shown in the photo

You can see that my burp suite is opening, now we will configure our burp suite.
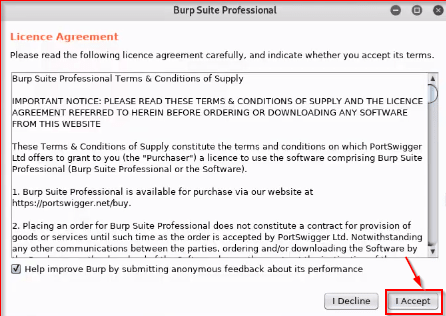
After this you will have some kind of screen show inside which there is an agreement of burp suite which you can also read and watch. After all this, you have to click on the button of the I Accept.
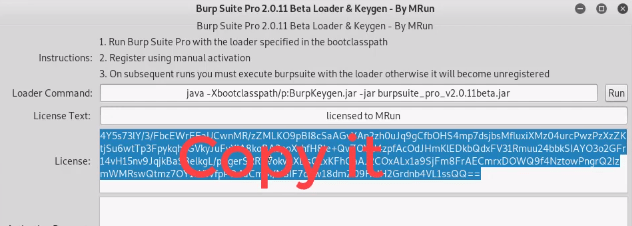
After all this you have to copy the license key. Which was found when you opened your loader.jar file.
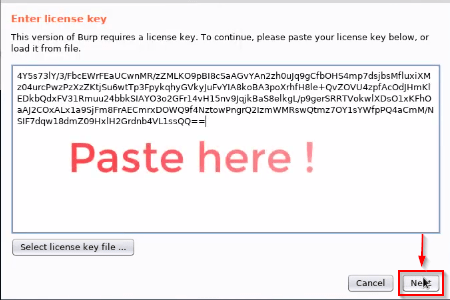
Then after that you paste the license key in this box and click on the Next button.
Manually Activation.
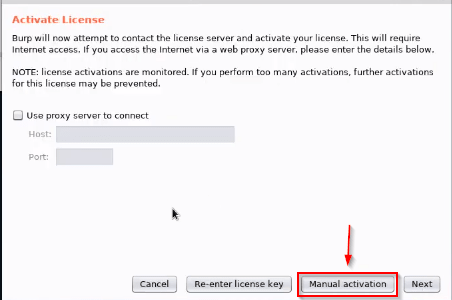
After this process, you will have some kind of screen in front of which you have to click above manual activation so that you can manually activate your burp suite.
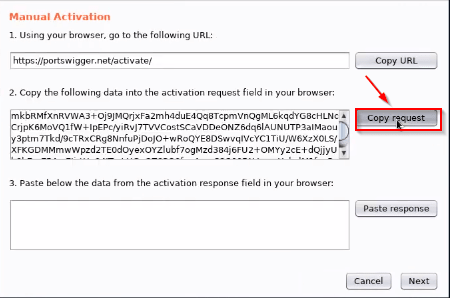
After this, you have to copy the given code, for which you have to click above the copy request button.
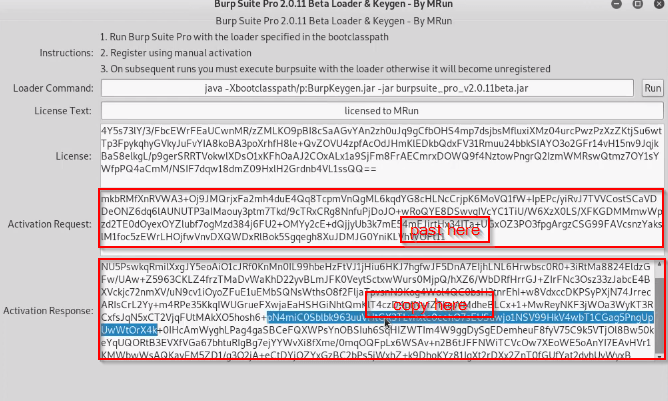
And then copy and paste the coad in the loader.jar file in the authentication request section. After all this, a code will be automatically generated in the section with activation response, which you have to copy.
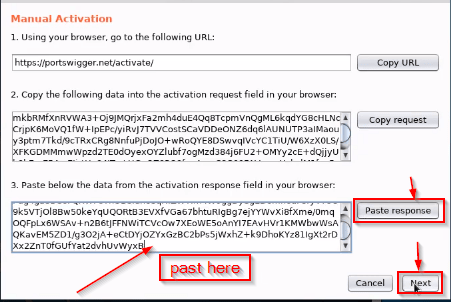
And then you have to come back and paste in the burp suite, after all this process, you have to click on the Next button, which will complete your activation.

You can see that my activation successfully has been completed and my burp suite by Successful has been installed.
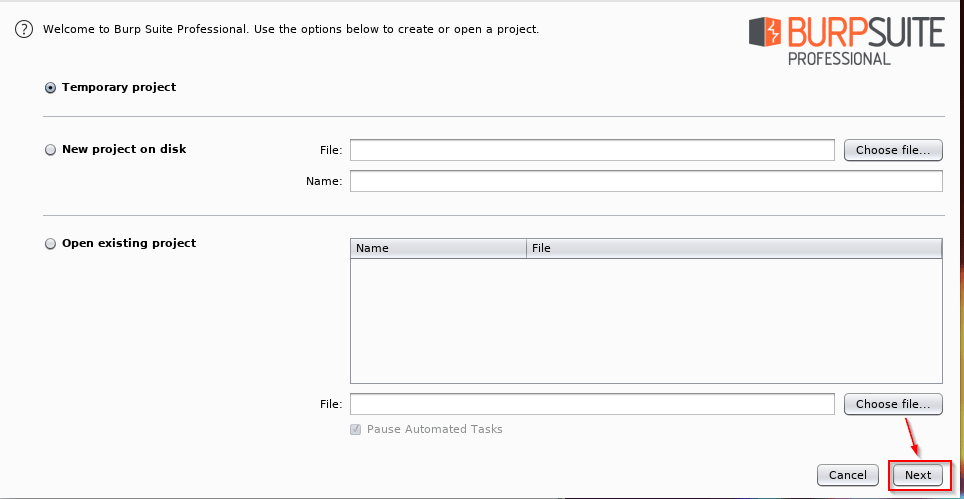
There will be some such window show in front of you in which you have to click on the Next button and do not make any kind of change.
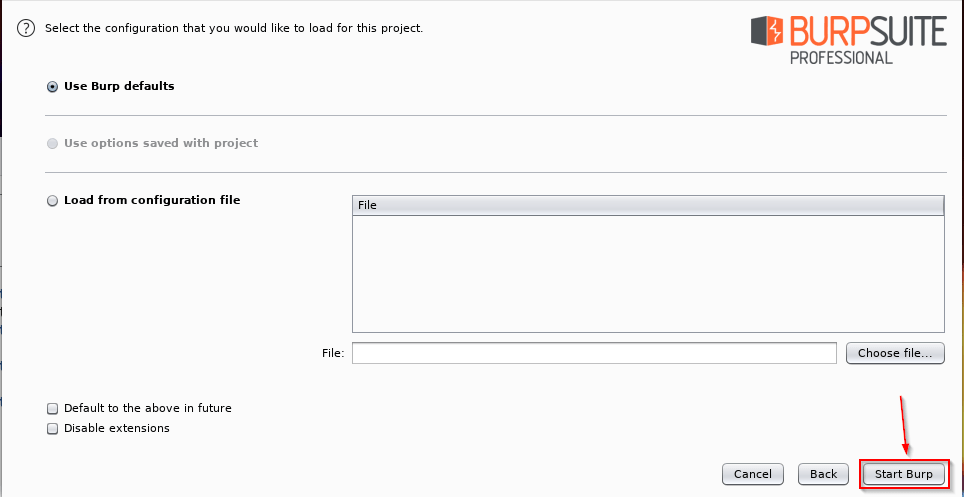
Then you have to click above the start burp button so that your burp suite will start.
Kali Linux – Configure The Proxy.
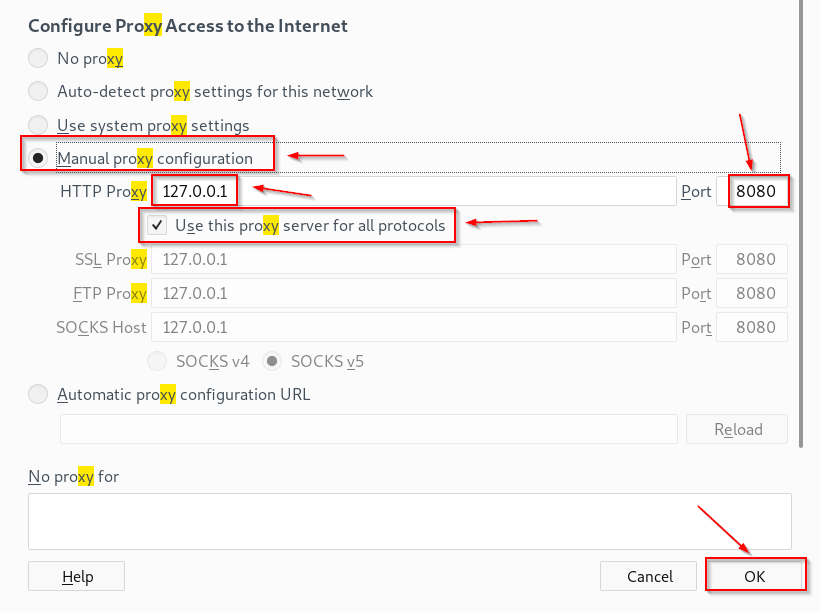
After this process, you have to configure your browser, for which you will have to go to your browser settings and add a Proxy. Which you can add by going to the proxy section in the settings as shown in the photo.
Download and Import the CA Certificate.
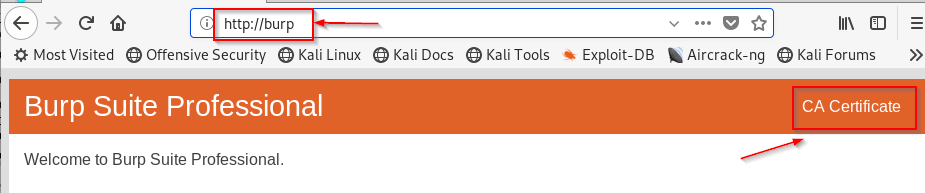
After all this you will have to download a CA certificate for your browser. For which you have to enter the URL given in the photo in your browser and then click on the CA certificate and download
the certificate. To perform all this process your burp suite must be open.
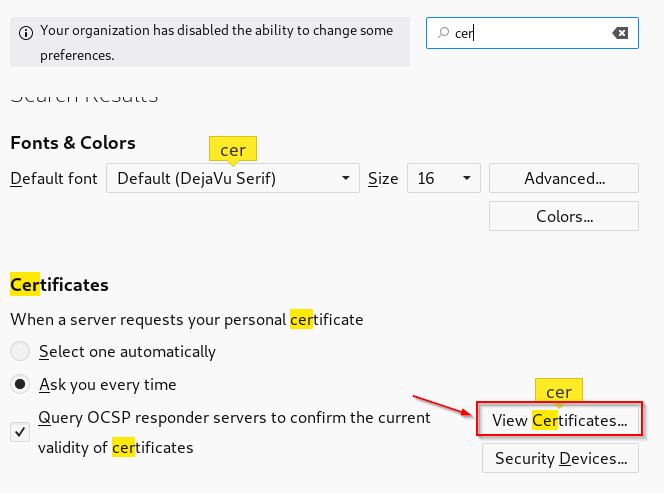
Now to connect the certificate with your browser, for which you have to go to the settings and
search the certificate then click on the button of view certificate.
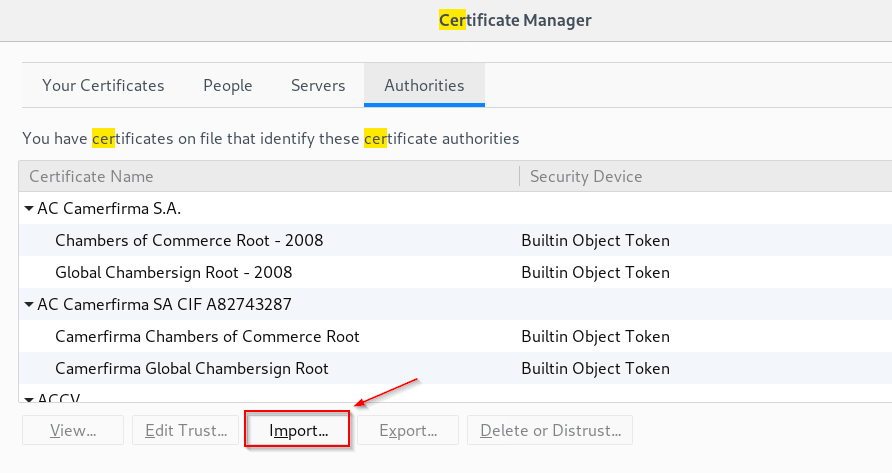
There will be some such window show in front of you, in which you have to click above the
import button, from which you can import your certificate into the browser.

After this, you have to select your downloaded certificate and click above the open button. Burp Suite Configuration.
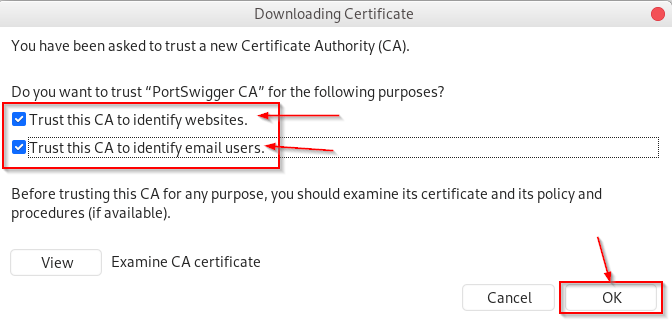
After this you have to tick both the options shown in the photo and click on the OK button after
which your CA certificate will be connected with the browser and you can run your burp suite with the browser.